Best practices for using Trimble GNSS receivers with Esri ArcGIS Field Maps
Users of Esri® ArcGIS® Field Maps can take advantage of Trimble® industry-leading high-accuracy GNSS receivers through direct integration into Esri’s software. In this blog, we’ll discuss how to configure Trimble Mobile Manager (TMM) for use with Esri ArcGIS Field Maps for most users. Any users who are unsure if they are using the right settings should contact their administrator.
This blog has been updated for users of Esri ArcGIS Field Maps 25.2 or newer. Before using this information, users should ensure they have updated to the current versions of Field Maps and Trimble Mobile Manager.
This blog assumes some knowledge of GNSS and coordinate systems. If the reader is at all unfamiliar with these topics, or wants a great refresher, we recommend reading the GPS 101 and Understanding geodetics for high-accuracy GIS data collection blogs.
How Trimble Mobile Manager and Field Maps work together
One can think of TMM as the control panel for Trimble GNSS receivers. When using a Trimble receiver to enable high-accuracy workflows in Field Maps, TMM is used to connect to the receiver and configure the correction source and reference frame (coordinate system) information needed. When you use a Trimble receiver in Field Maps by opening a map, TMM will automatically connect to the last used receiver and provide positions to Field Maps.
What needs to be done in Trimble Mobile Manager?
TMM provides a single interface to configure GNSS settings for all supported Trimble receivers, from the Trimble Catalyst™ DA2 GNSS receiver to the survey-grade Trimble R980 GNSS receiver. Field Maps users should configure their receiver and GNSS configuration inside TMM before using Field Maps for the first time.
Select receiver
Make sure that your receiver is paired to your device. In TMM navigate to the Home screen, choose Select receiver and connect to your receiver.
Note: Once set up, Field Maps will ask TMM to connect to the last used receiver on your behalf; you do not need to open TMM yourself. If you have already connected to the receiver in TMM, Field Maps will use that receiver.
Once you have configured the receiver in TMM, select Configuration from the tab bar and configure the GNSS options as follows:
GNSS correction source
There are two options for GNSS corrections in TMM: Auto and Custom local.
Leave this setting on Auto unless you have details for an NTRIP or internet-based correction source (i.e., RTK or VRS). If you need to specify details for your local correction source select Custom local.
Auto
The Auto behavior depends on whether you are using the Trimble Catalyst DA2 or an R-series receiver such as the Trimble R1 or R2.
Trimble Catalyst
Trimble Catalyst users can take advantage of Trimble Corrections Hub, which dynamically selects the best correction source1 for your location and connectivity from the following list:
- Trimble VRS Now
- Trimble RTX via the internet
- Trimble RTX via satellite
- SBAS
Trimble R-Series, Trimble TDC650, Trimble TDC150
Non-Catalyst receivers will cycle through the available correction sources1 based on the best one available from the following list:
- Trimble RTX via the Internet
- Trimble RTX via satellite
- SBAS
Note: RTX services will only be available if the receiver has a current RTX subscription installed. More information on RTX for Mapping and GIS customers can be seen here.
Custom local
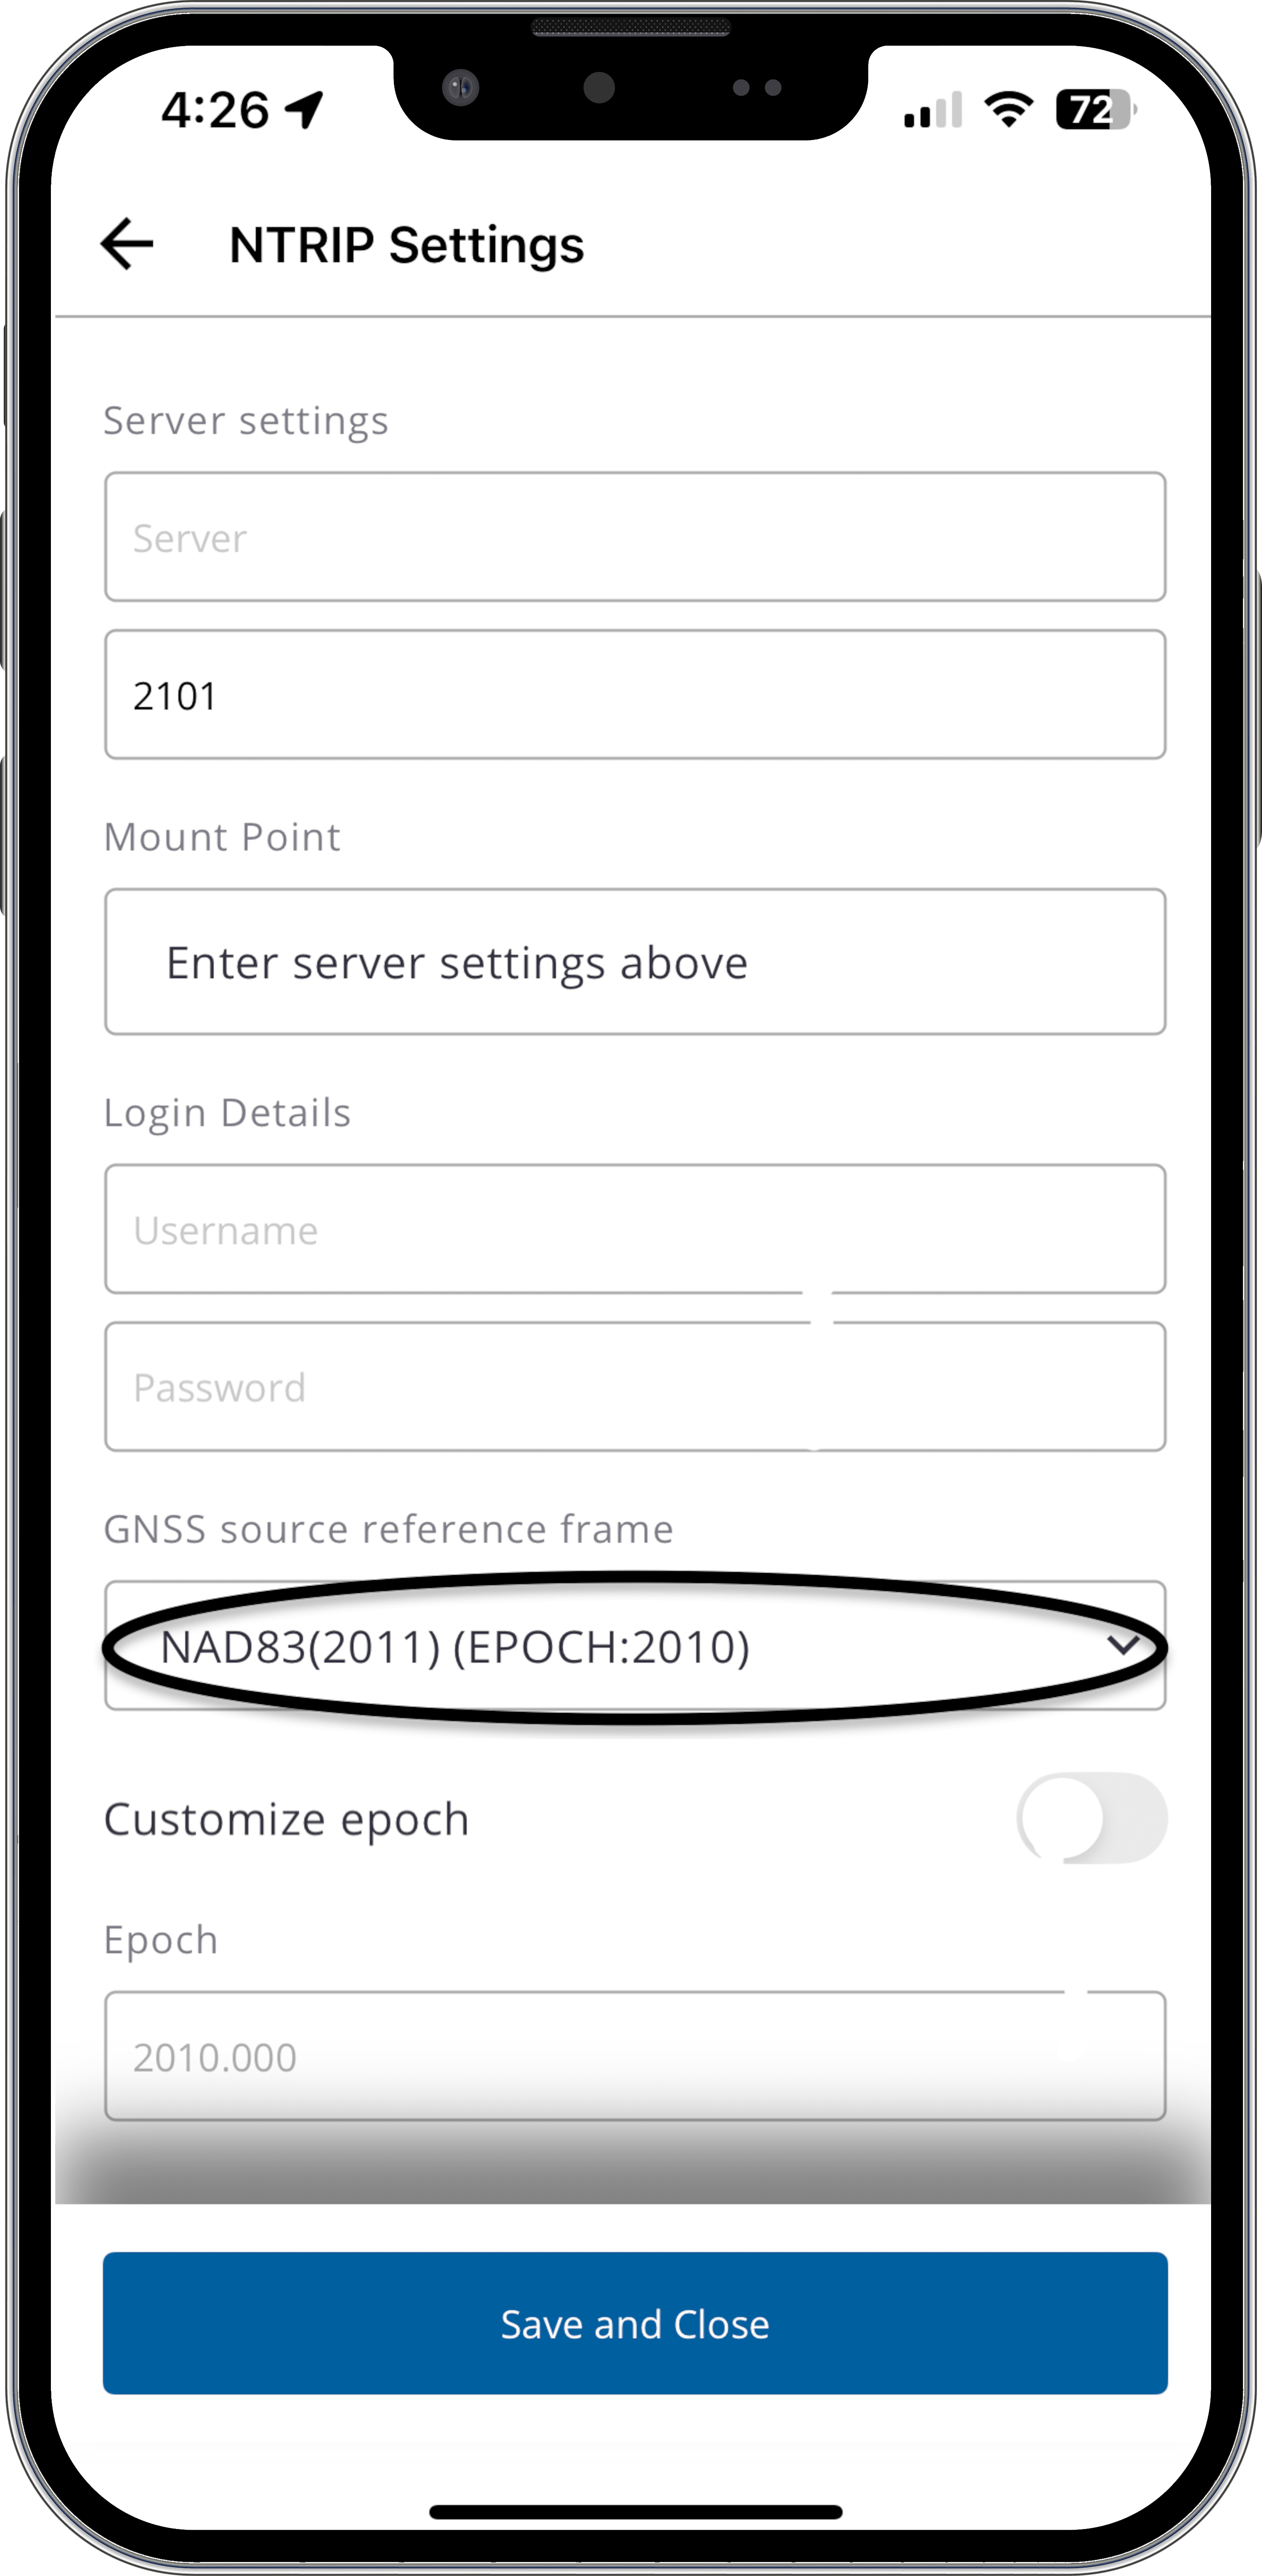
When Custom local is selected you will be shown the current configuration with an option to Edit NTRIP Settings, tap the button to open the NTRIP Settings screen.
When entering details for your local correction source, it is important the GNSS source reference frame matches that of your correction source. In most cases, this will work when set to Auto, but if you know the reference frame we recommend setting it here. In general, Auto will use the most common or standard local reference frame (datum and epoch) for the current region.
GNSS output
GNSS output allows you to specify the reference frame that will feed into Field Maps. We recommend that unless you know otherwise, leave this as Auto as in this mode TMM will automatically select the reference frame most suited to your current location using the same logic described above.
Geoid
Field Maps consumes both the GNSS default ellipsoidal heights (HAE) as well as the more useful orthometric heights (e.g., height above mean sea level or MSL). At the time of feature collection, the former is stored to Esri’s standard GNSS metadata fields while the latter is stored to feature geometries (if Z-enabled). If you know your local geoid, you should select it in the list in TMM, otherwise the EGM96 (Global) geoid model is available for use worldwide.
If your required geoid is not listed, you can load your own geoid into TMM using a procedure described on the Mapping and GIS Community here.
Antenna Height
When a Trimble receiver is being used, Field Maps reads antenna height information from TMM. Be sure to select the options that correspond to your setup:
Antenna type
This will update to provide available options depending on the connected receiver and supported antennas. Select the appropriate setting.
Measurement method
This will update to provide available options depending on the connected receiver. Select the value that corresponds to the point to which you are measuring from the ground.
Antenna height
Enter the height measured from the ground to the selected measurement method.
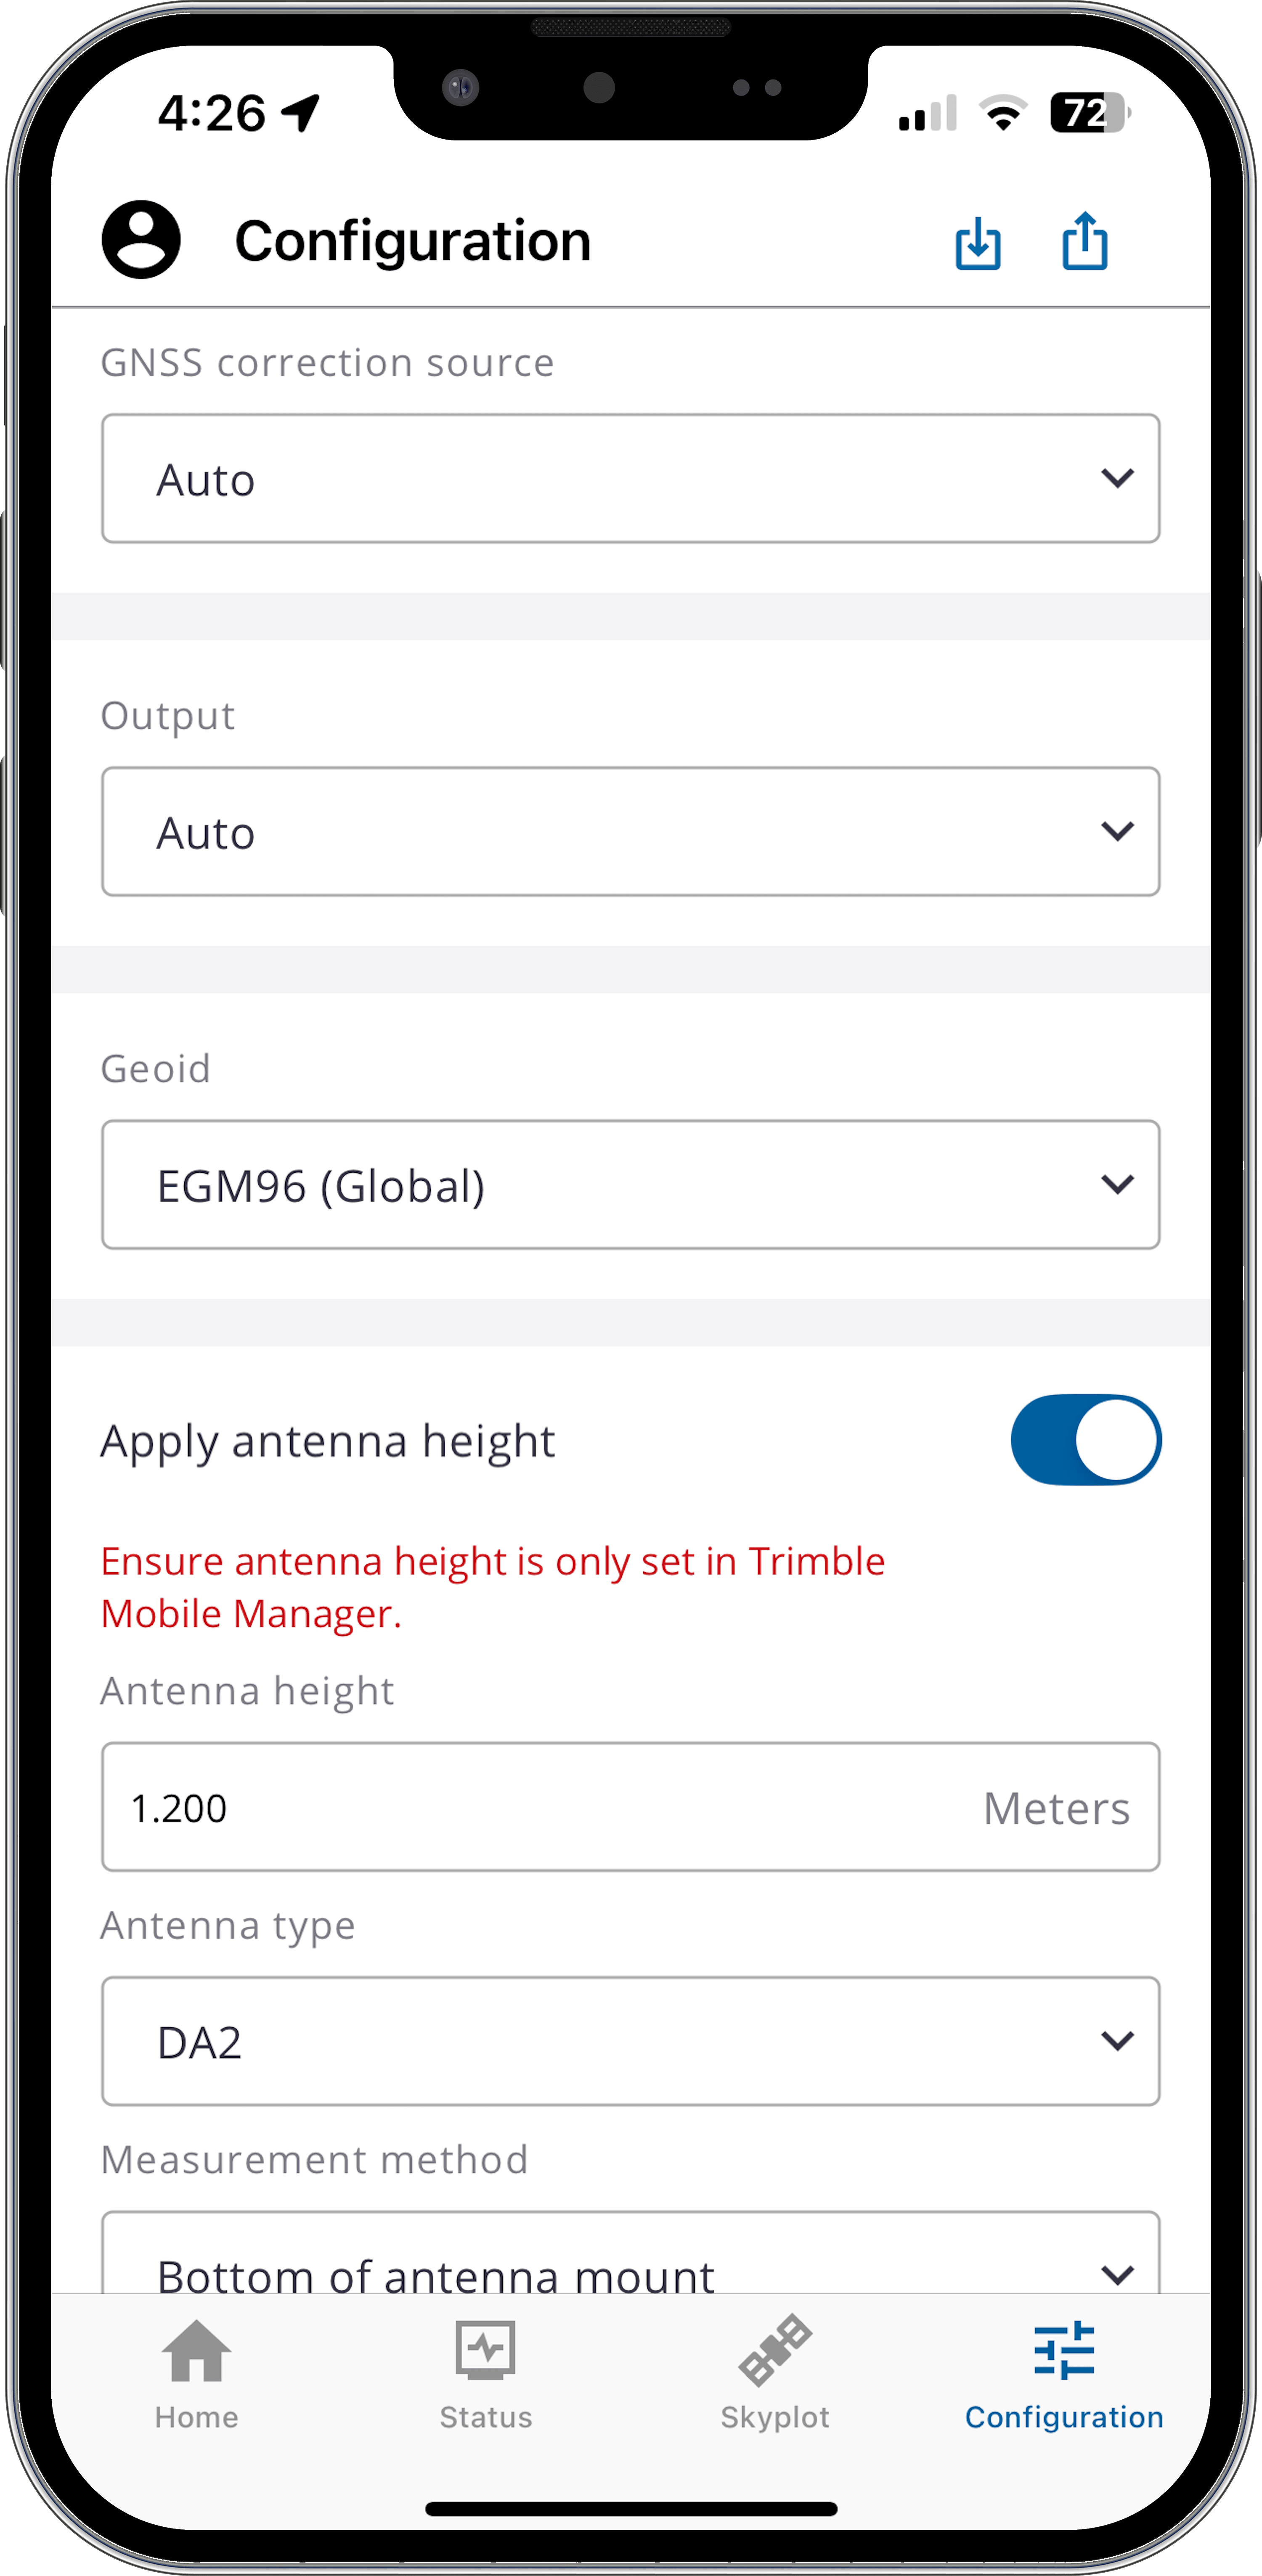
An example of what your GNSS configuration screen would look like is shown here:
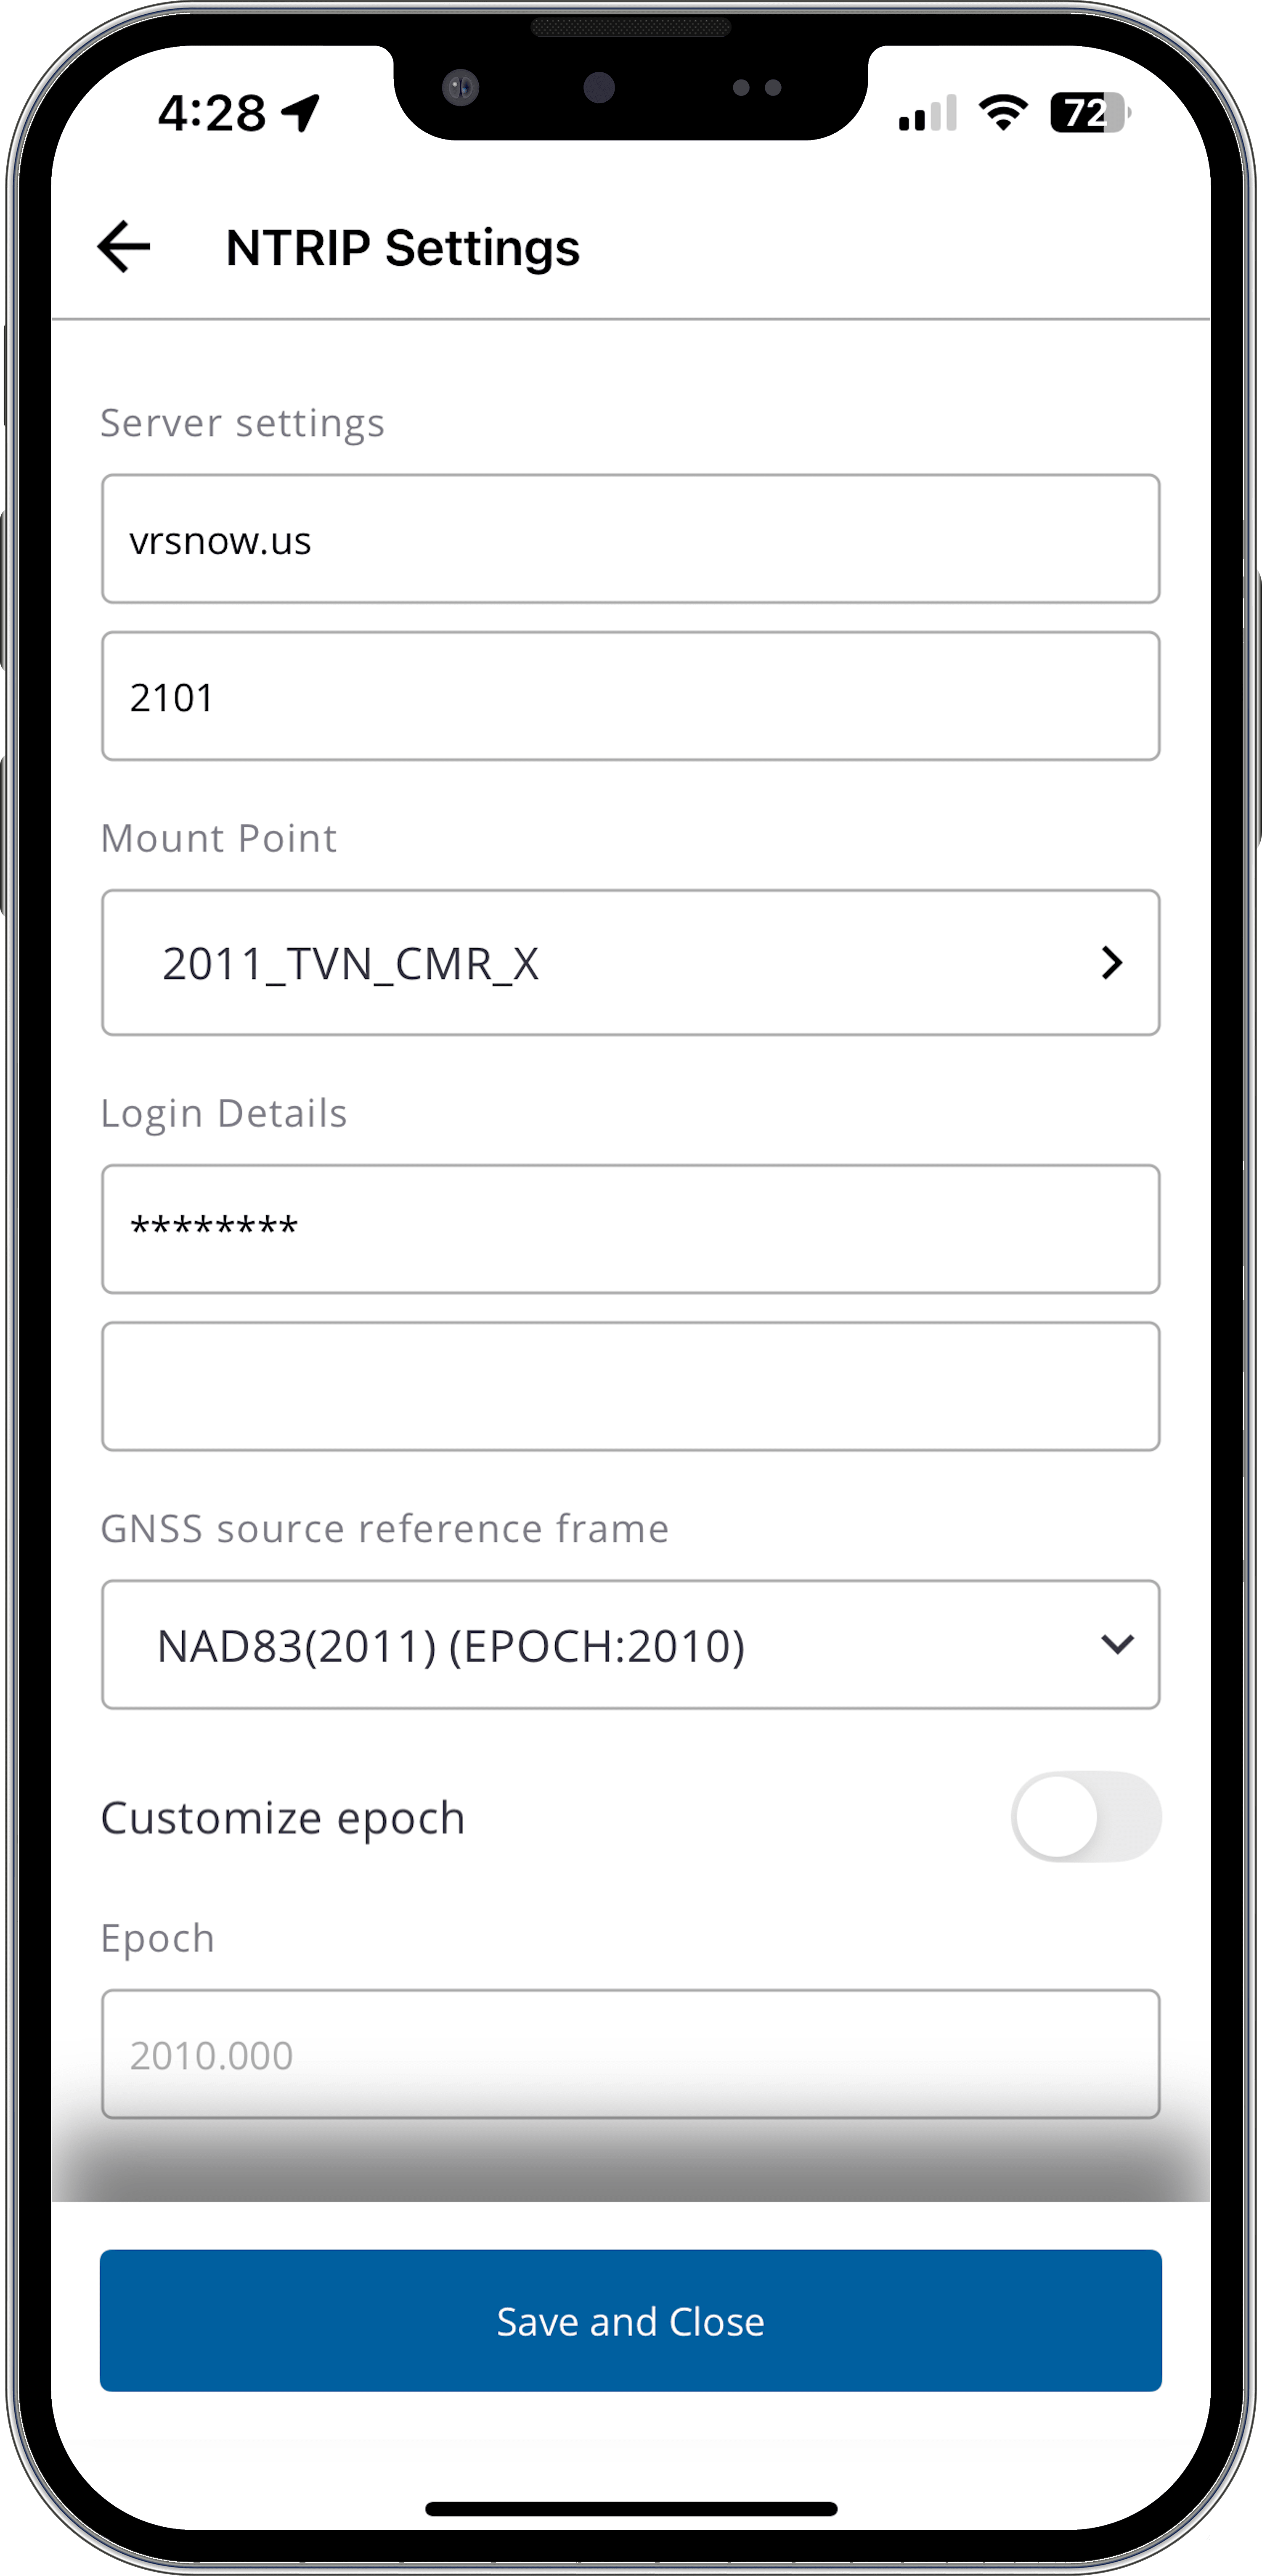
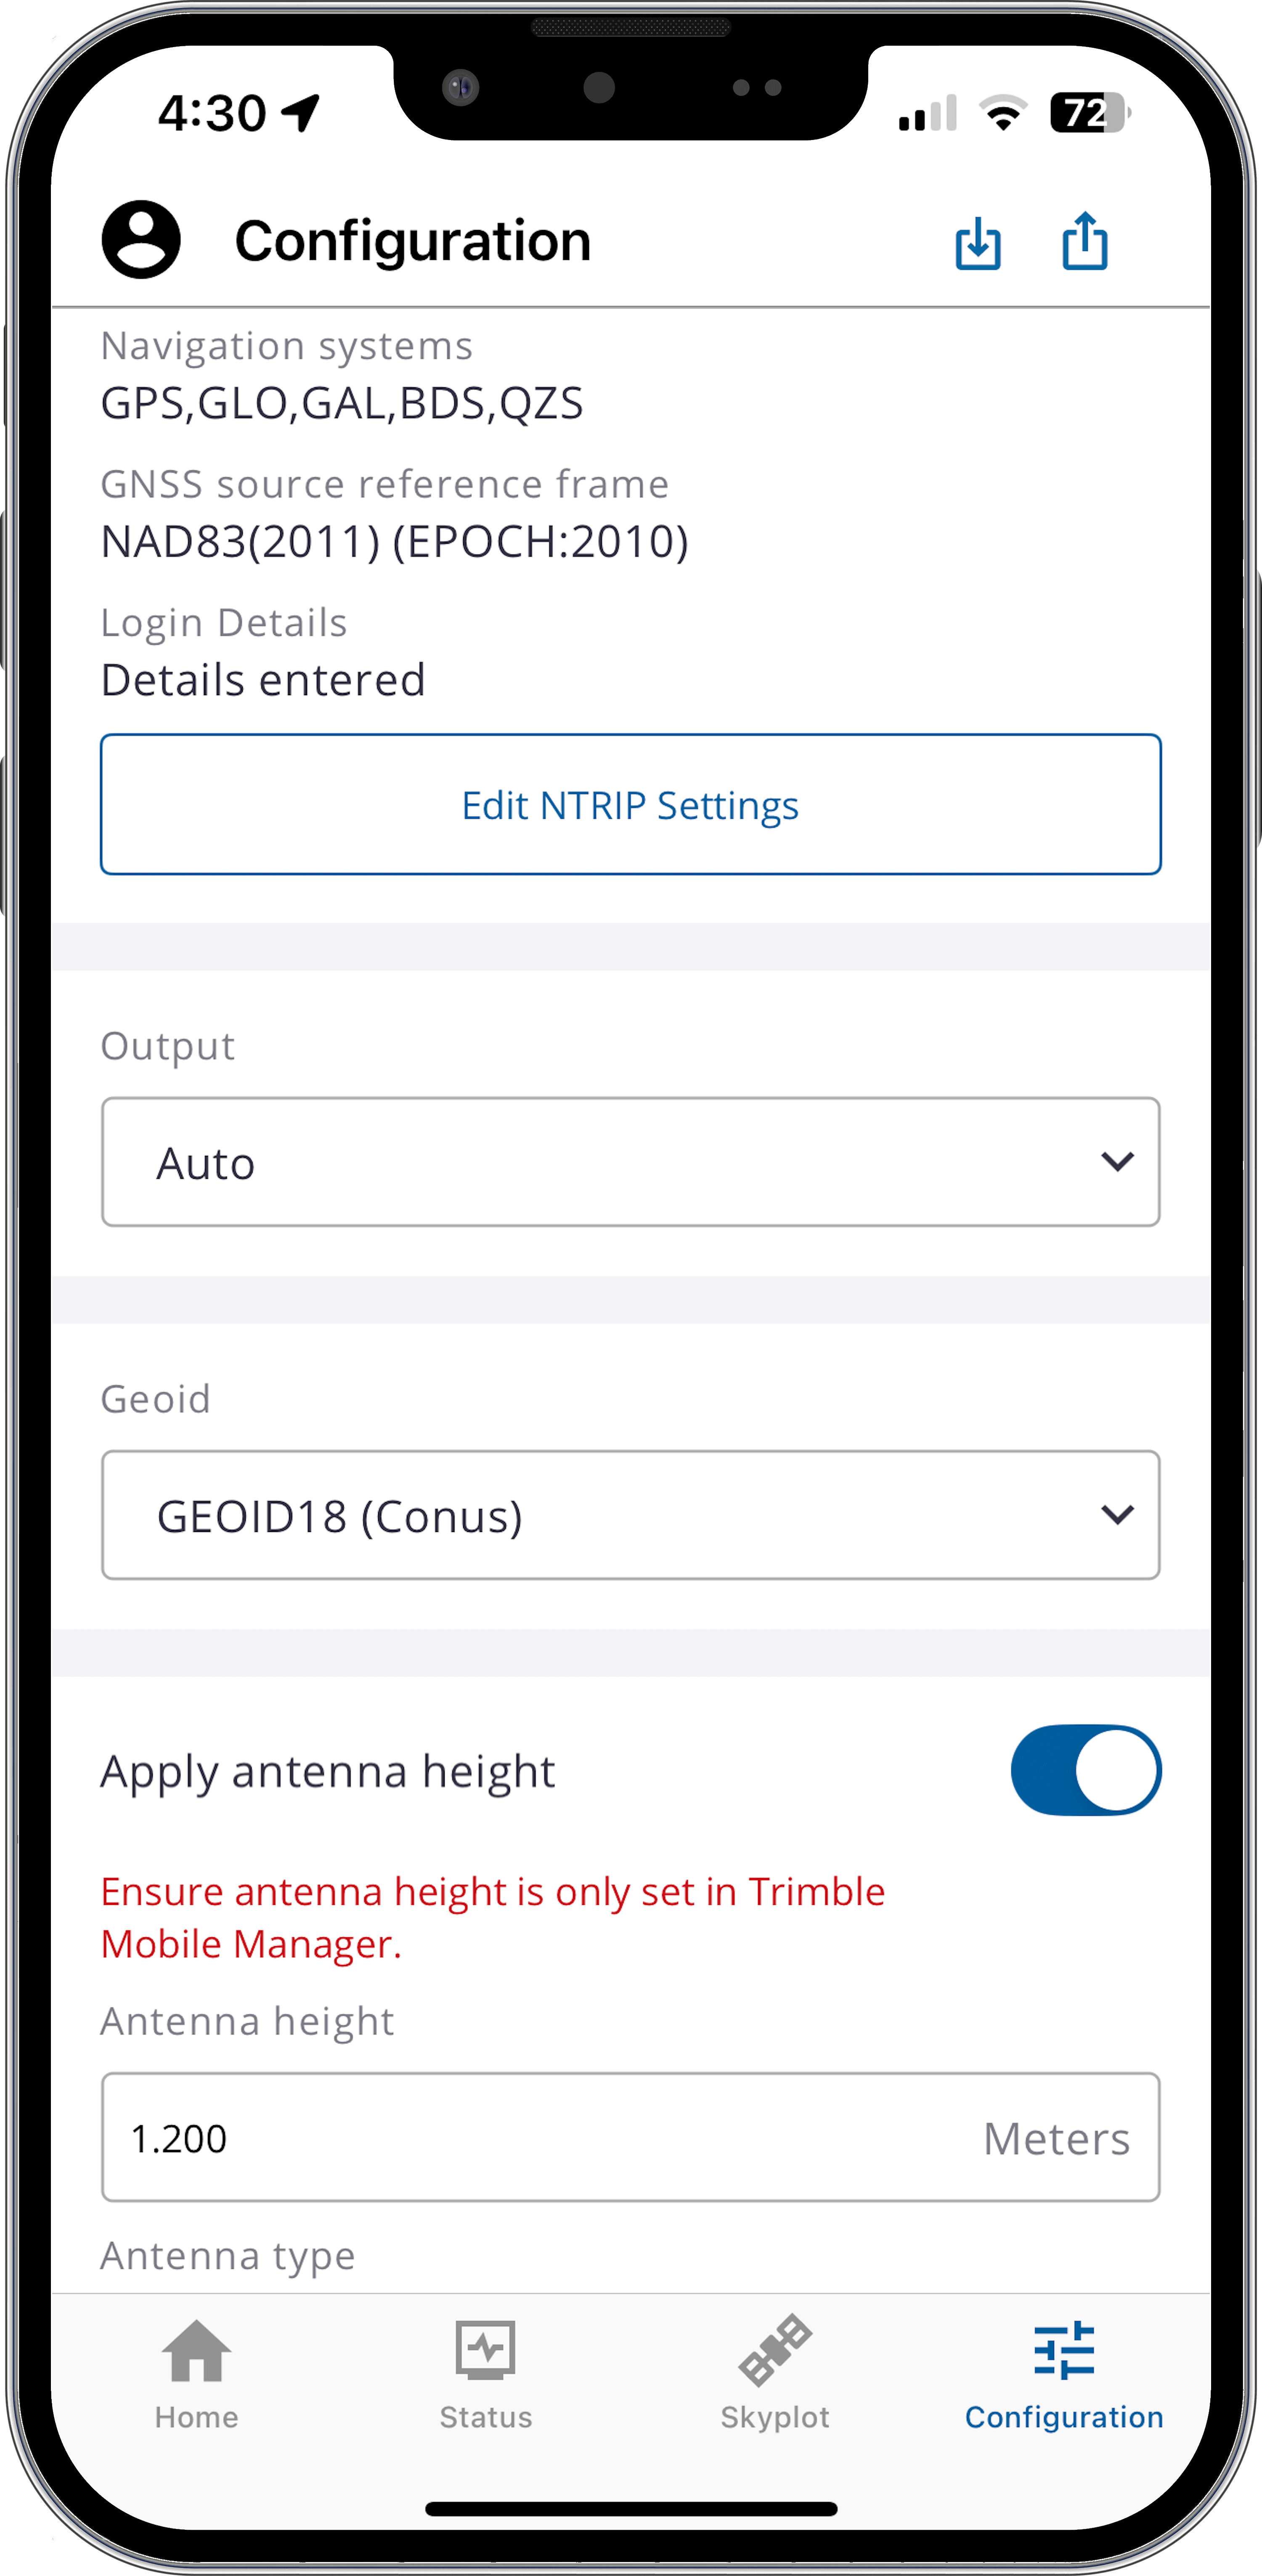
You may need to configure specific GNSS configuration settings if told to do so; an example of what that might look like for the NTRIP Settings and Configuration screens is shown here:
What needs to be done in Field Maps?
The information presented below is a Trimble-specific subset of configuration steps in Field Maps. For a more in-depth discussion of configuring Field Maps for high-accuracy data collection, please consult Esri documentation.
All users
Location Provider
Field Maps utilizes Location Providers to manage connections with GNSS receivers. To use a Trimble receiver with Field Maps, you must create a 'Location Provider' entry. You only need to create one Trimble provider, as Field Maps will automatically identify the receiver each time you connect to a different Trimble receiver in TMM.
Note: If you have migrated from an older version of Field Maps and were previously using a Trimble receiver, Field Maps will have created a Trimble Location Provider for you.
Create the Trimble Location Provider using the steps below:
1. Open the Profile screen by clicking on the user icon at the top of the screen. From there, choose the Provider option to open the Location Providers screen. If your Trimble receiver is already listed, skip to step 3 below.
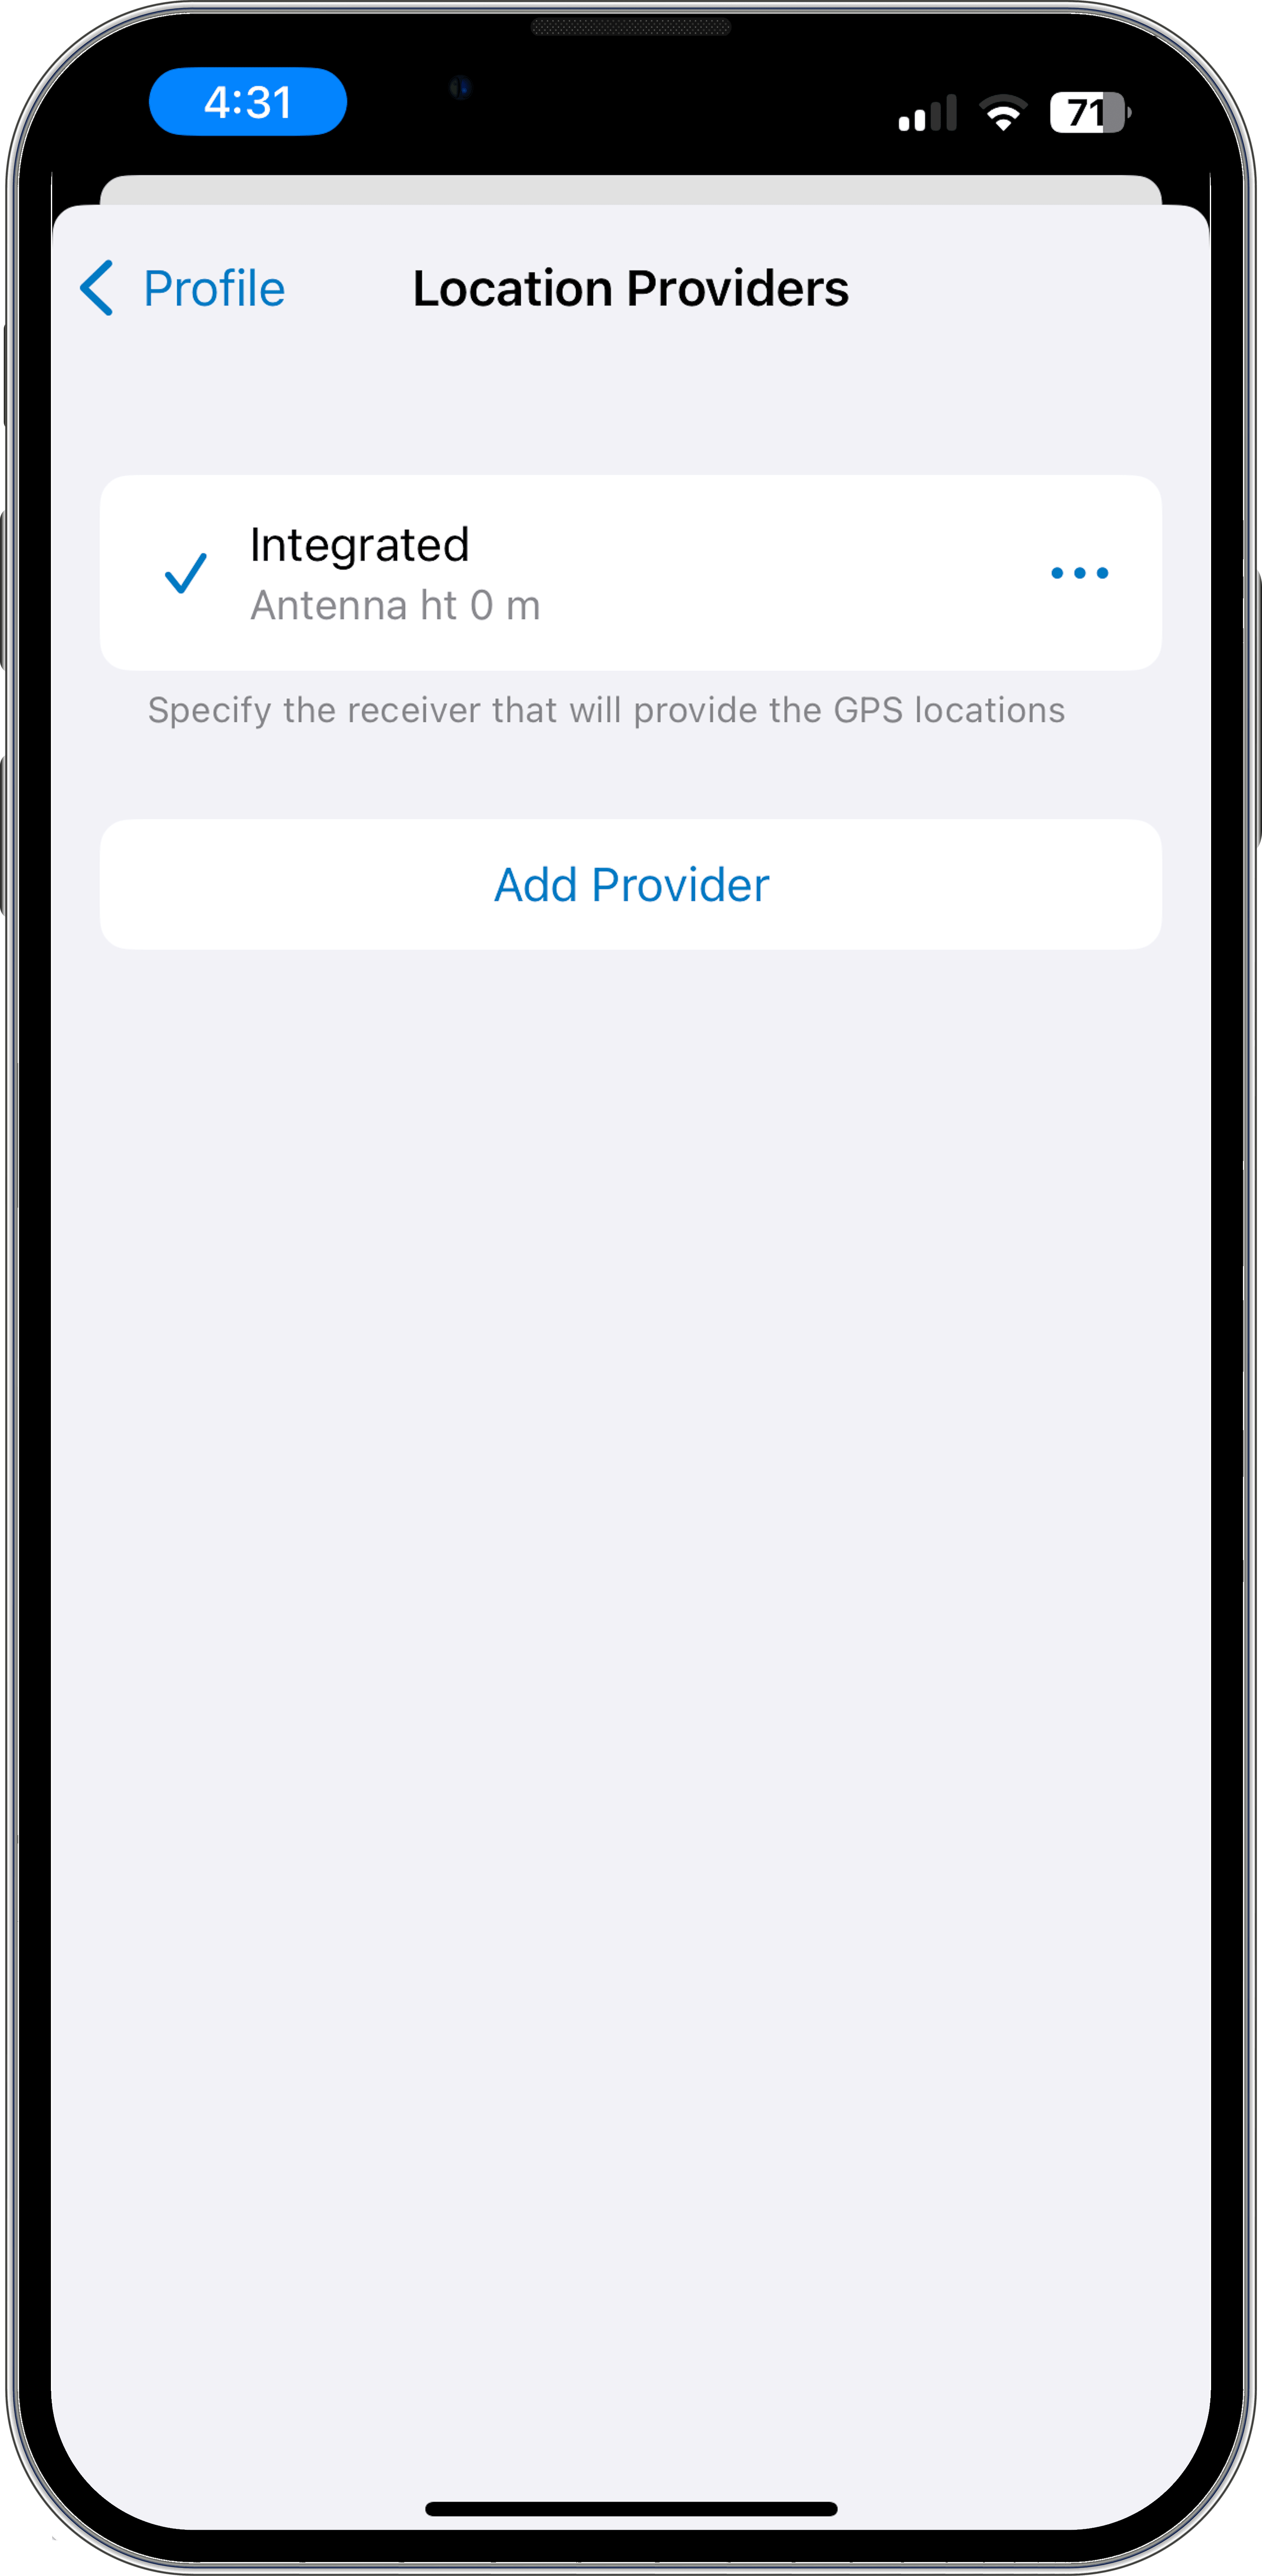
2. Add a new provider by clicking on Add (or Add provider, depending on the platform). Select the Trimble - Trimble Mobile Manager device option.
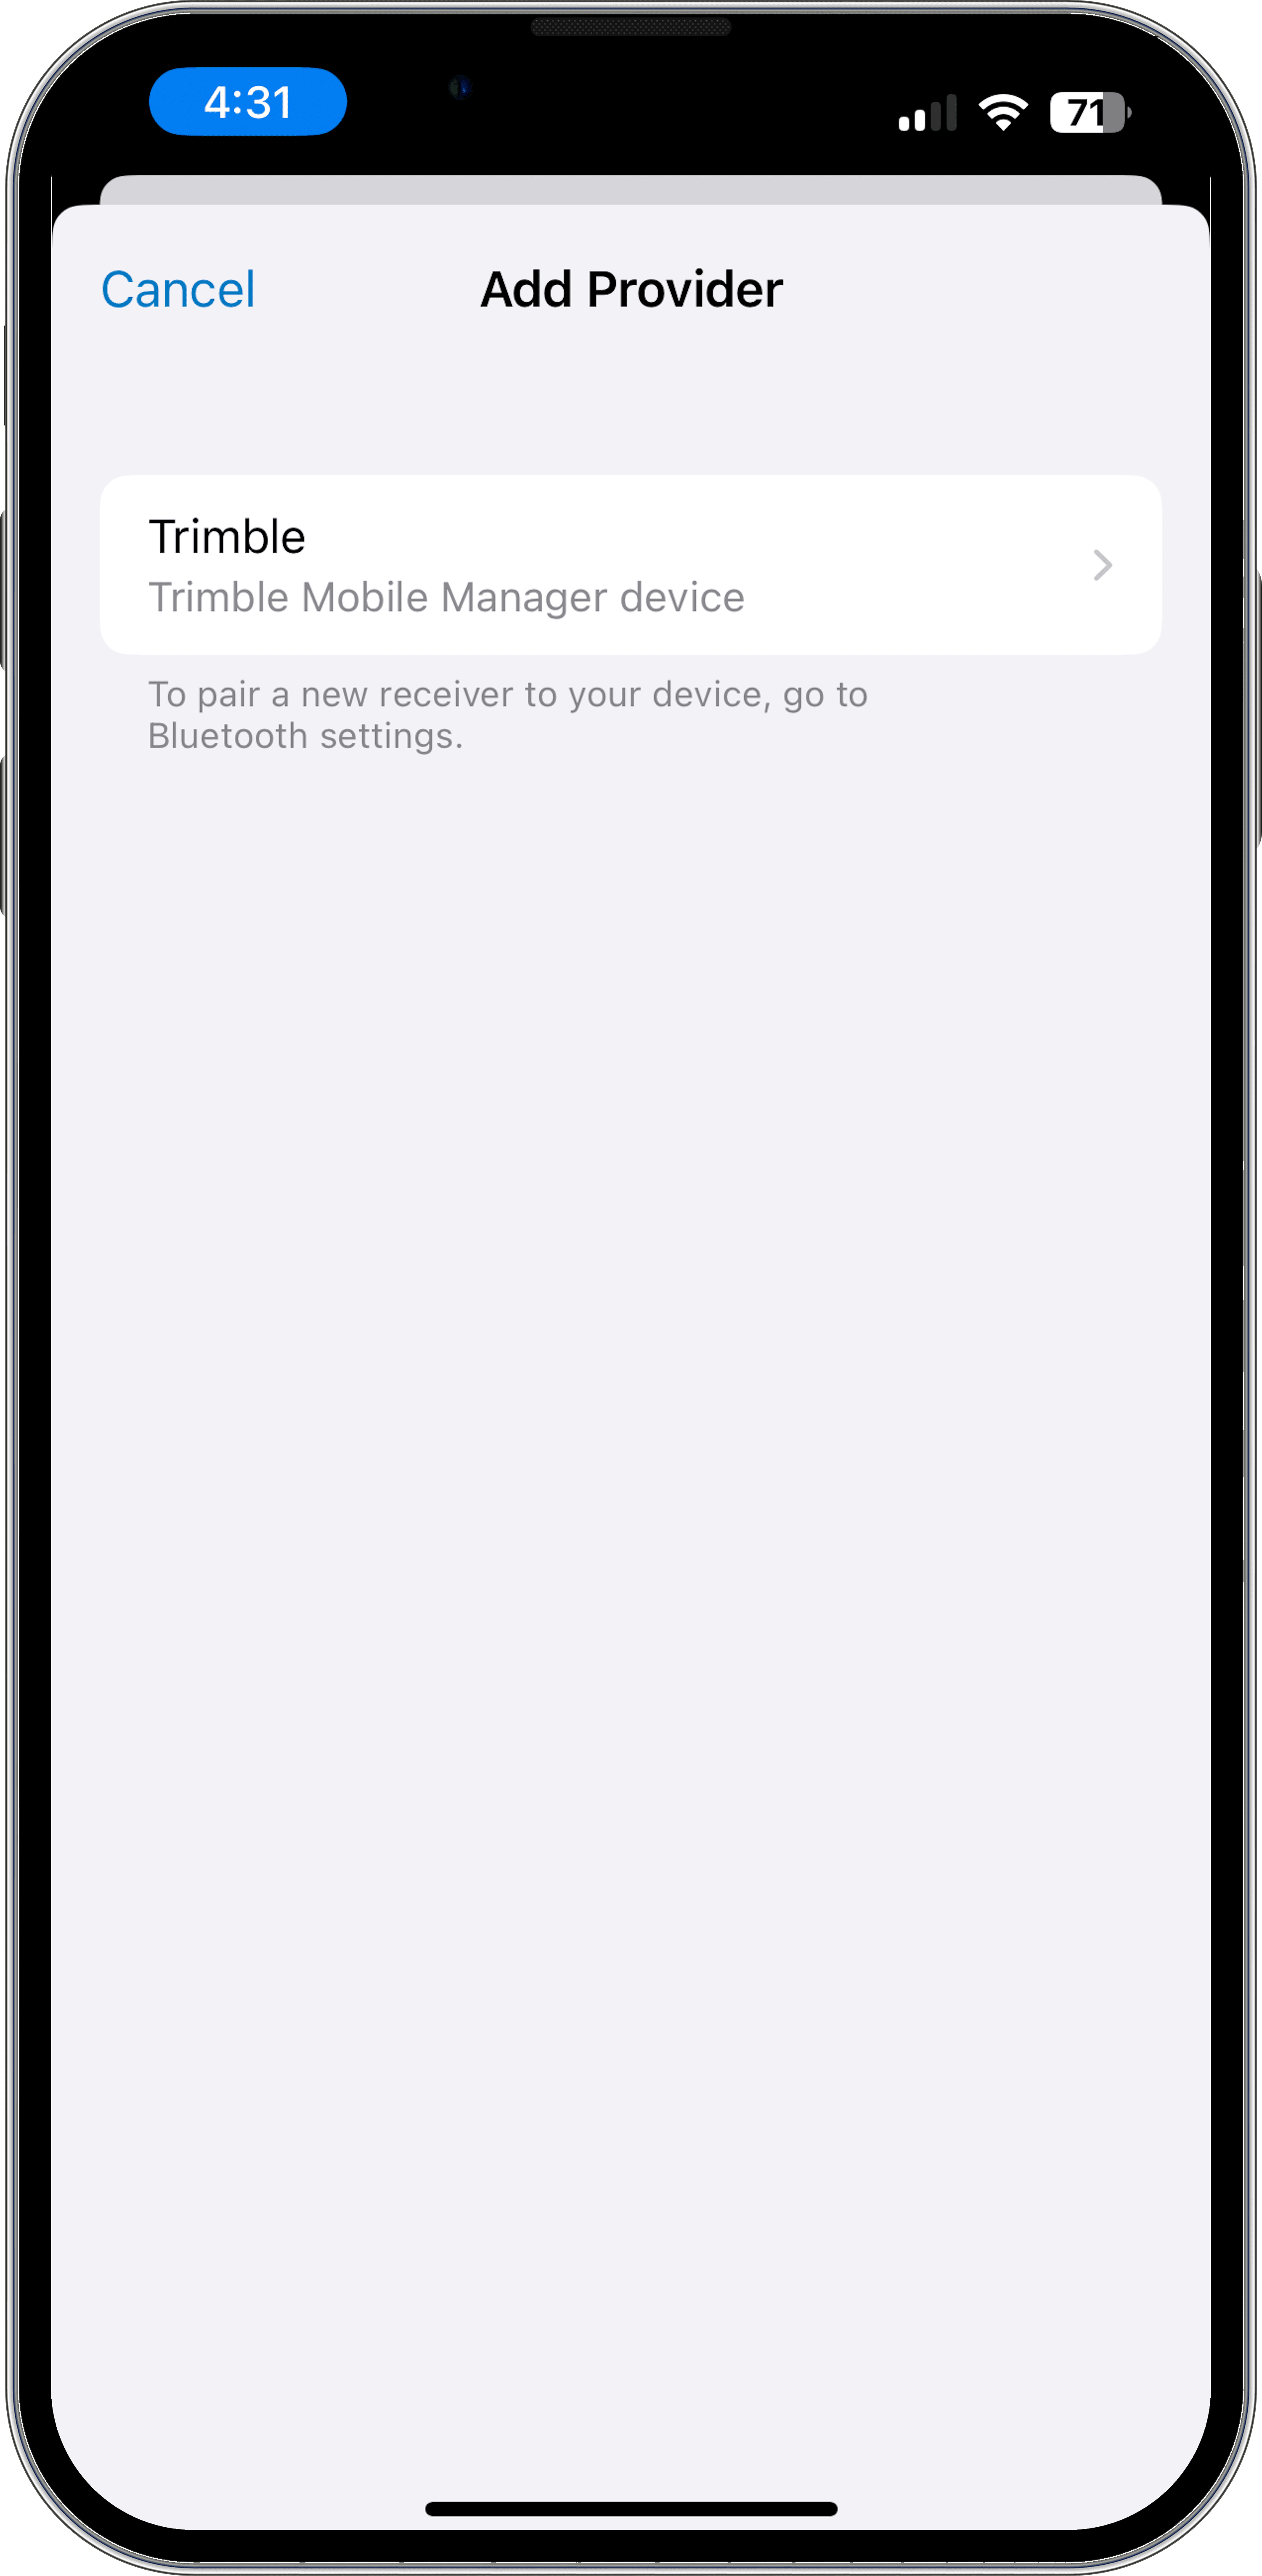
3. Select your Trimble receiver from the list.
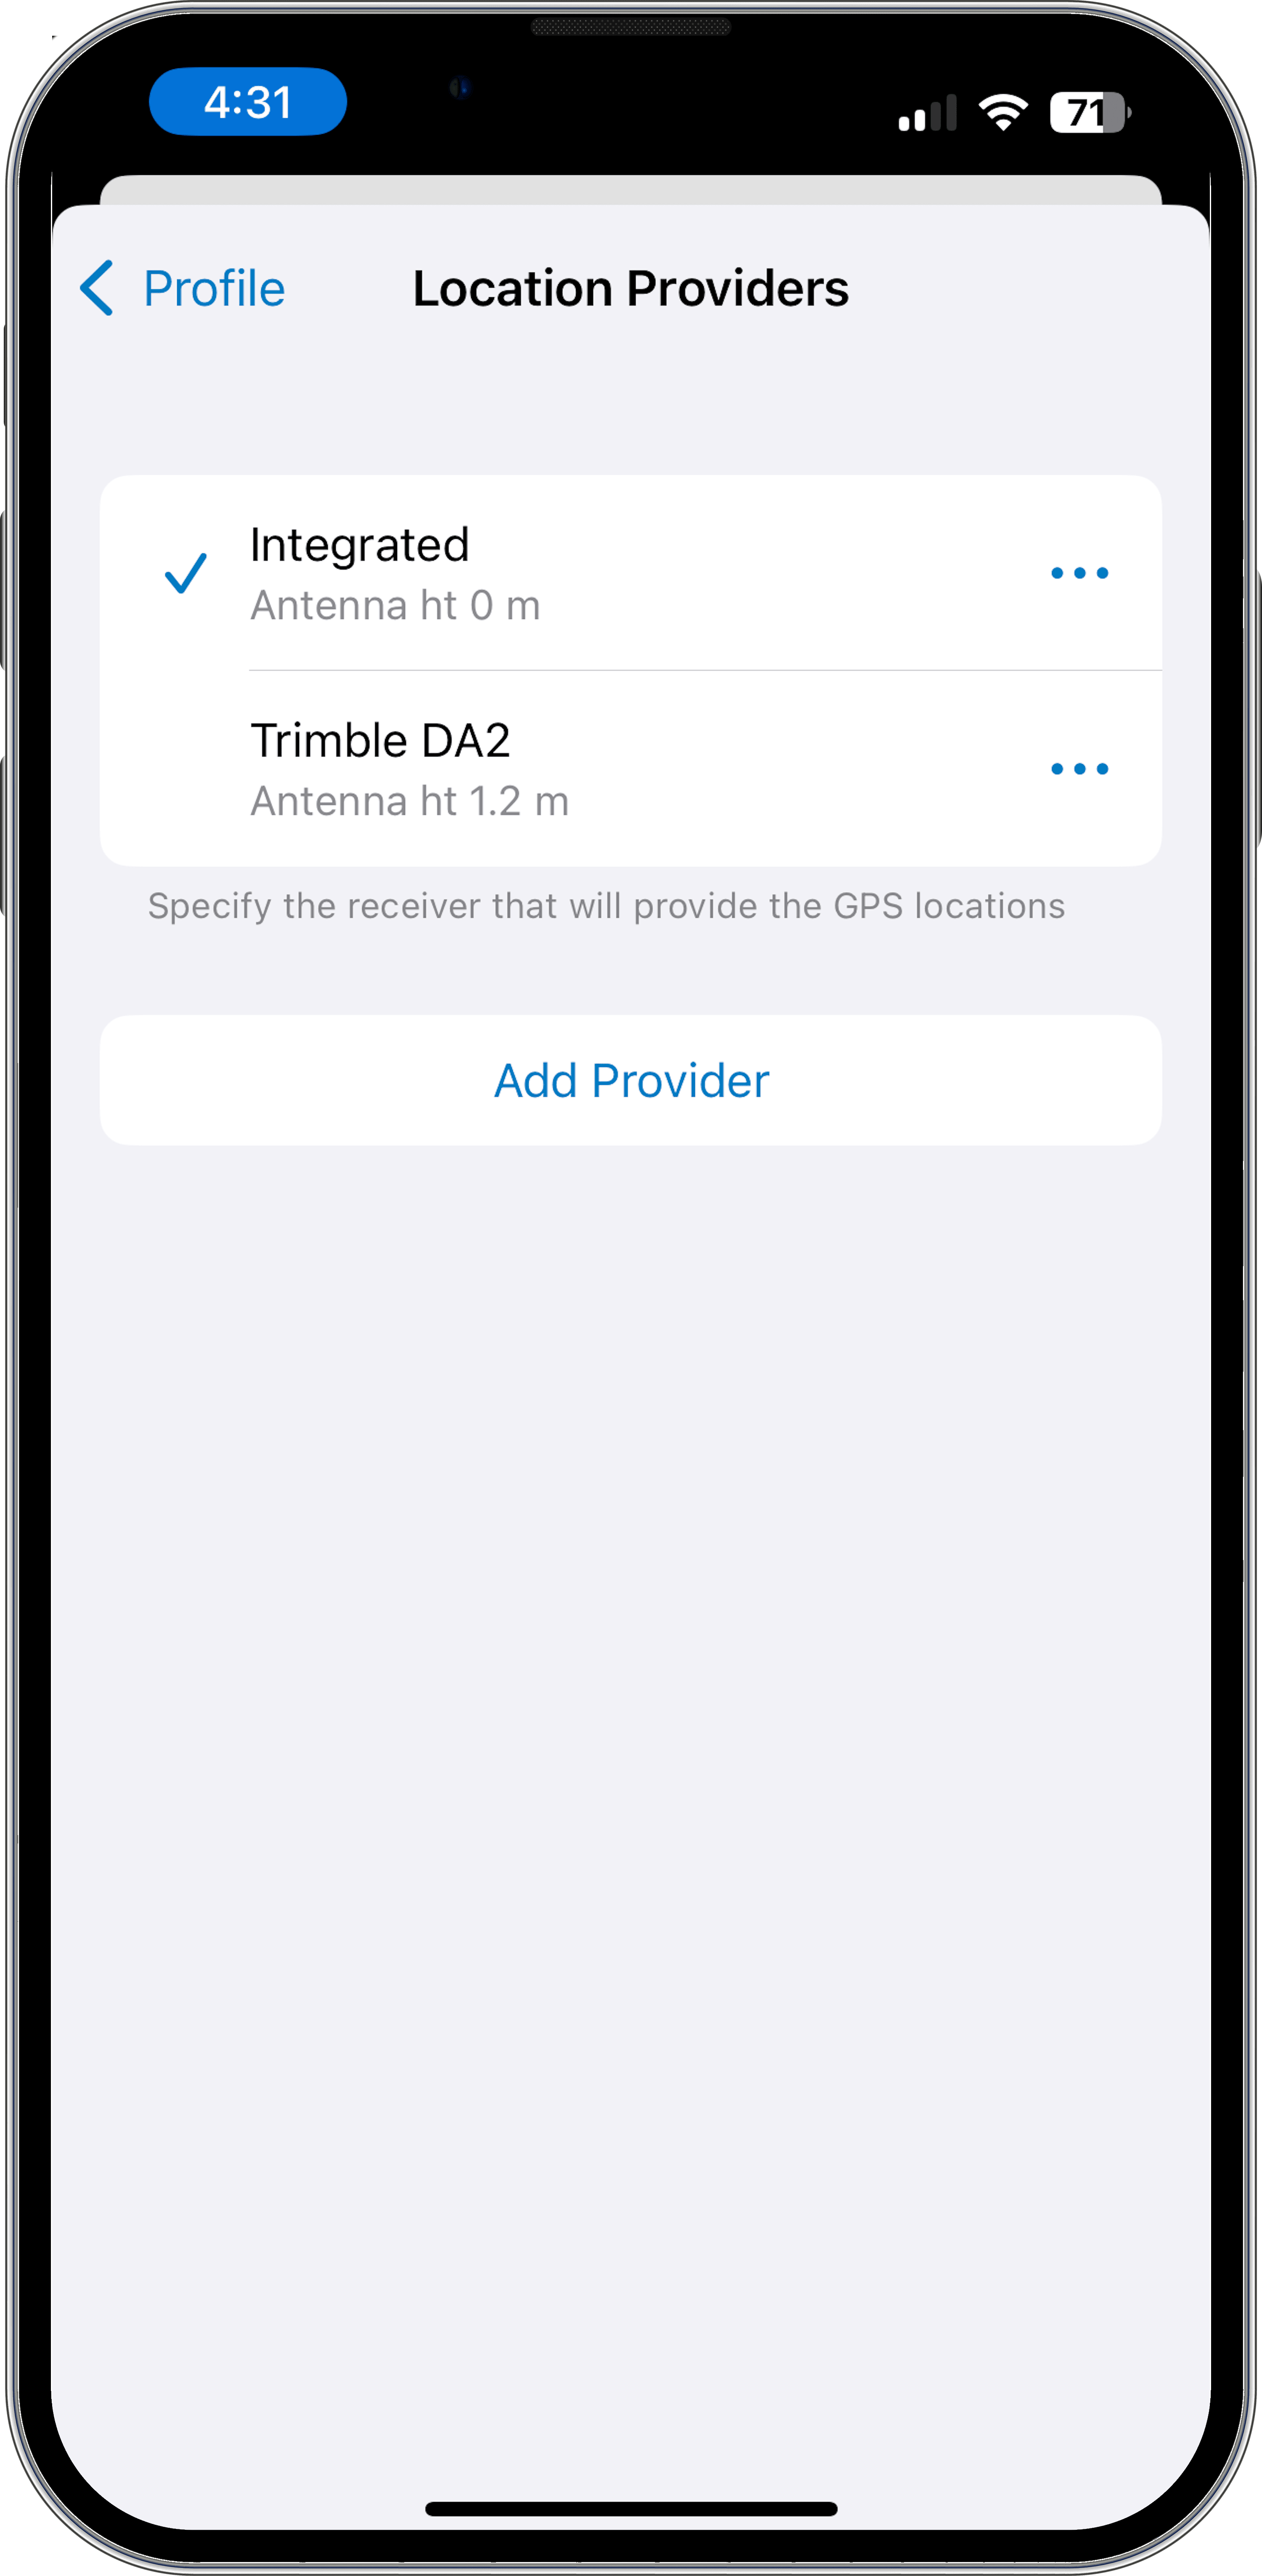
If you are using a Trimble Catalyst DA2 receiver, you may be prompted to sign in to your Trimble account using Trimble Mobile Manager.
Location Profile
In order to make sure that Field Maps handles the GNSS coordinates properly, you need to create a Location Profile to define the (geographic) coordinate system of the incoming GNSS stream, the coordinate system of the web map(s) you intend to use, and if necessary, the datum transformation between the two.
For this blog, we will assume that the web map is using a default ArcGIS basemap and hence the coordinate system will be WGS 1984 Web Mercator Auxiliary Sphere. The coordinate system of the basemap will generally define the coordinate system of the web map. To configure your profile, follow these steps:
1. In Field Maps, open the Profile screen by clicking on the user icon at the top of the screen. From there choose the Profile option. From the Location Profiles screen, select Add (iOS) or Add profile (Android) to create a new profile.
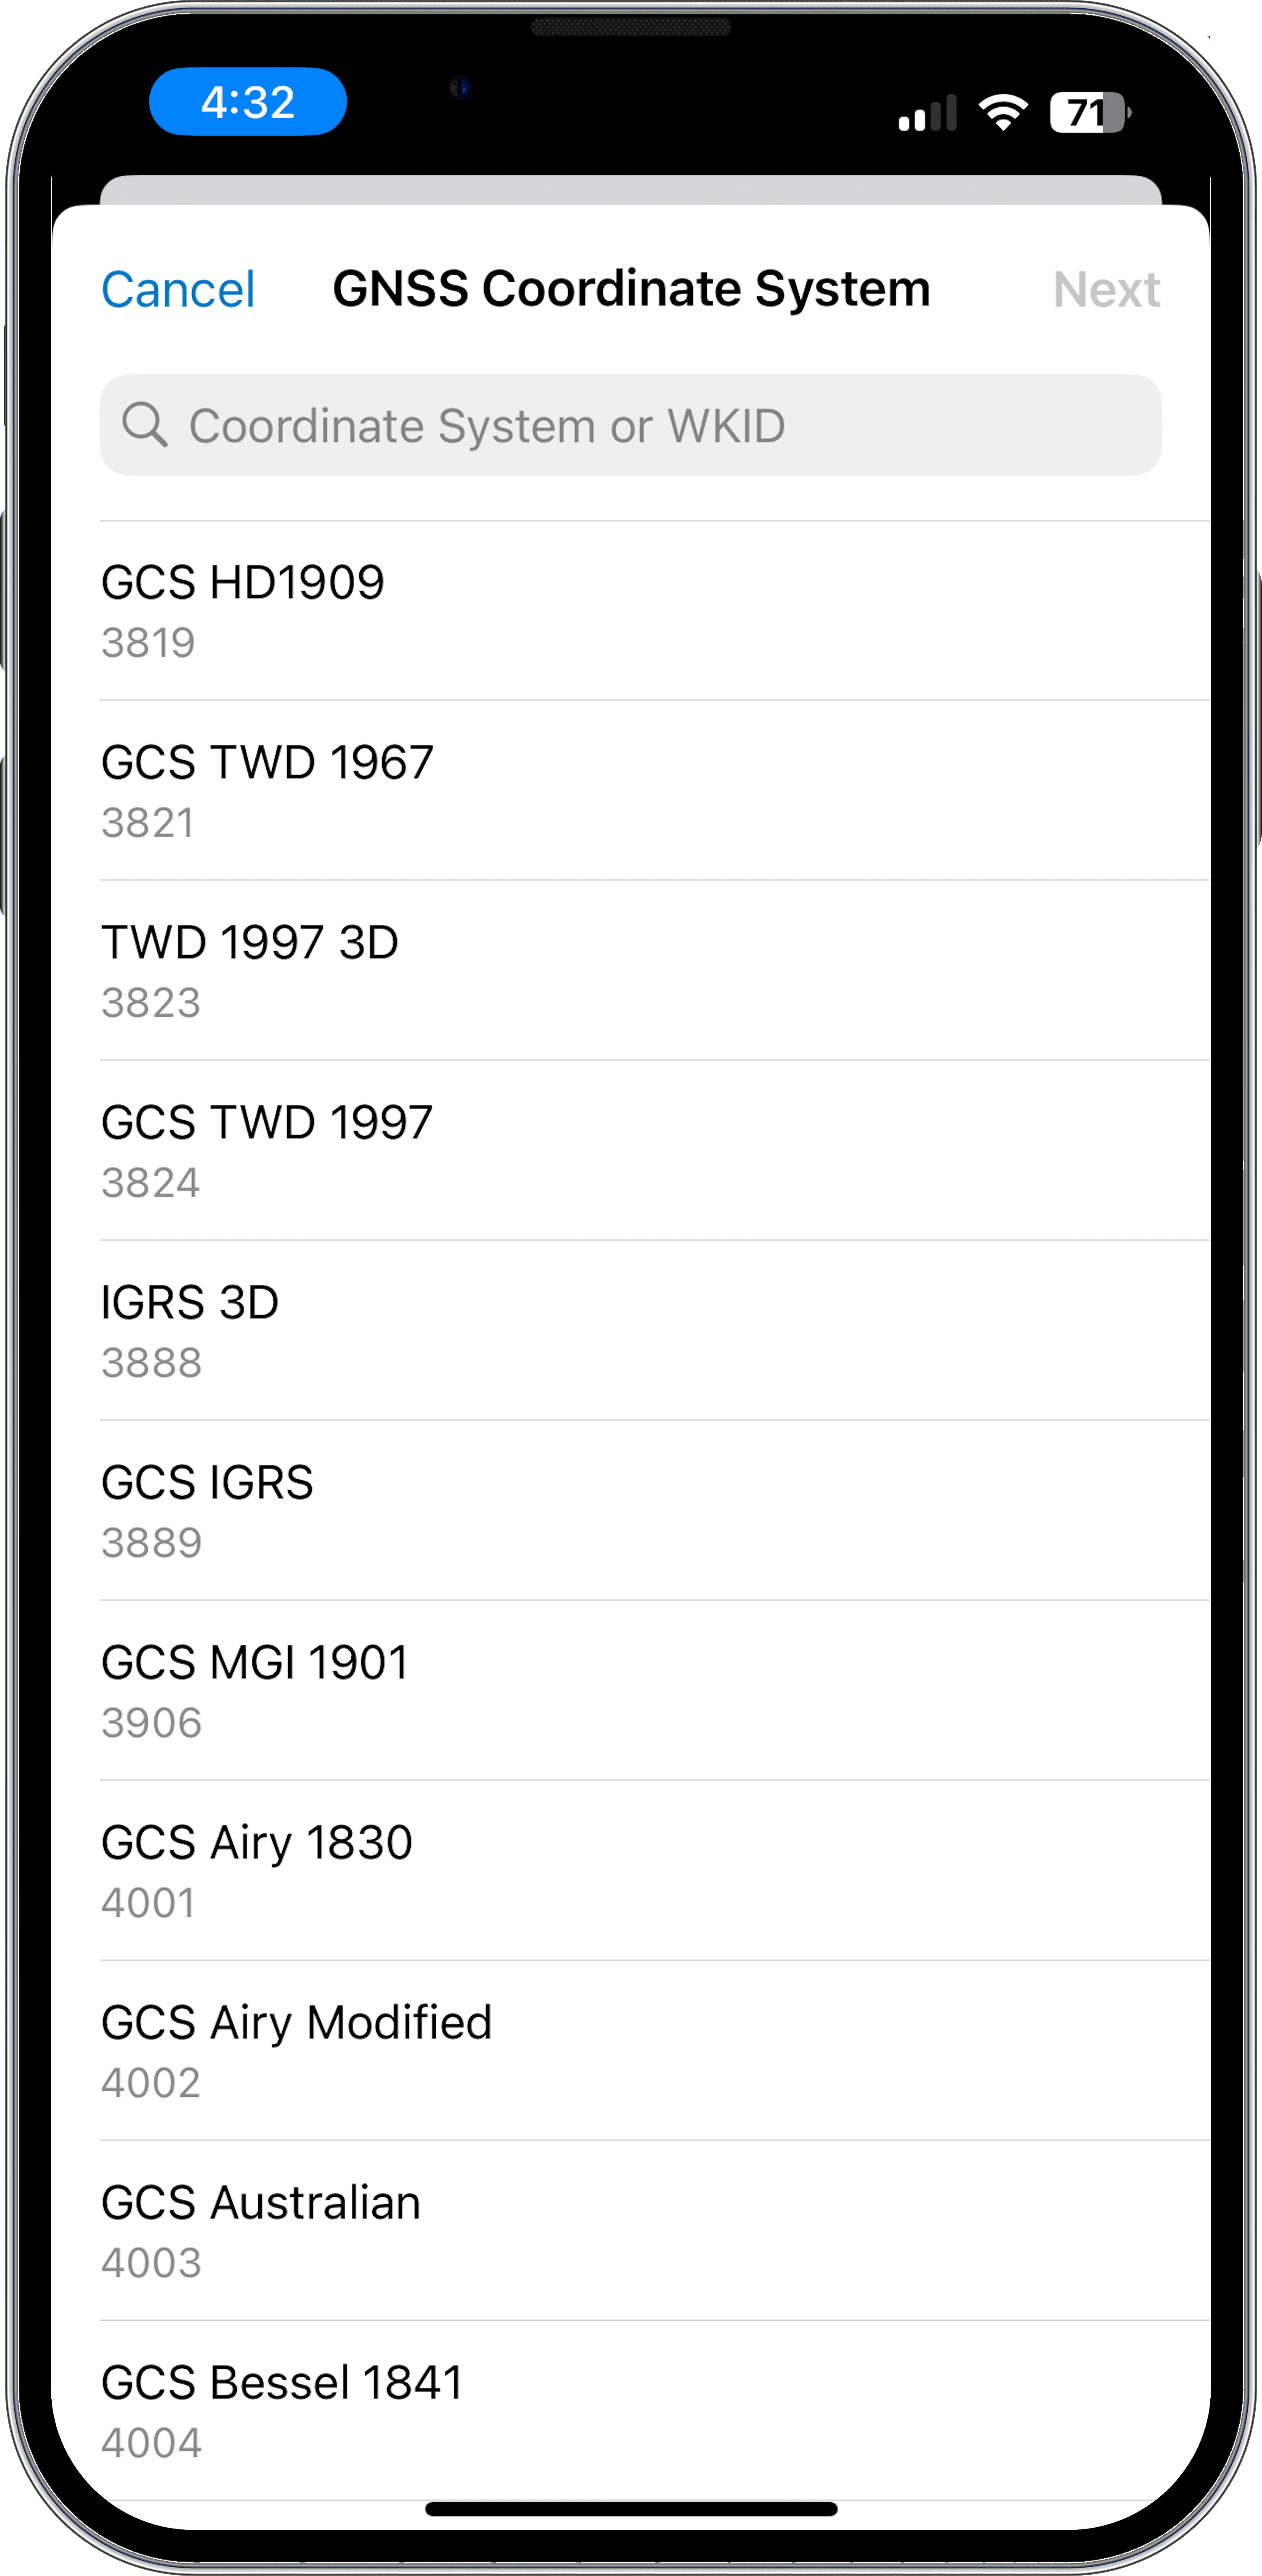
2. Select the GNSS Coordinate System that matches the GNSS output (see above) of TMM. Assuming you have GNSS output in TMM set to Auto, you should select the item that corresponds to your location as shown in the list here. If you have selected a specific reference frame in TMM then select the corresponding one here.
The list of coordinate systems is filtered to geographic coordinate systems supported in this version of the software. Remember from the Understanding geodetics for high-accuracy GIS data collection topic that a geographic coordinate system is inextricably tied to a datum and the naming will reflect that. Use the well-known ID (WKID) code for an easier search or lookup.

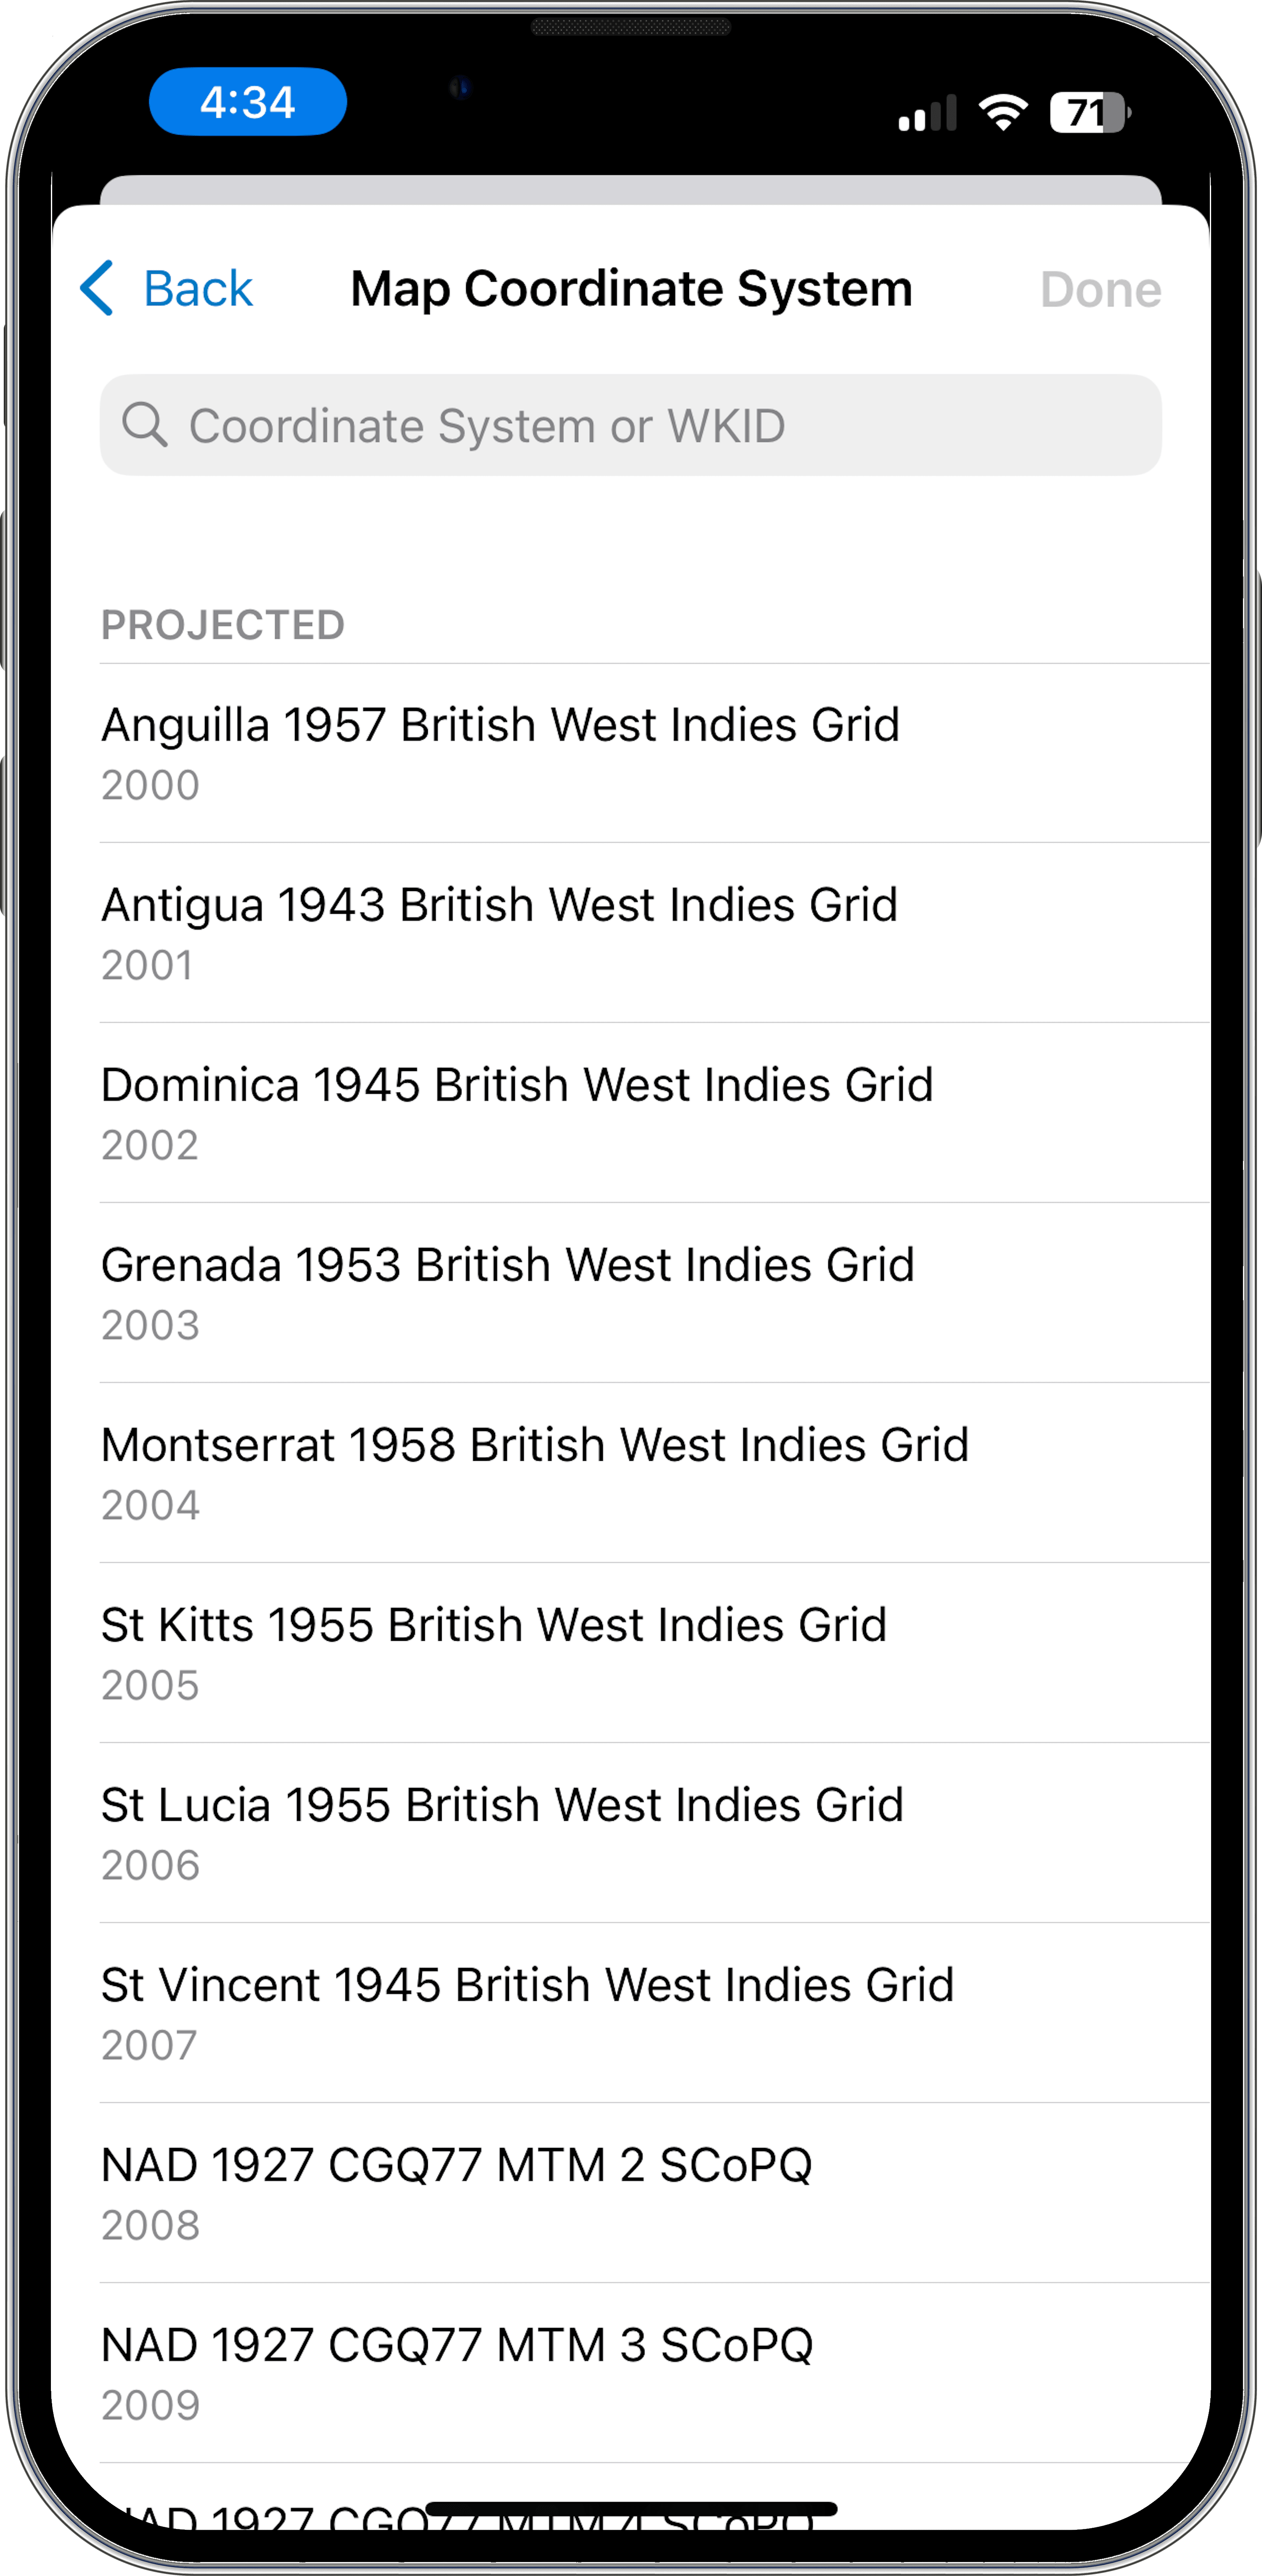
3. For the Map Coordinate System, select WGS 1984 Web Mercator Auxiliary Sphere.

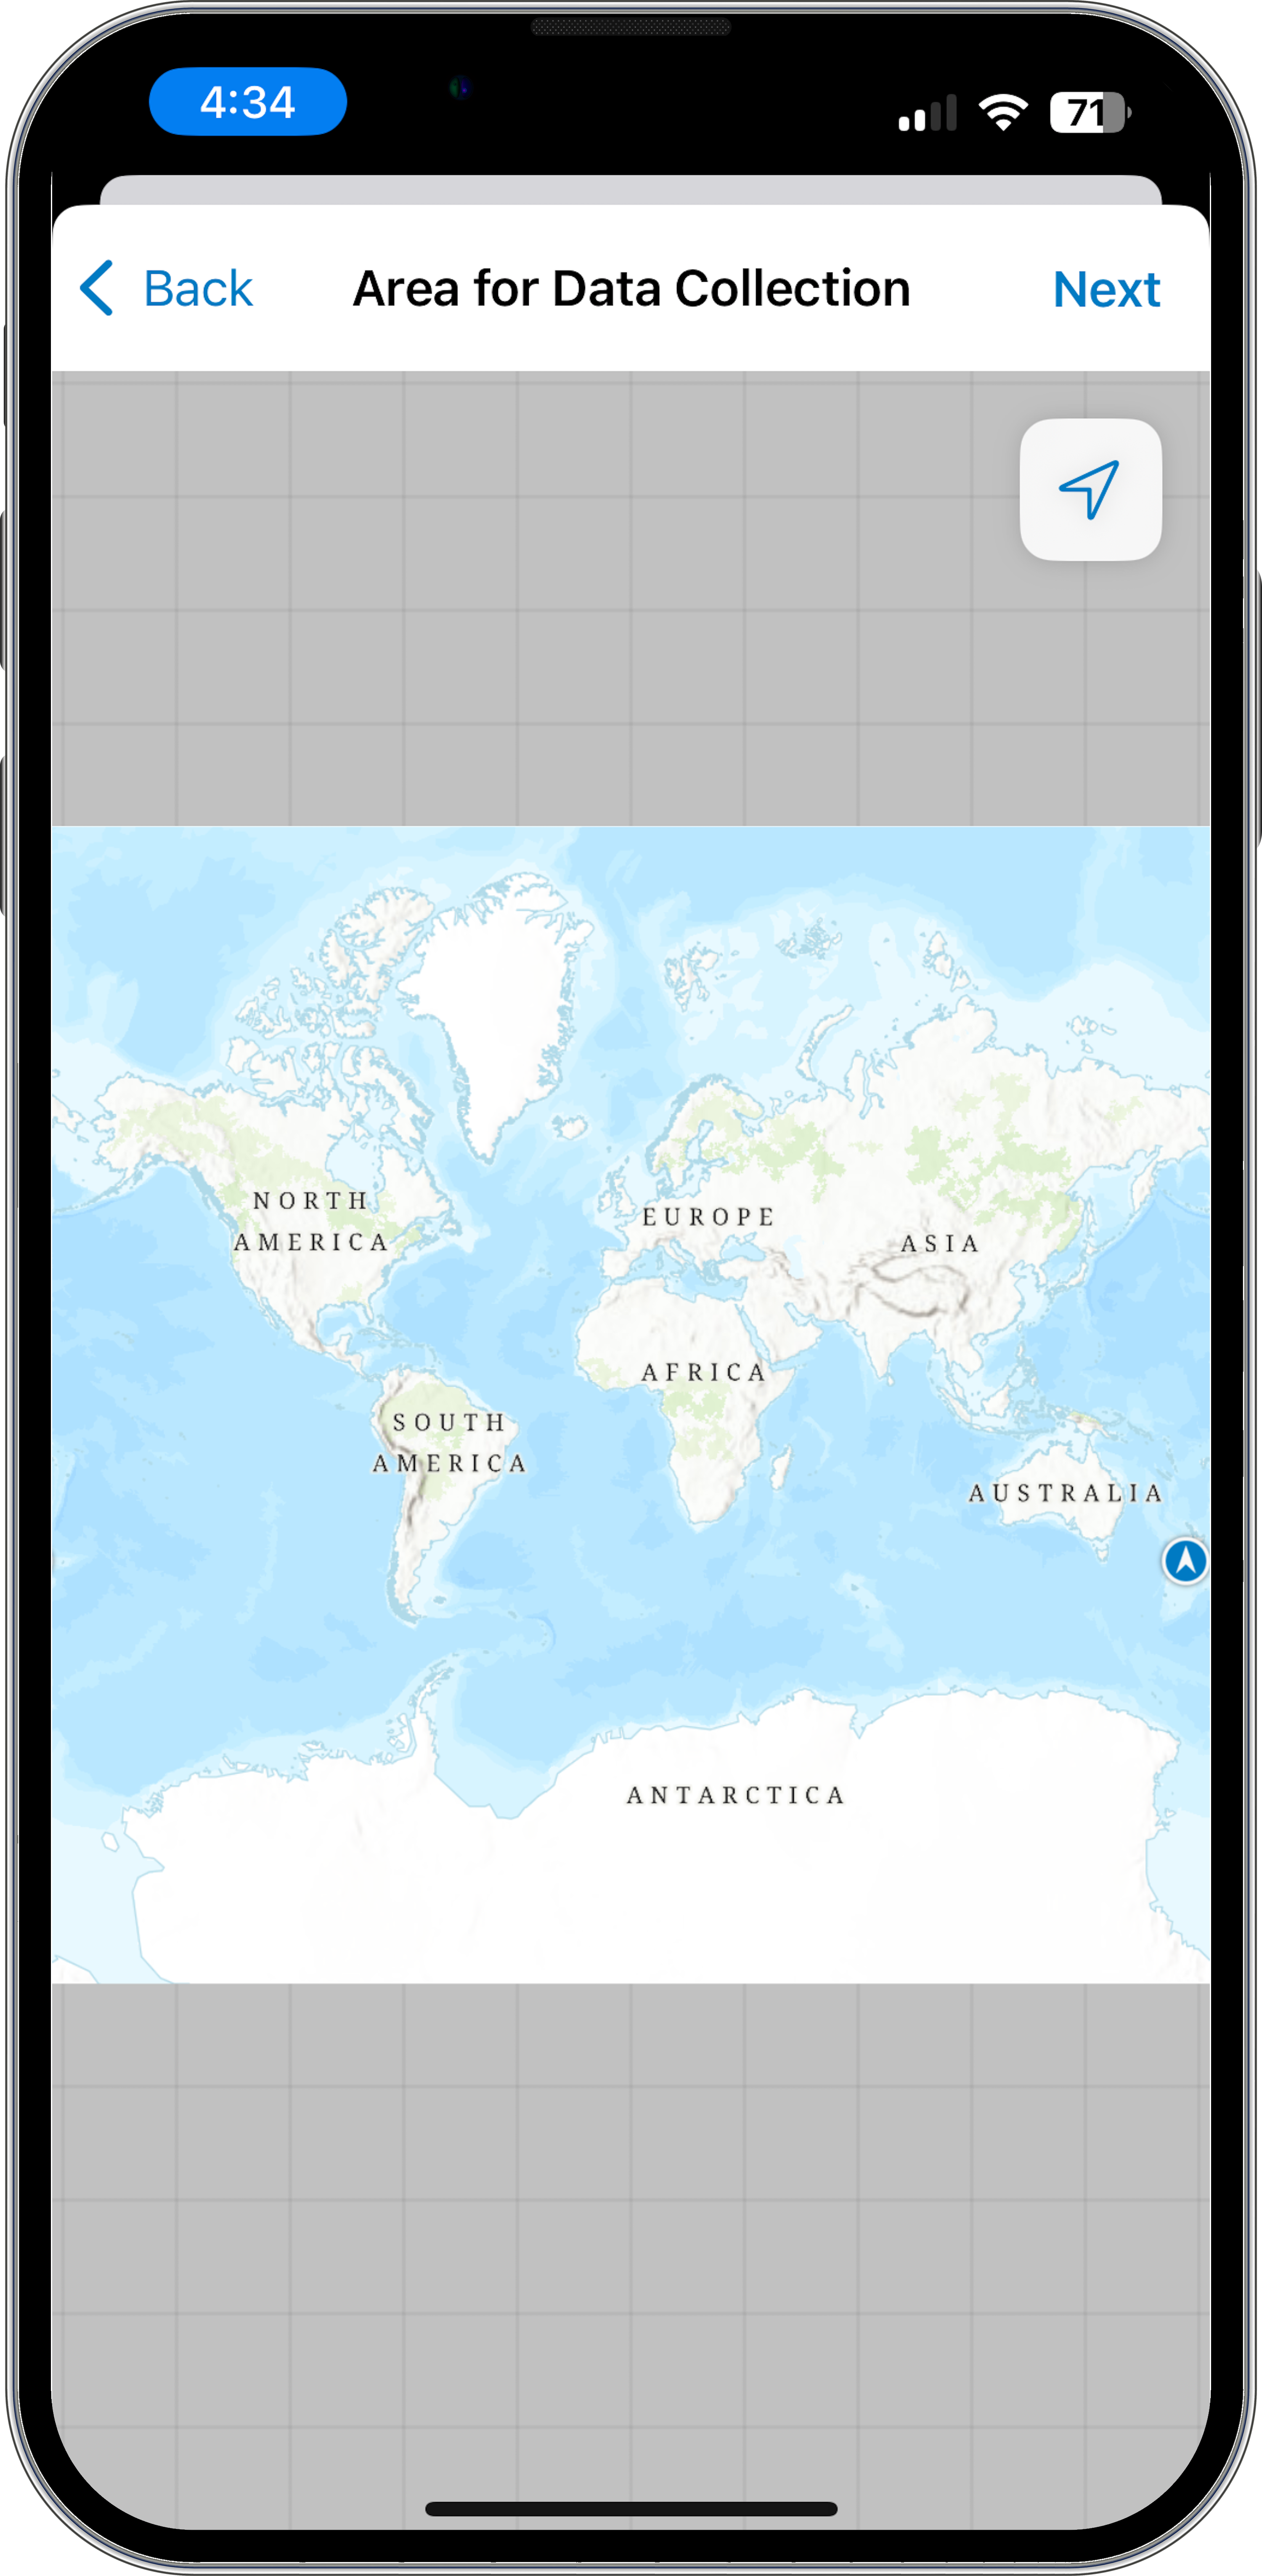
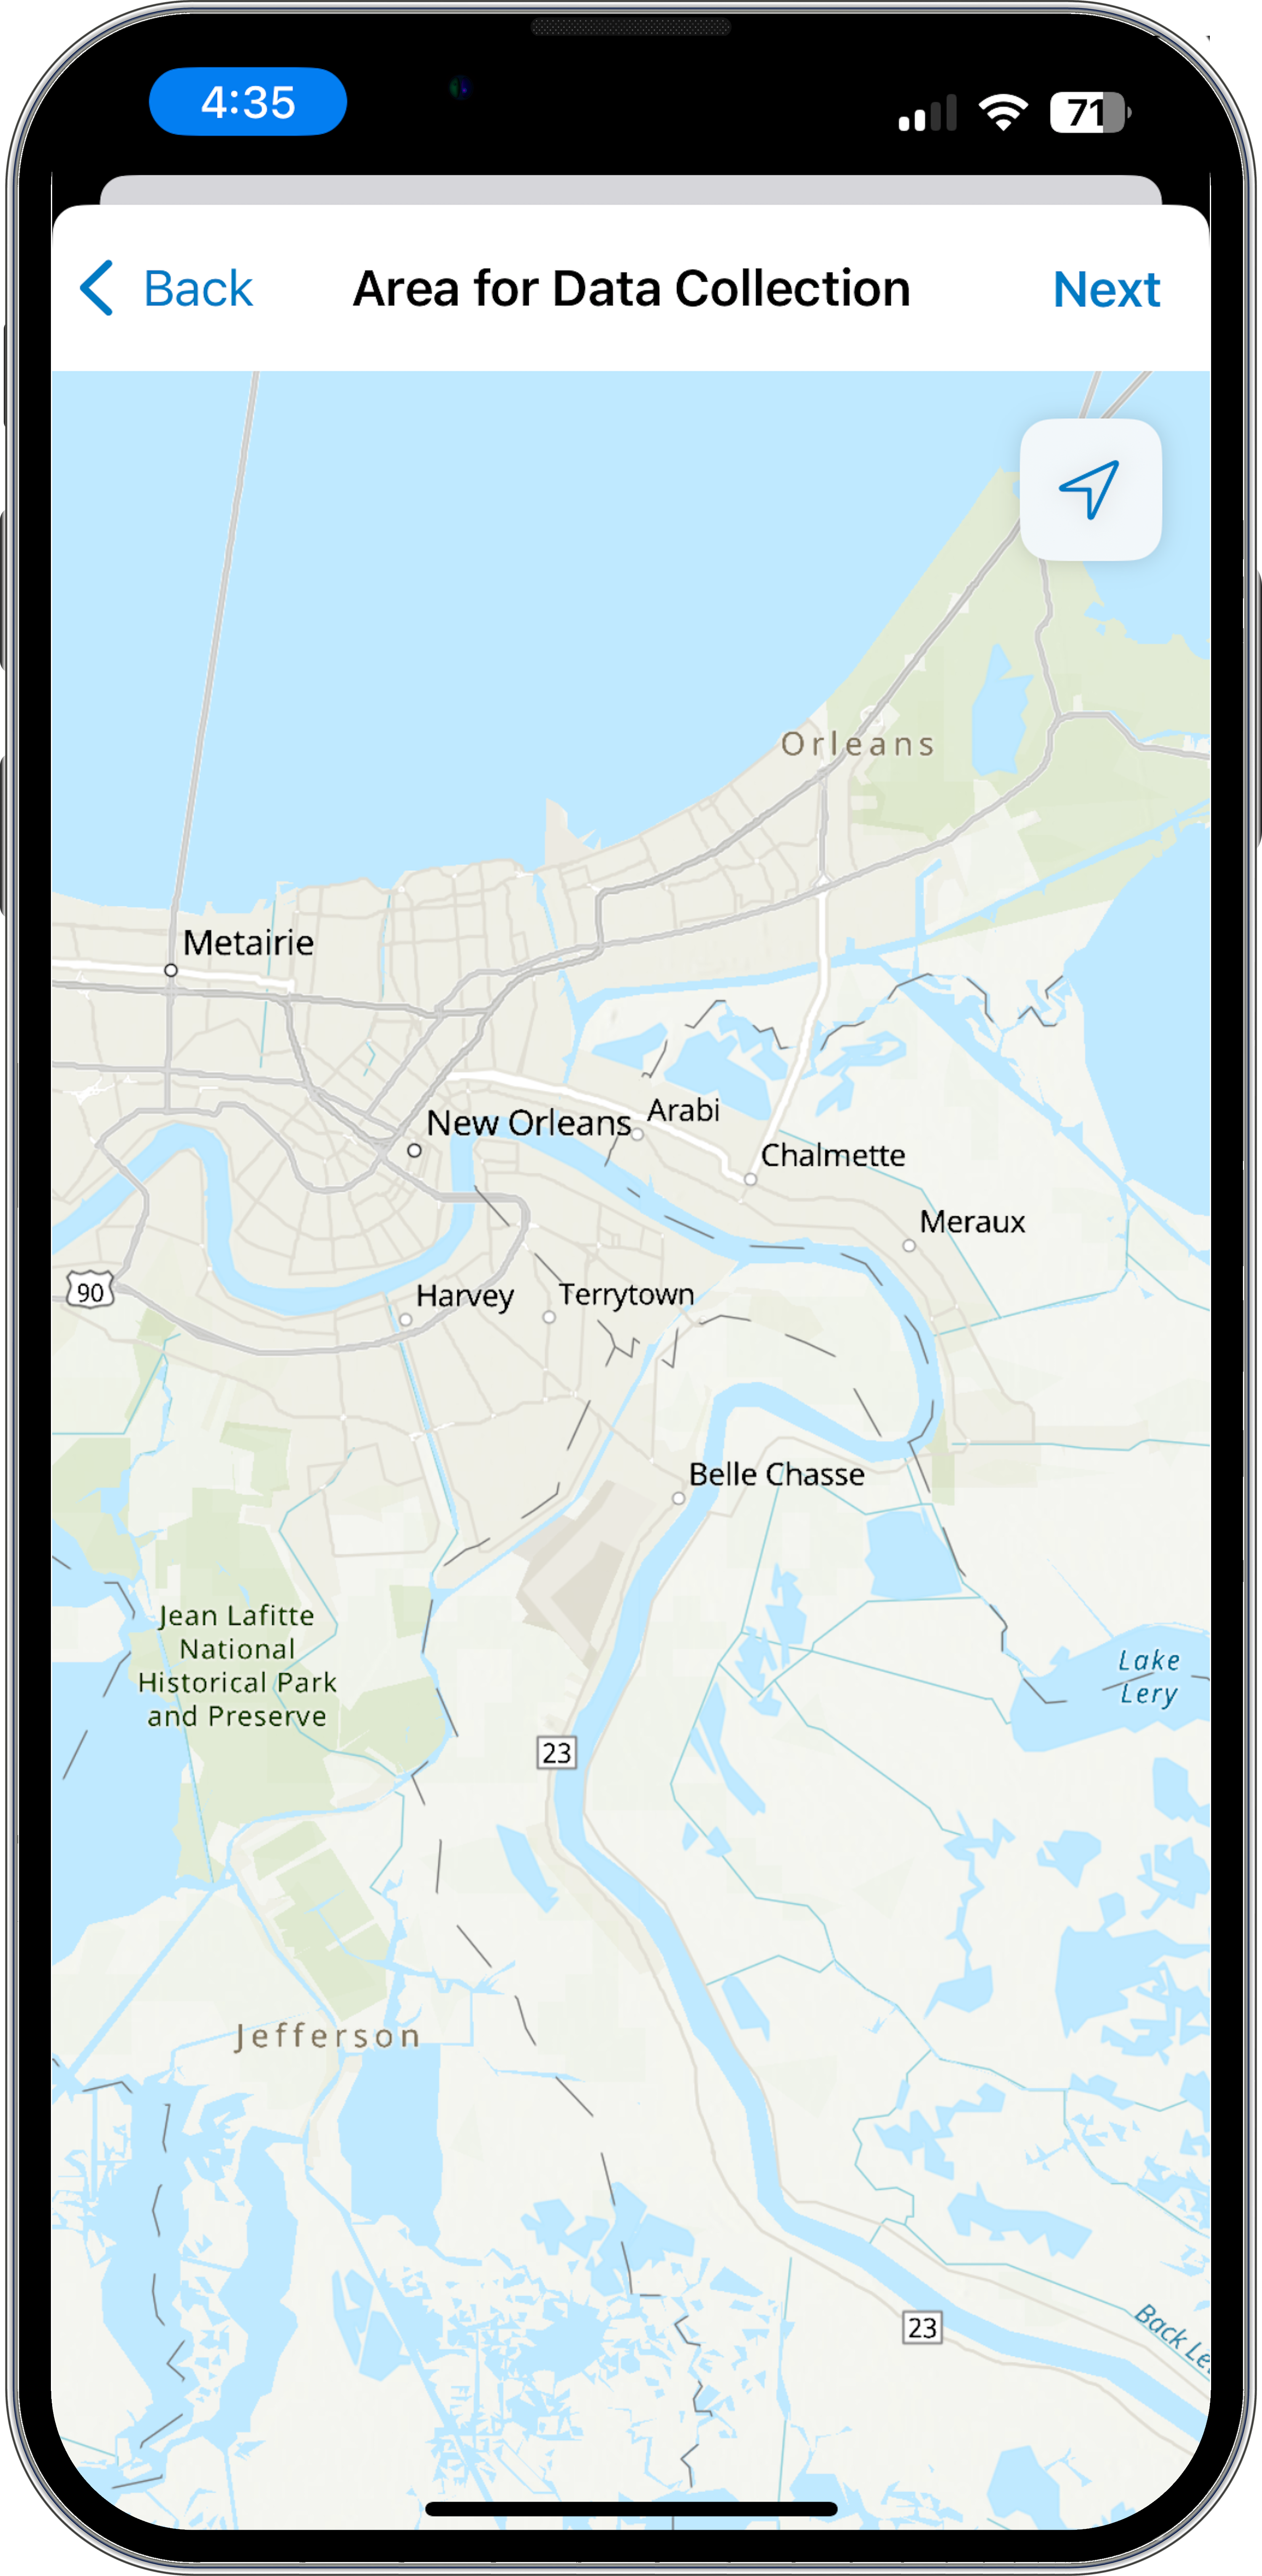
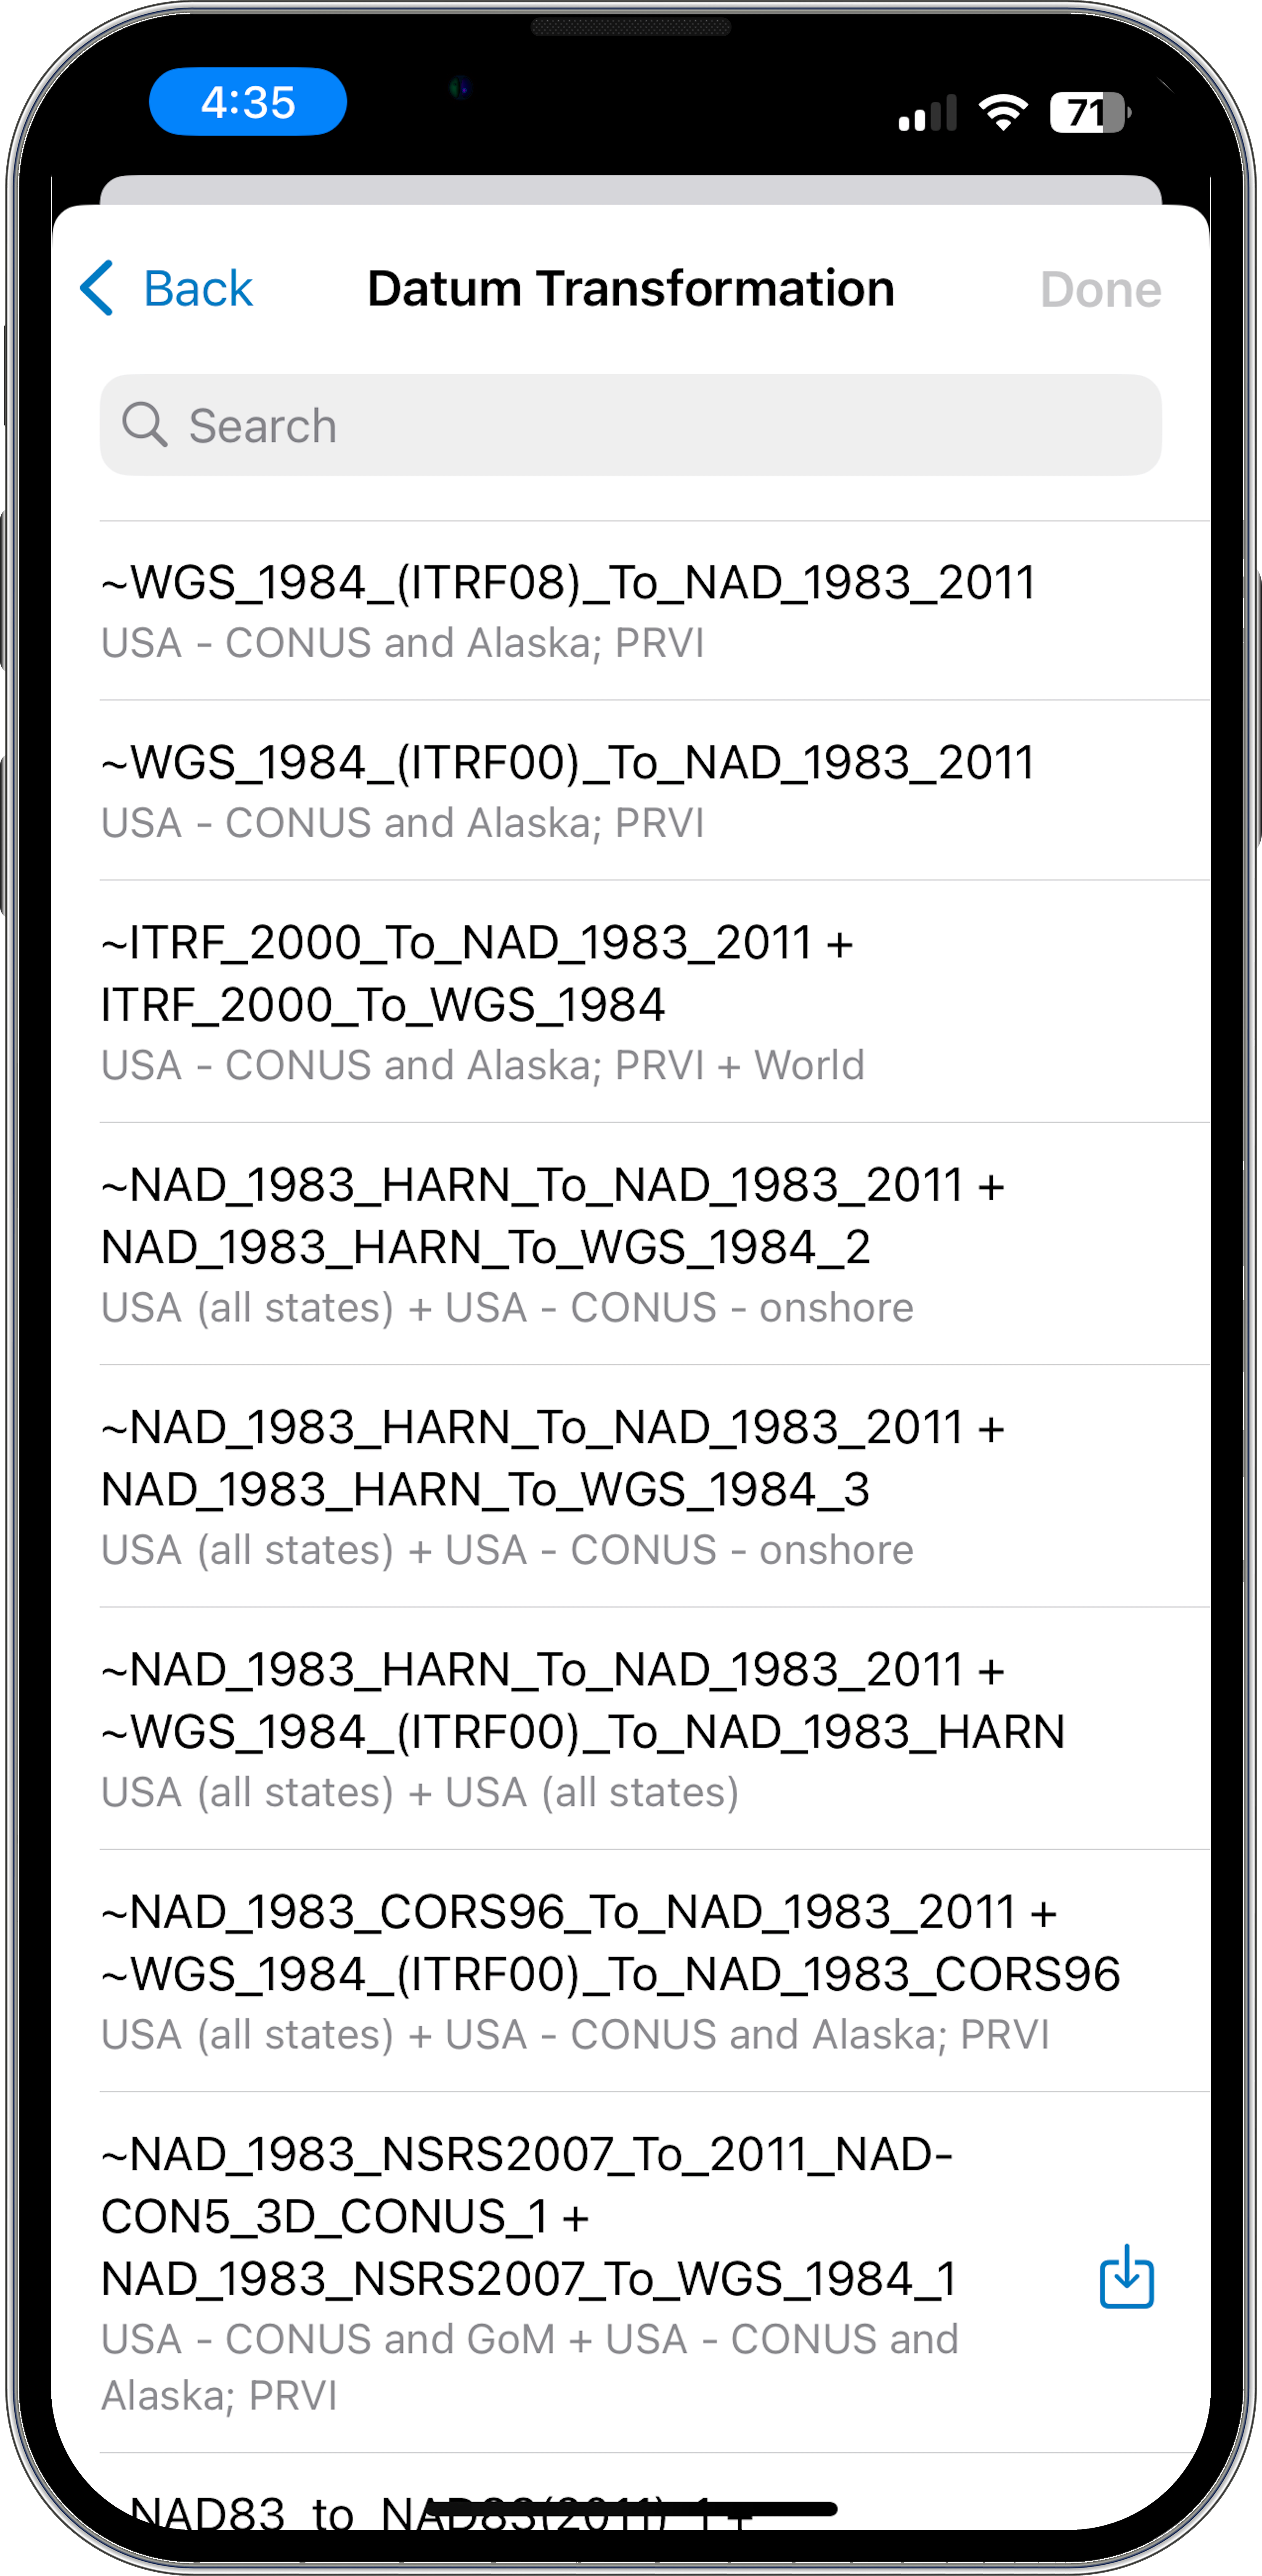
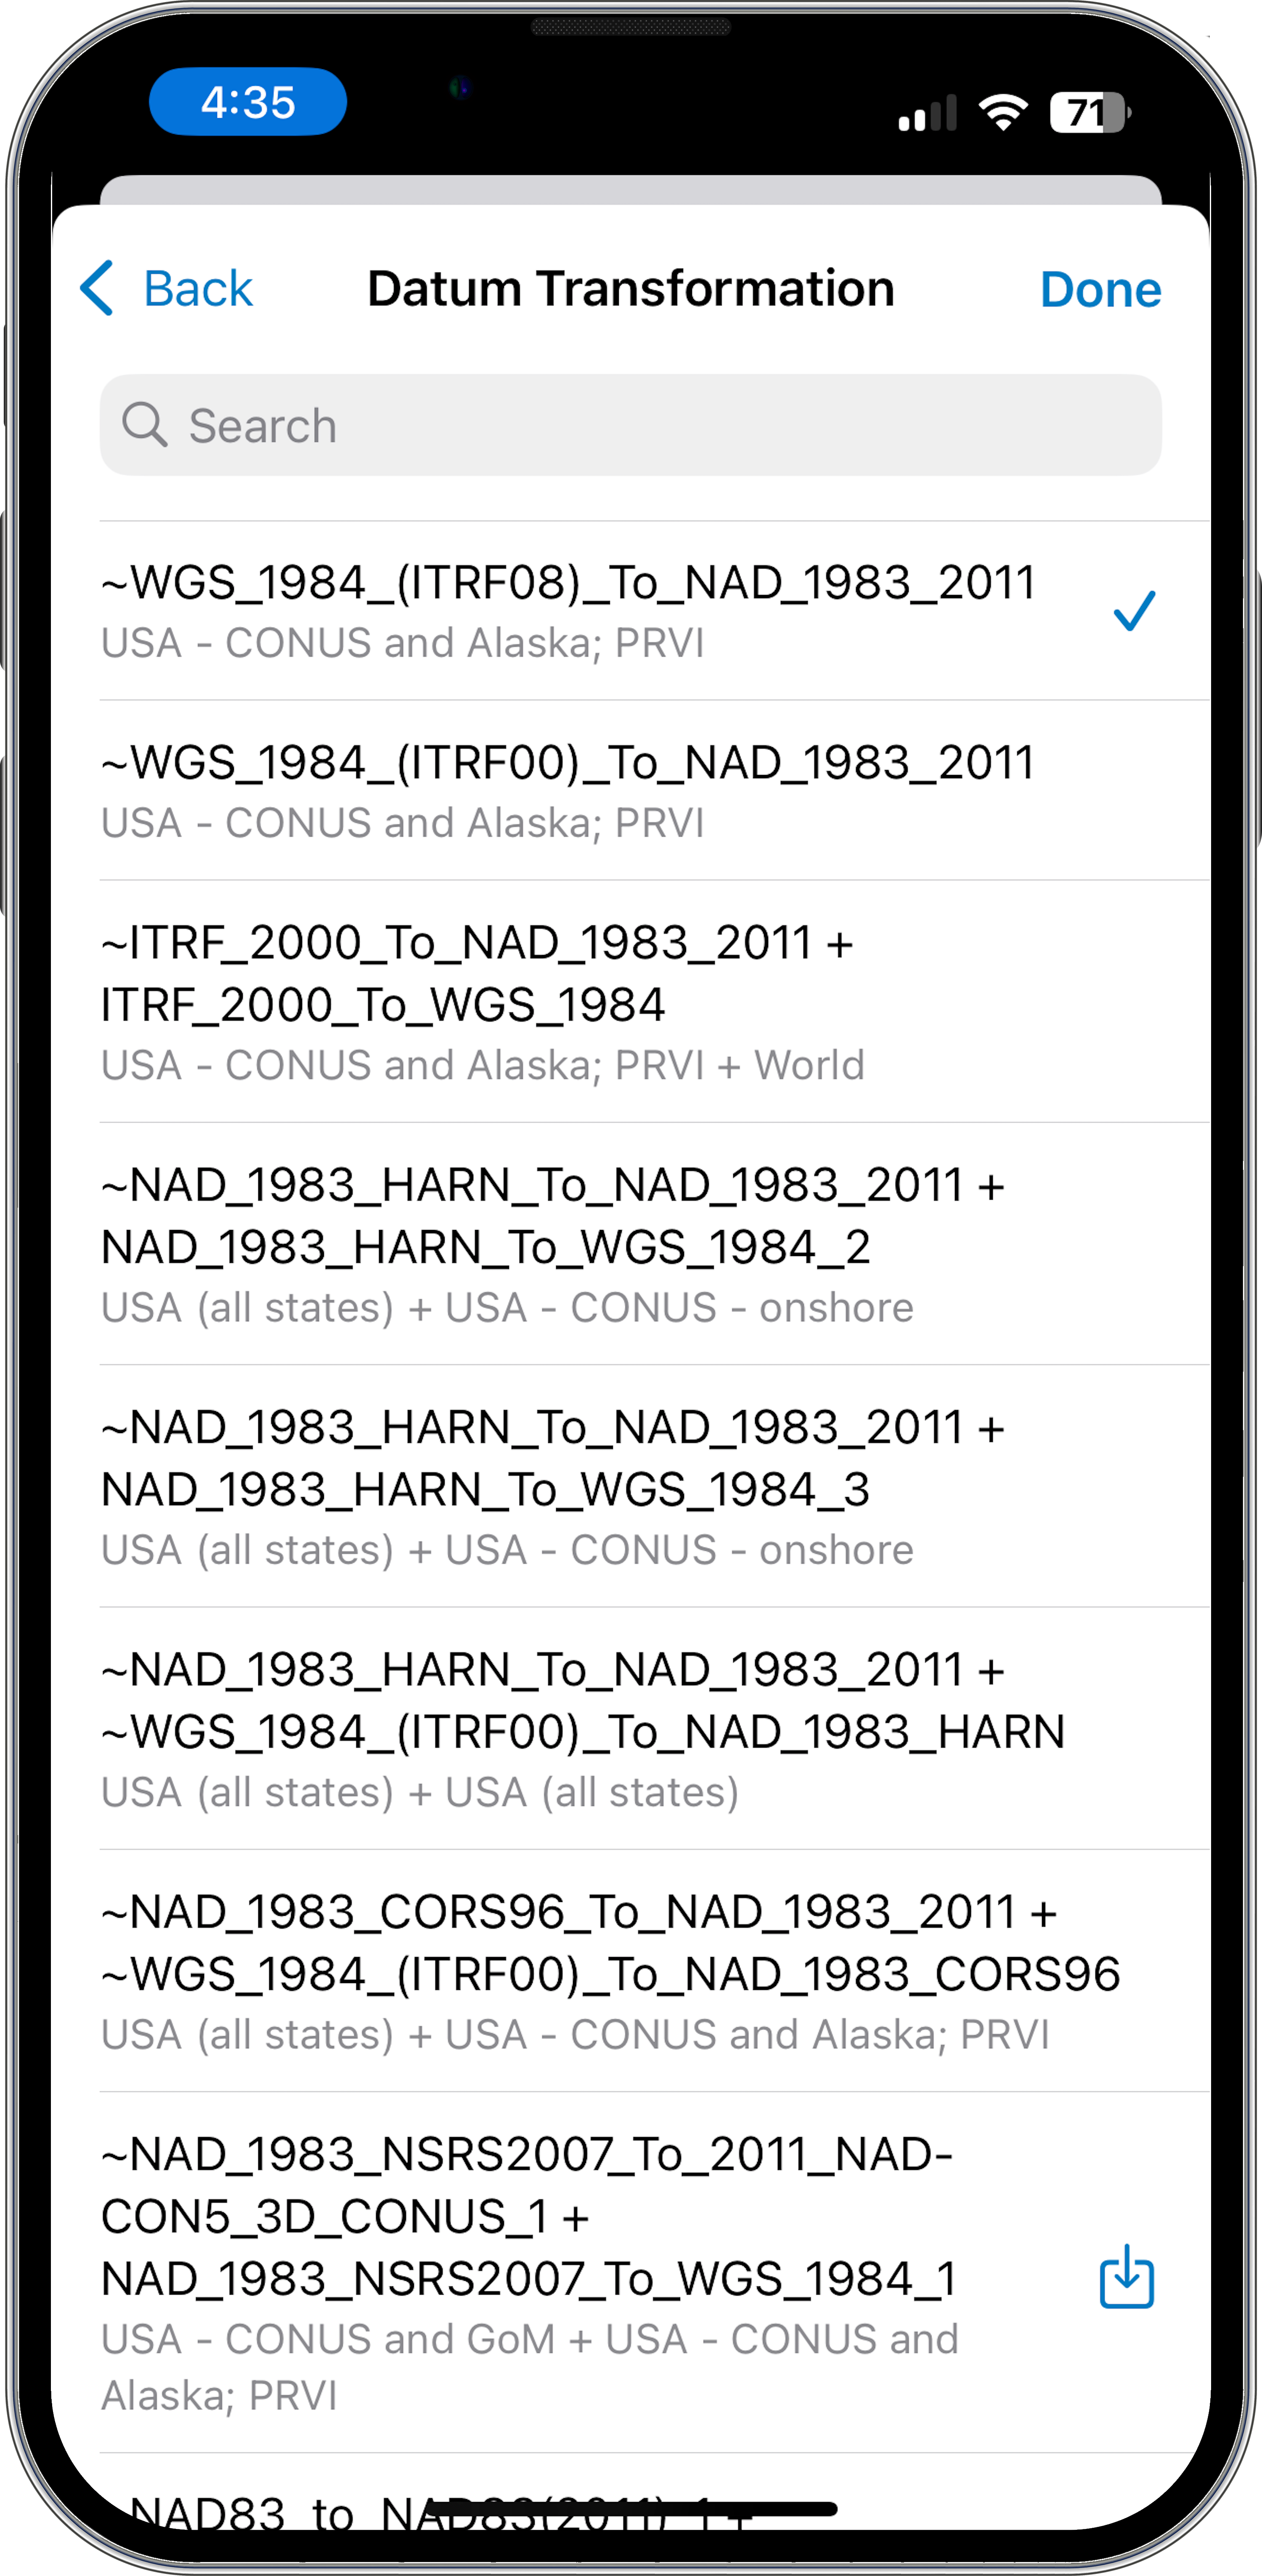
4. You will now see a Map Extent screen. Zoom in to select the extent of the work area—this will enable Field Maps to provide a list of applicable datum transformations, sorted by accuracy.
Note: You must be online for this step, otherwise you will skip to the next step.
5. Select the top (default) Datum Transformation from the next screen unless you have been told otherwise by your GIS administrator or Trimble dealer.
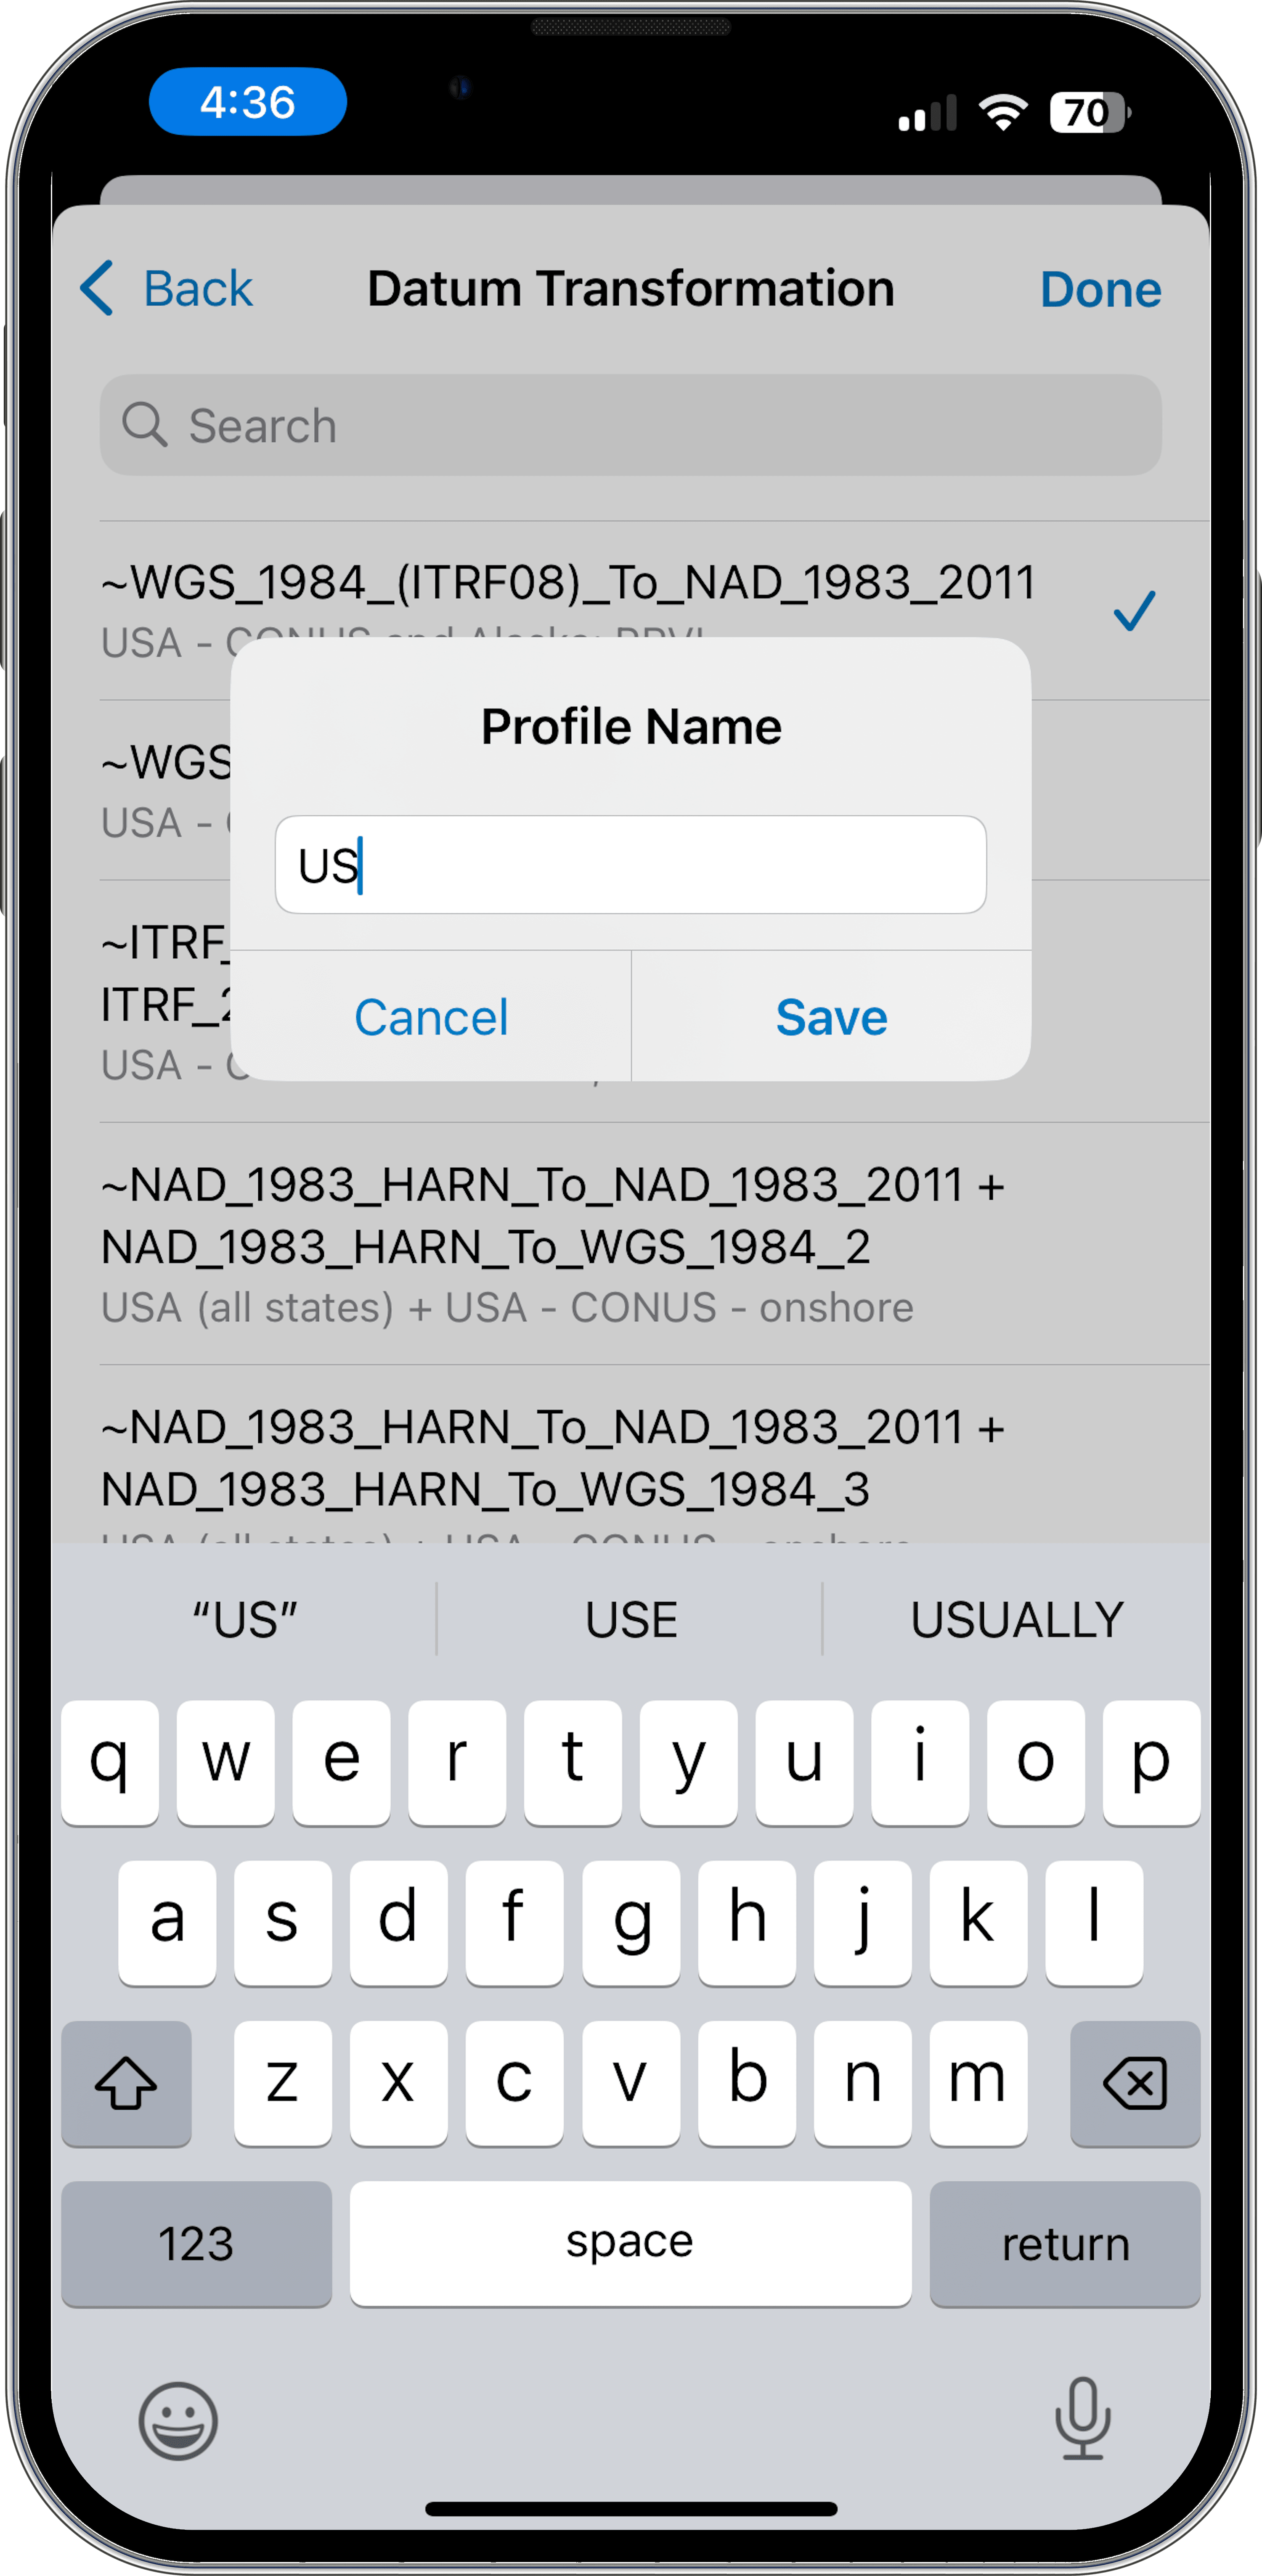
6. Give the profile a Name and save it.
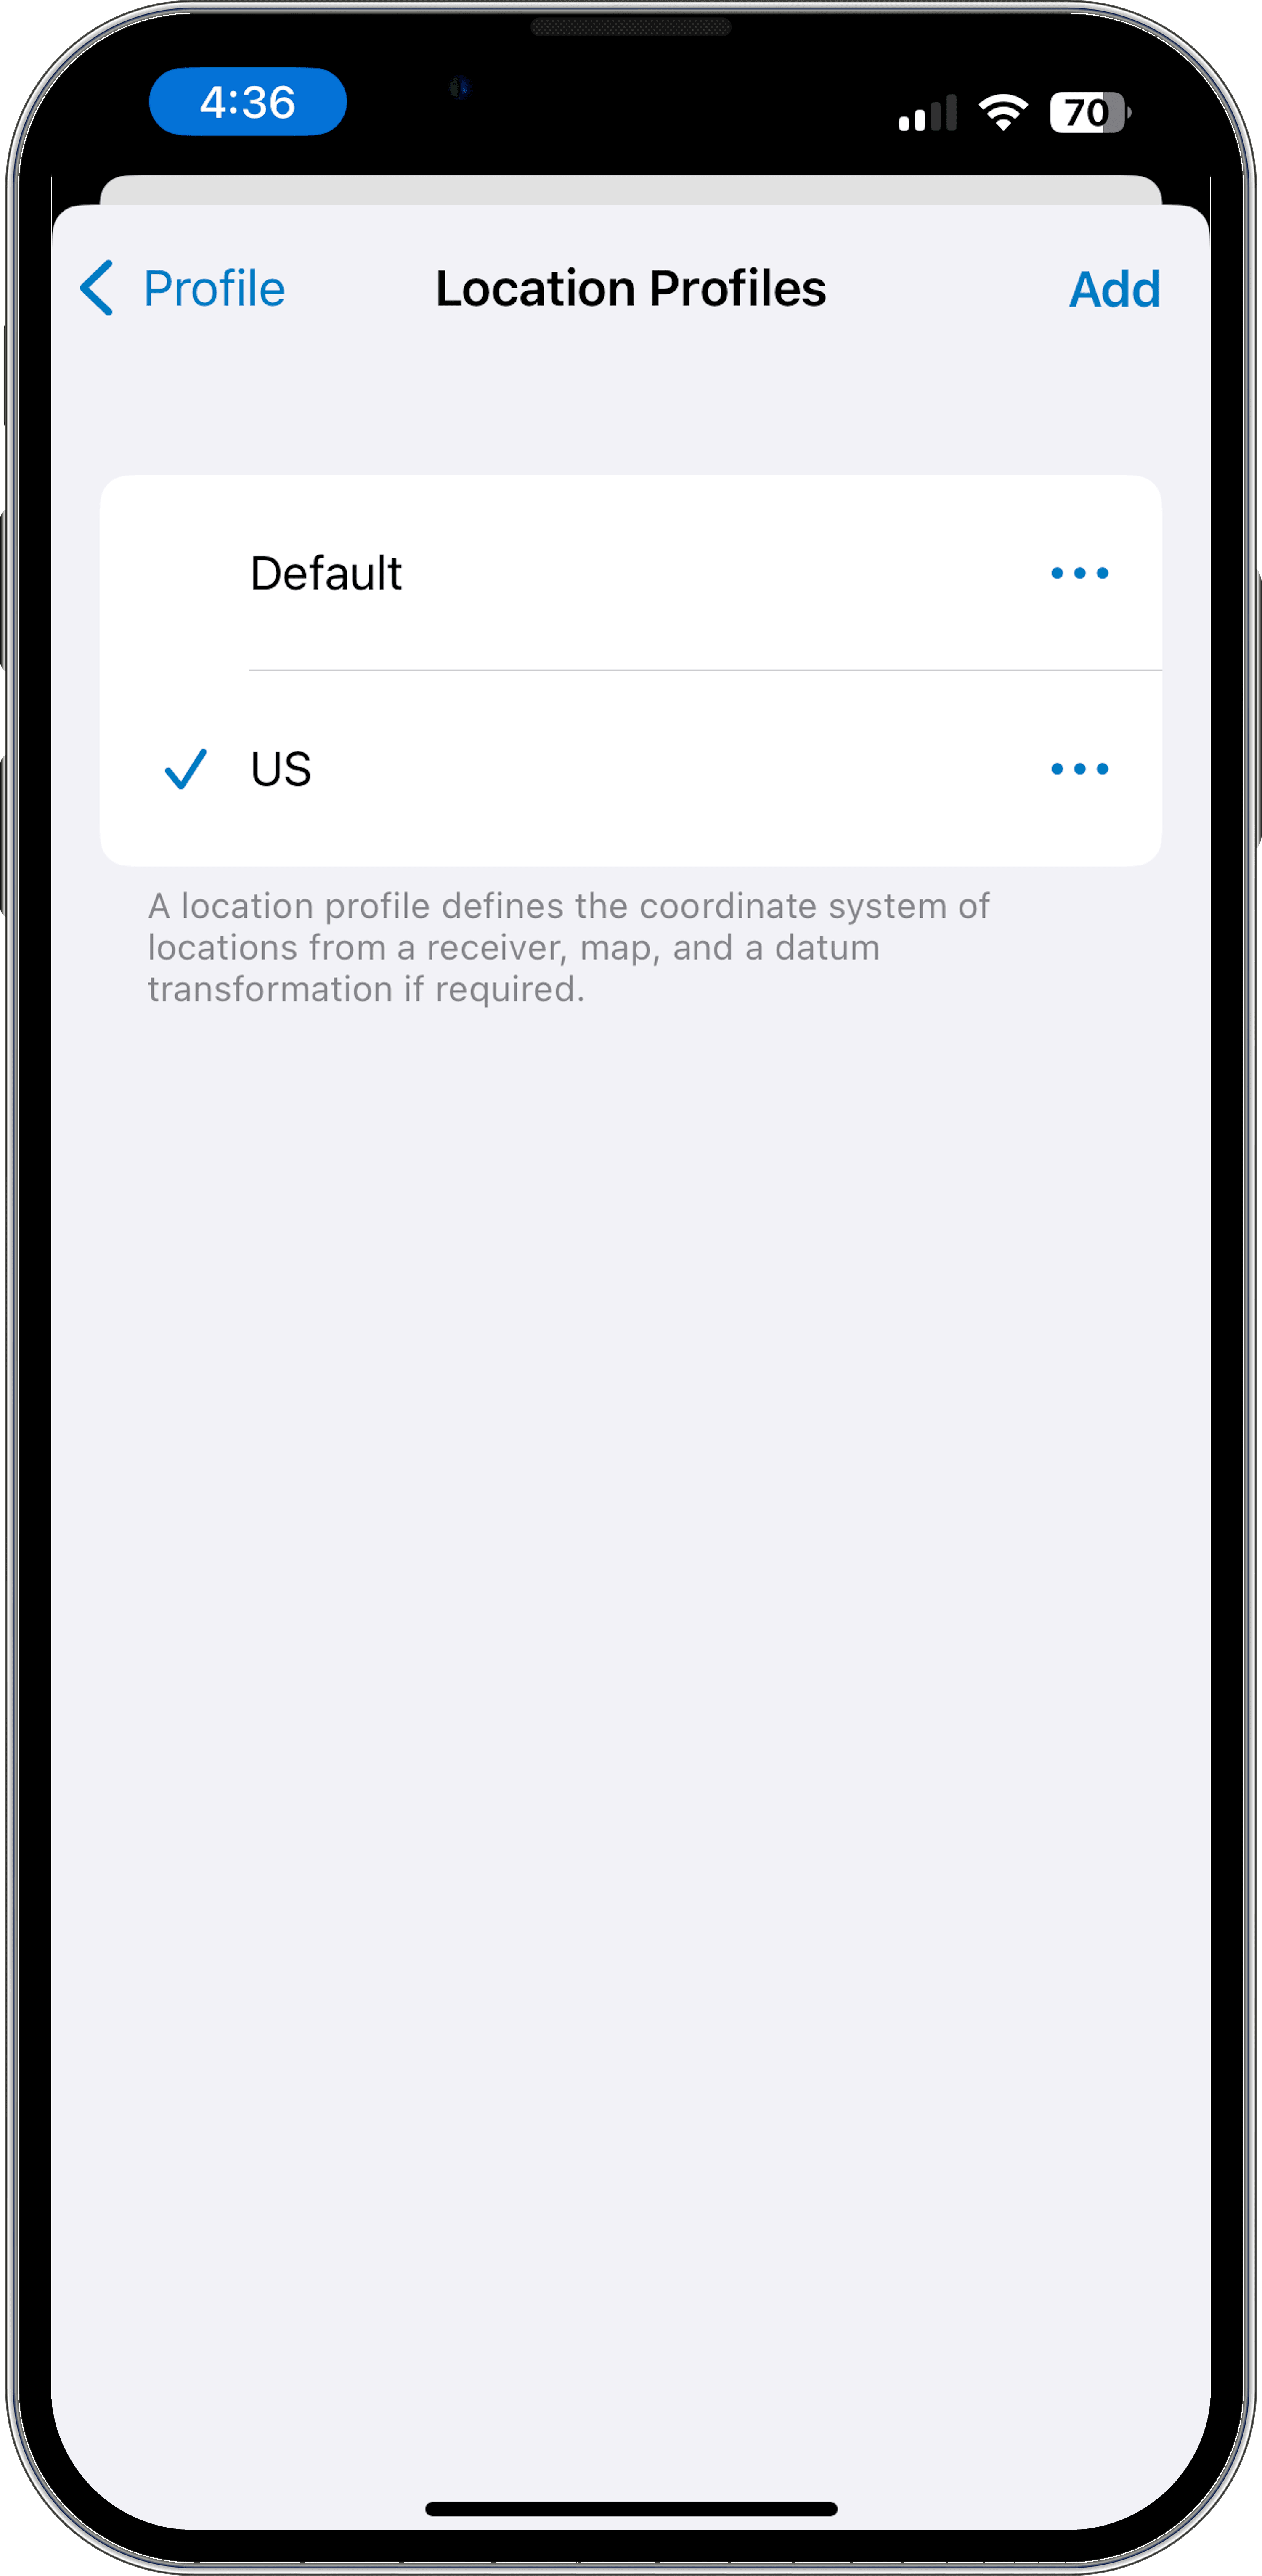
7. Finally, select your location profile from the list.
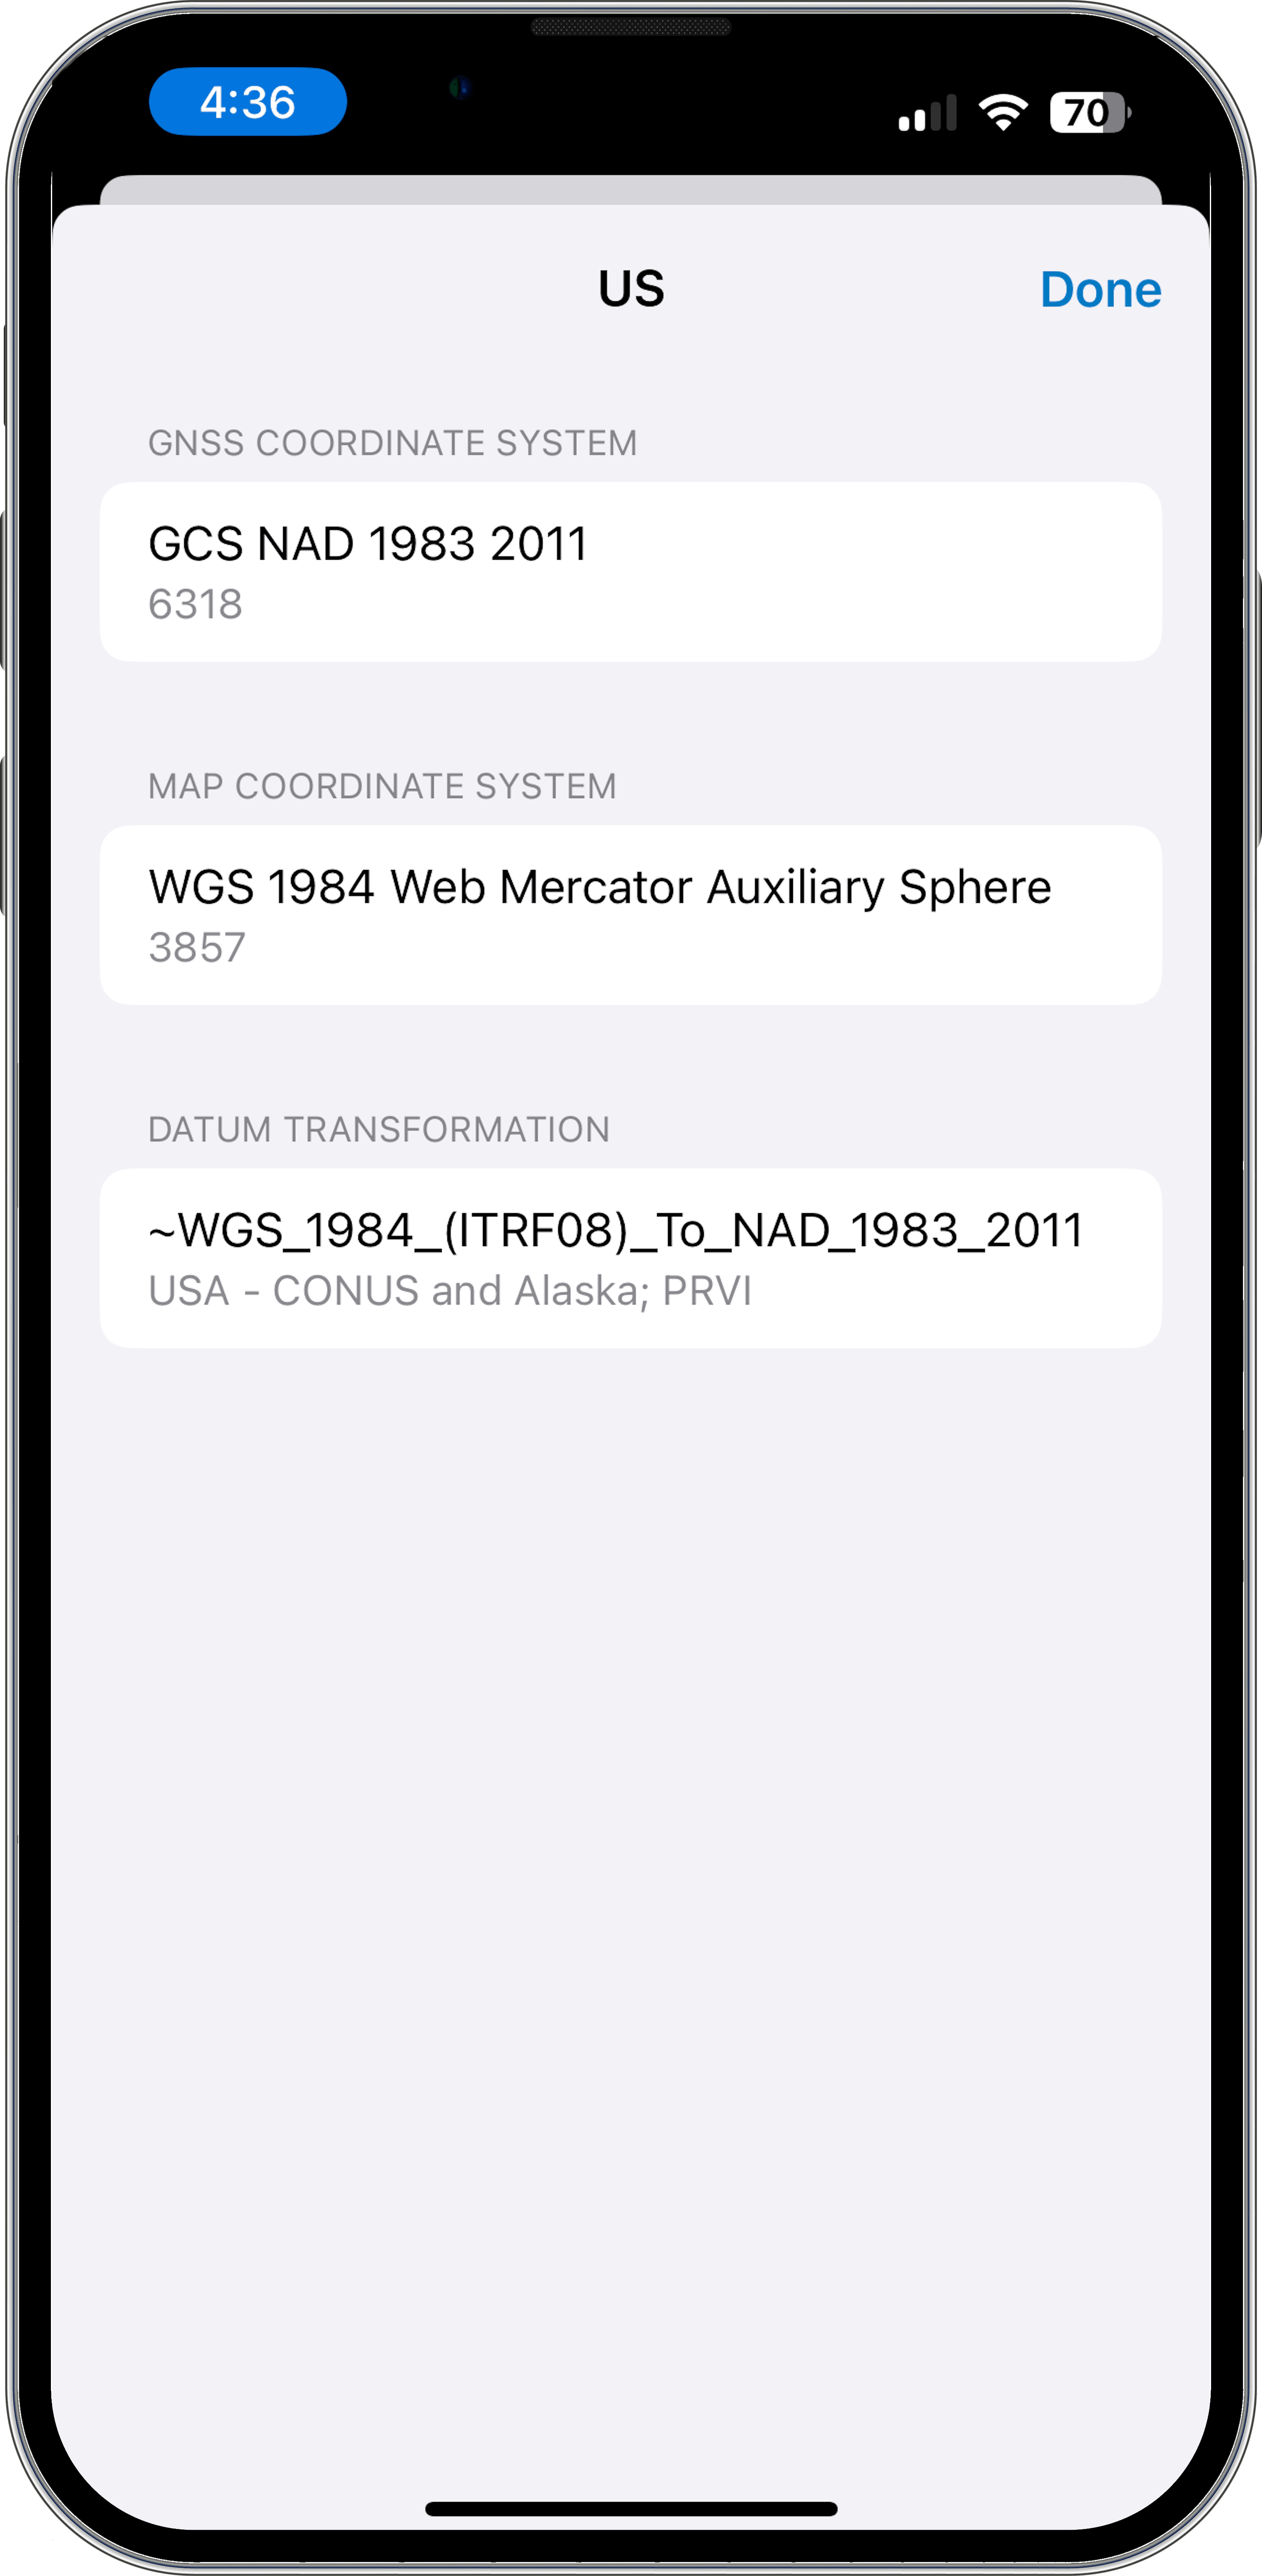
You can see an example profile for default settings in the continental US here:
Note: A location profile is not the only use of datum transformations in a Field Maps data collection workflow—any differences in coordinate system between basemap and feature layers, or feature layers and geodatabase, would require additional datum transformations selected in the ArcGIS components. Please consult Esri documentation for additional information.
You should now be ready to use your Trimble GNSS receiver to collect high-accuracy data in your Esri ArcGIS Field Maps web maps.
1If no correction sources are available the receiver will output autonomous (non-corrected) positions.