Taking advantage of Trimble TIP positions in Esri ArcGIS Field Maps
Users of Esri® ArcGIS® Field Maps can leverage Trimble’s industry-leading high-accuracy GNSS receivers using Trimble® Mobile Manager (TMM). This article will review how Esri ArcGIS Field Maps users can configure TMM to take advantage of Trimble TIP™ technology on Android™ when using Trimble R980, R12i and R780 GNSS receivers.
Trimble TIP (Trimble Inertial Platform) is an IMU-based (inertial measurement unit) technology used for tilt compensation. This allows for accurate data collection by compensating for the tilt of the GNSS receiver, ensuring precise positioning even when the device is not perfectly level. Any users unsure if they are using the right settings should contact their administrator.

This blog assumes some knowledge of GNSS and coordinate systems. If the reader is unfamiliar with these topics or wants a great refresher, we recommend reading the GPS 101 and Understanding geodetics articles.
How Trimble Mobile Manager and Field Maps work together
To take advantage of Trimble TIP positions, all communication with the Trimble receiver will need to be through TMM. For this workflow, TMM provides all of the position data to Android using mock locations, including extra position data. Field Maps reads this data directly from Android.
What needs to be done in Trimble Mobile Manager?
Mock locations
For TMM to be able to provide position data to Android, it needs to be set as the mock location application. Follow these steps for Android on the Trimble Mobile Manager Help Portal.
GNSS configuration
In TMM, select GNSS configuration from the application menu and configure the options as follows:
GNSS correction source
There are two options for GNSS corrections in TMM: Auto and Custom local.
Leave this setting on Auto unless you have details for an NTRIP or internet-based correction source (i.e. RTK or VRS). If you know you need to specify details for your local correction source, select Custom local.
Auto
The receiver will cycle through the available correction sources1 based on the best one available from the following list:
- Trimble RTX via the internet
- Trimble RTX via satellite
- SBAS
Note: RTX services will only be available if the receiver has a current RTX subscription installed. More information on RTX for Trimble mapping and GIS customers can be seen here.
Custom local
When Custom local is selected you will be shown the current configuration with an option to Edit NTRIP Settings. Tap the button to open the NTRIP Settings screen.
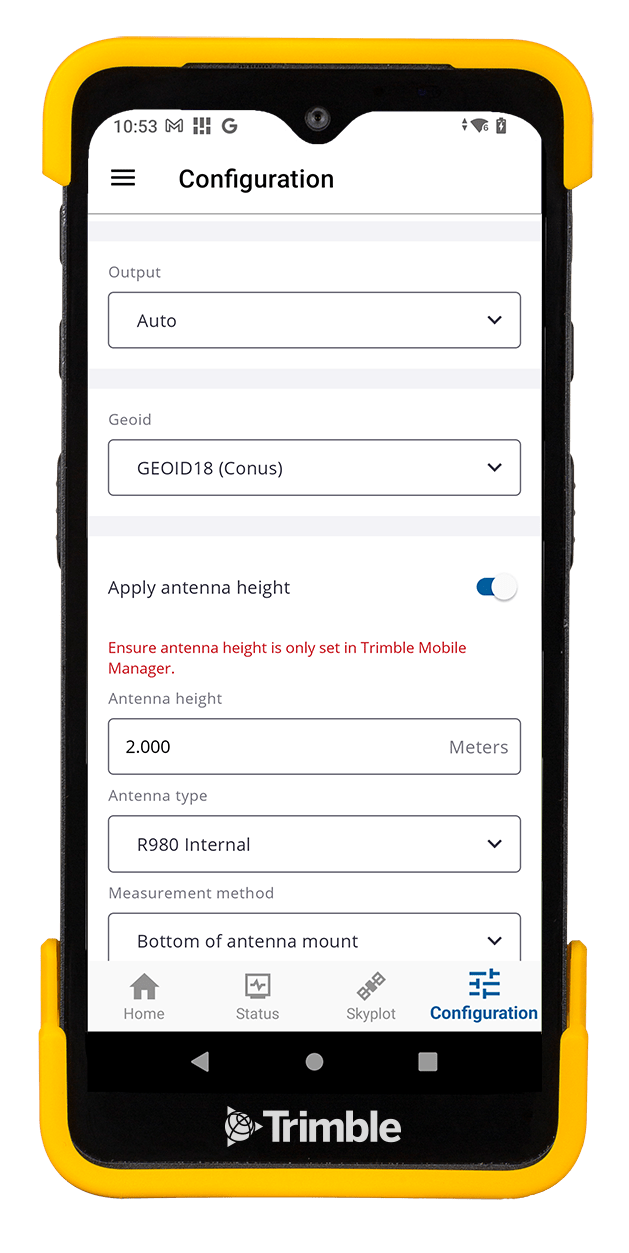
When entering details for your local correction source, the GNSS source reference frame must match that of your correction source. In most cases, this will work when set to Auto, but if you know the reference frame, we recommend setting it here. Auto will generally use the most common or standard local reference frame (datum and epoch) for the current region.
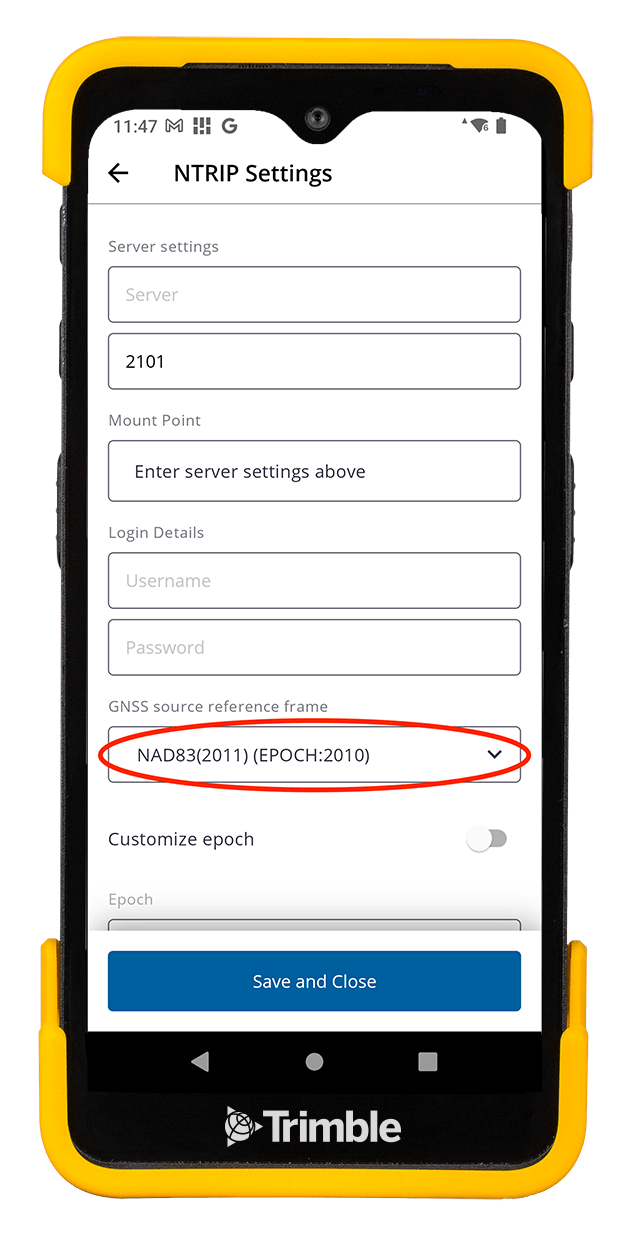
GNSS output
GNSS output allows you to specify the reference frame that will feed into Field Maps. We recommend that unless you know otherwise, leave this as Auto. In this mode, TMM will automatically select the reference frame most suited to your current location using the same logic described above.
Geoid
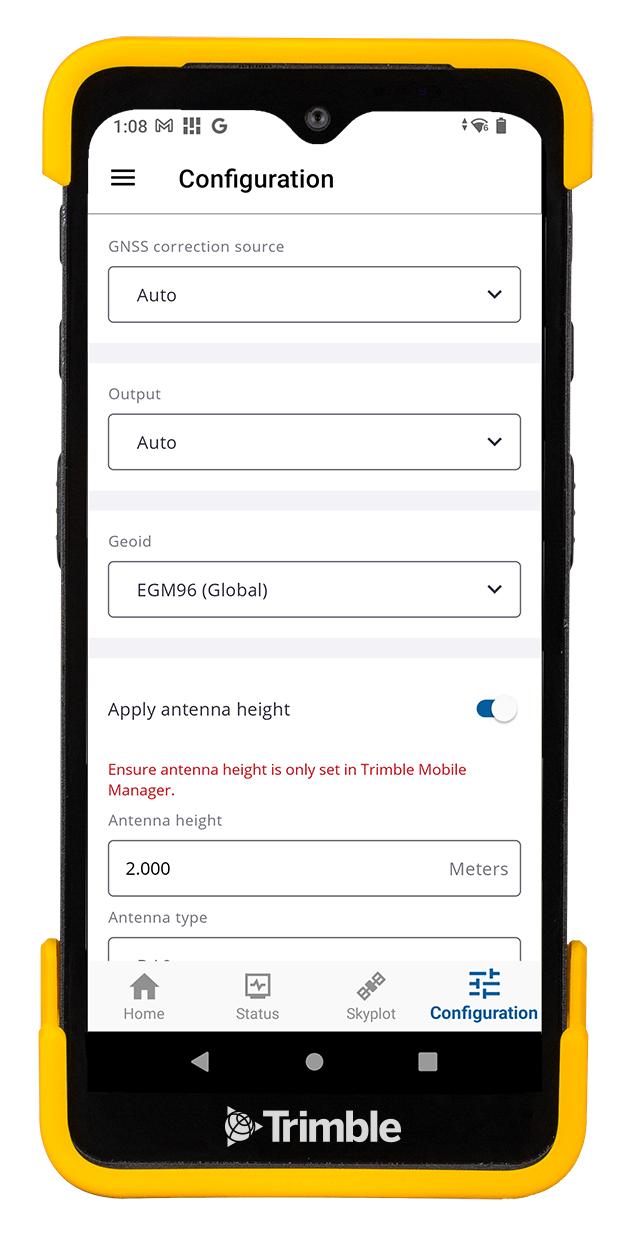
Field Maps consumes both the GNSS default ellipsoidal heights (HAE) as well as the more useful orthometric heights (e.g., height above mean sea level or MSL). At the time of feature collection, the former is stored to Esri’s standard GNSS metadata fields while the latter is stored to feature geometries (if Z-enabled). If you know your local geoid, you should select it in the list in TMM, otherwise the EGM96 (Global) geoid model is available for use worldwide.
If your required geoid is not listed, you can load your own geoid into TMM using a procedure described on the mapping and GIS community page here.
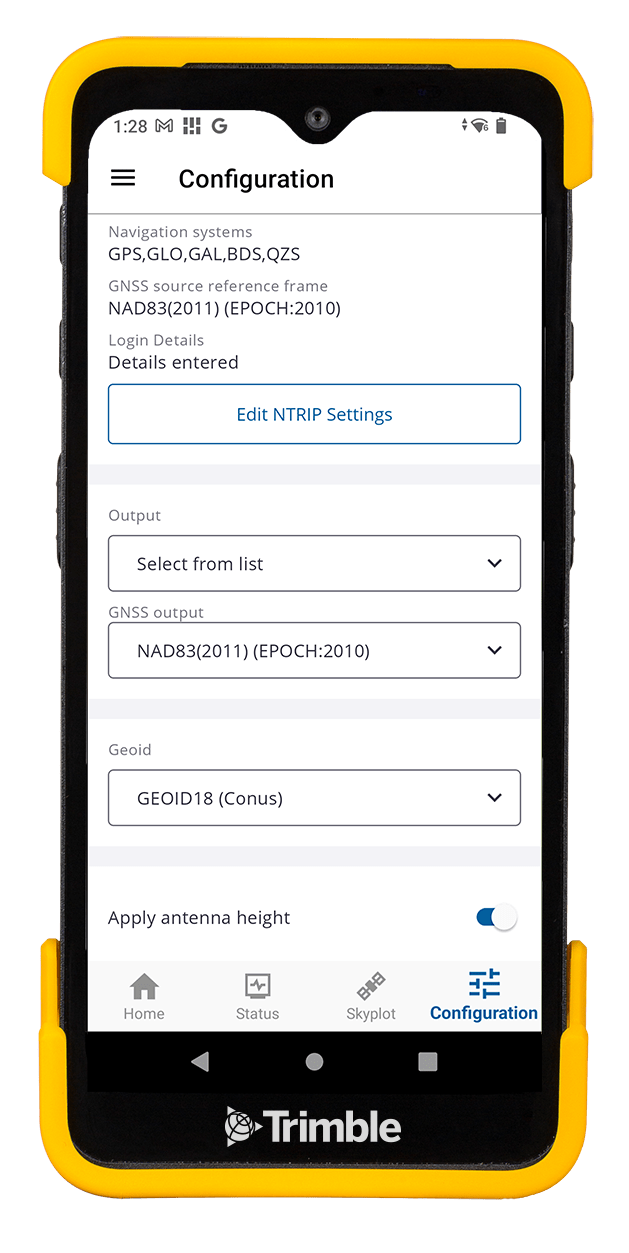
An example of what your GNSS configuration screen would look like is shown here:
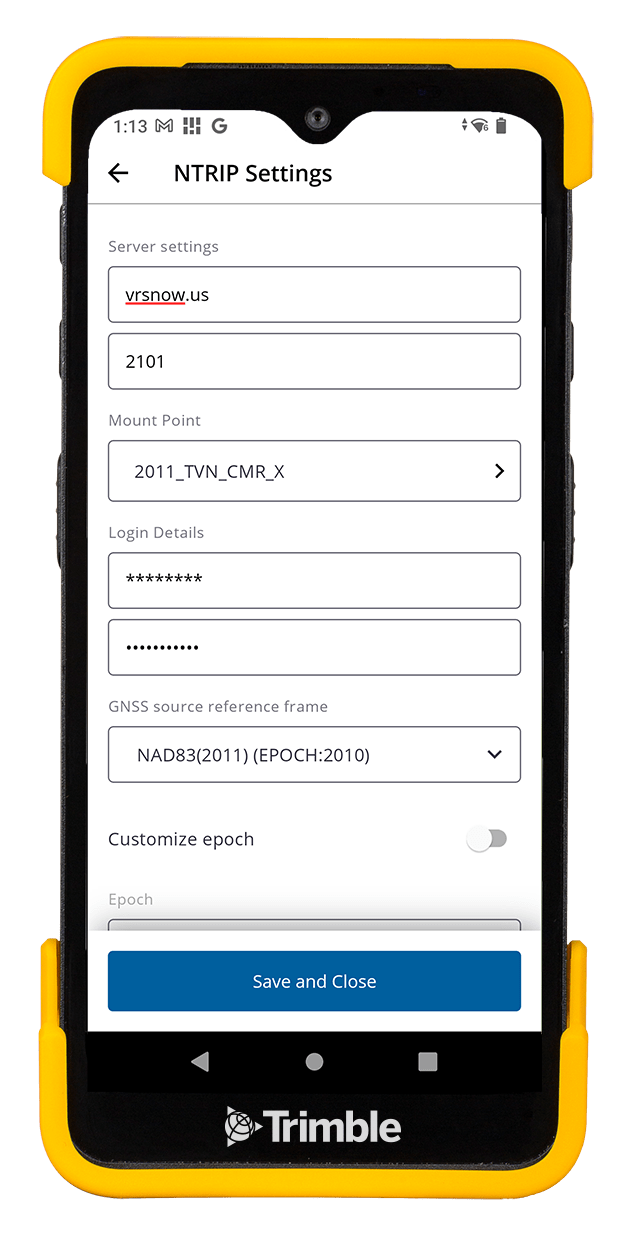
You may need to configure specific GNSS configuration settings if told to do so; an example of what that might look like is shown here:
Connect to receiver
From the TMM Home screen, ensure that you are connected to your Trimble receiver. If you need more information, follow the instructions on the Trimble Mobile Manager Help Portal. This is what the Home screen looks like when connected to a Trimble R980 receiver:
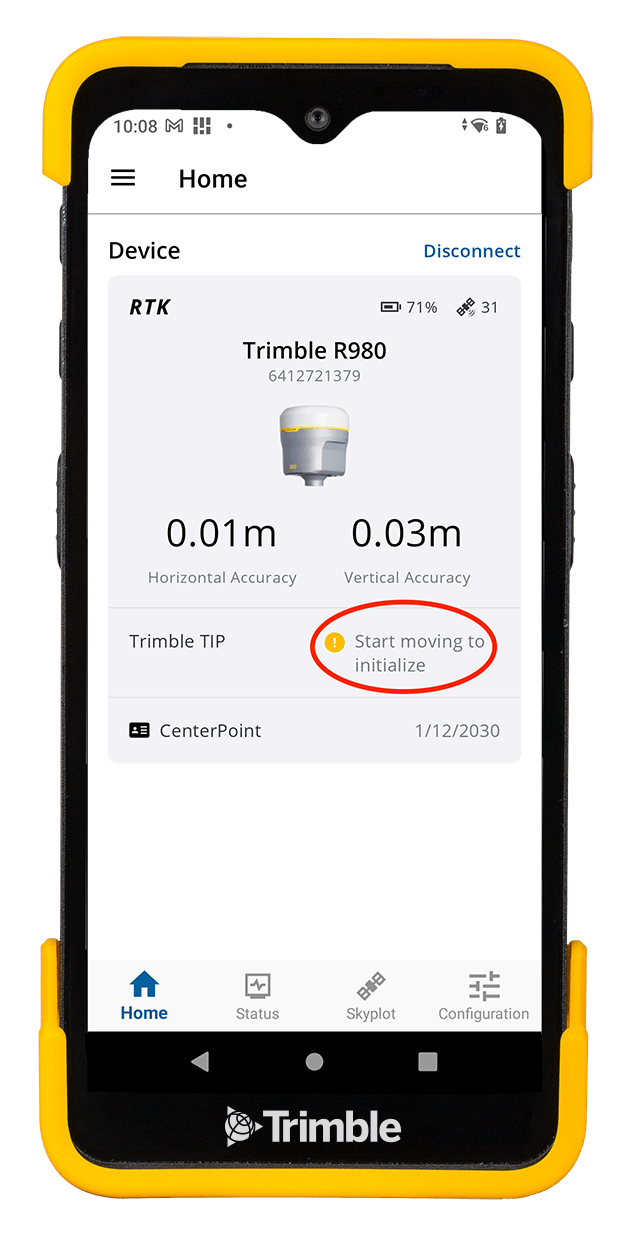
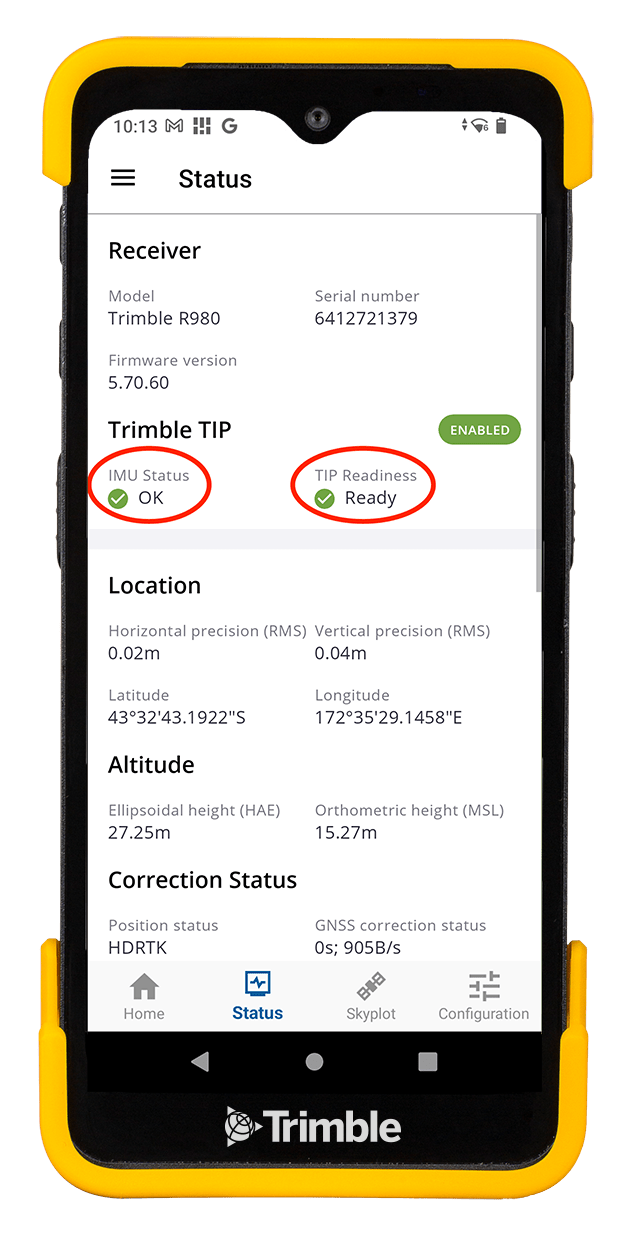
You can see here that Trimble TIP status shows the receiver needs initializing. The Status view also alerts the user to TIP sensor status and readiness:

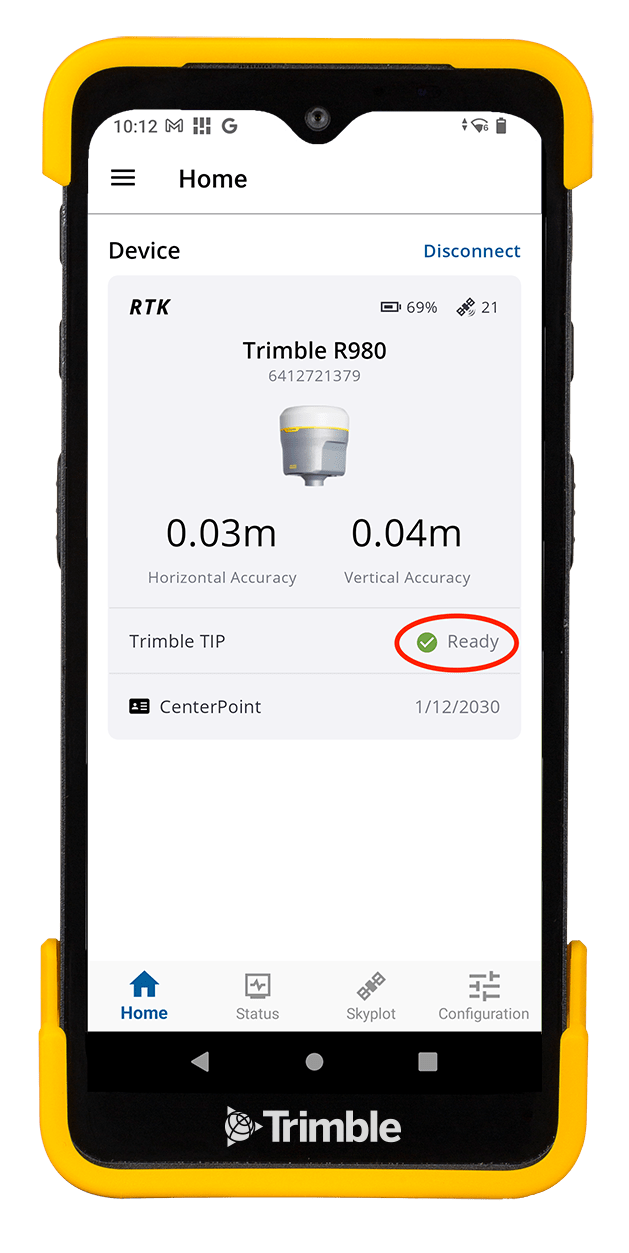
If you see this status, ensure you have a good view of the sky and walk around with the receiver upright — this serves to initialize the TIP sensor. After a short time you will see the status change as shown here:
You will be alerted if the receiver needs calibrating; if this happens you can select Calibration from the menu as shown here:
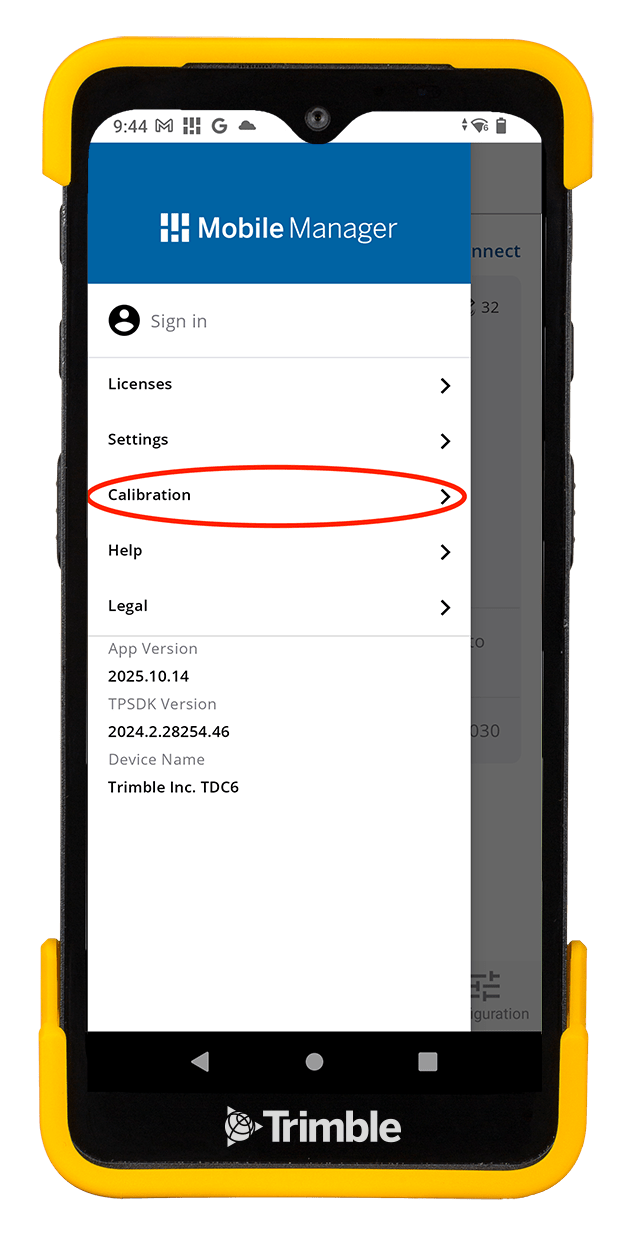
After selecting the Calibration option you will be shown the Calibration screen:

Follow the instructions to calibrate the receiver.
What needs to be done in Field Maps?
The information presented below is a Trimble-specific subset of configuration steps in Field Maps. For a more in-depth discussion of configuring Field Maps for high-accuracy data collection, please consult Esri documentation.
Location Provider
Field Maps manages connections to GNSS receivers through Location Providers. In order to utilize TIP positions from a Trimble receiver in Field Maps, follow the steps below:
- Open the Profile screen by clicking on the user icon at the top of the screen. From there, choose the Provider option to open the Location Providers screen.
- Select Integrated
- Set Antenna height to 0 (zero)
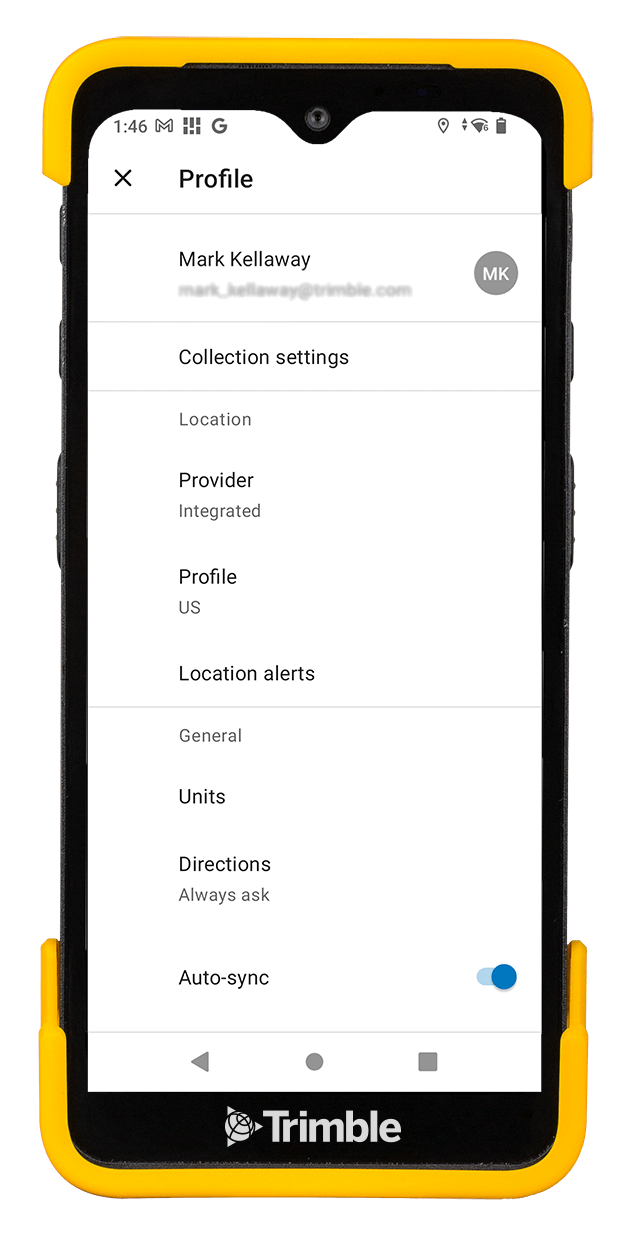
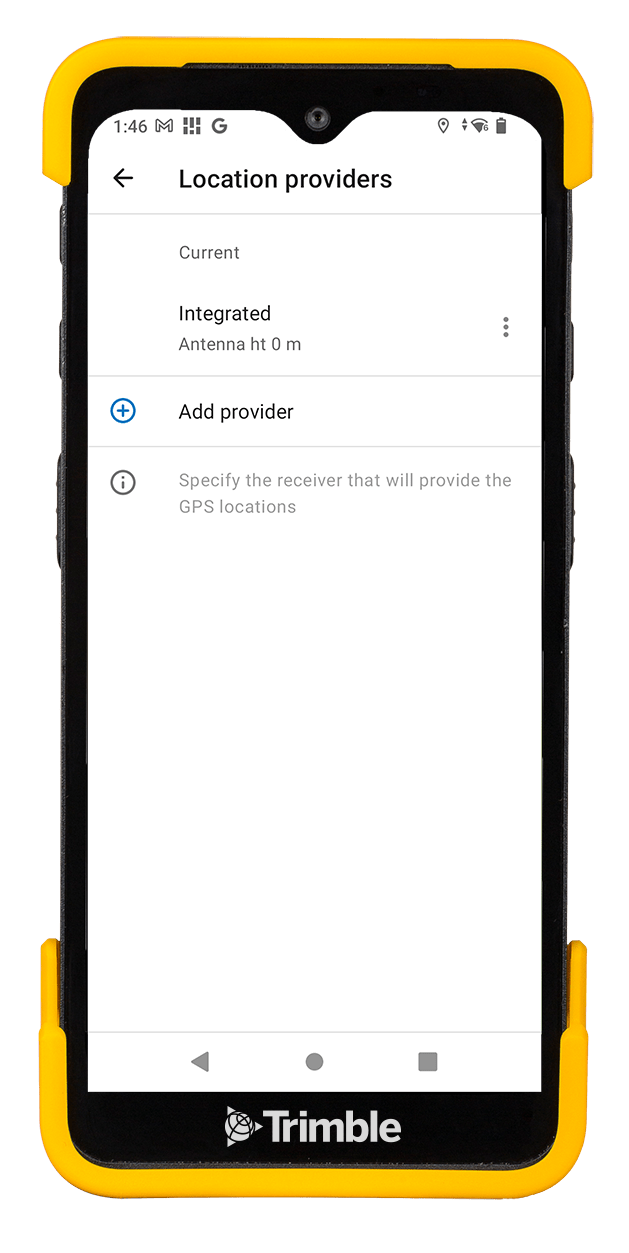
Note: The correct antenna height must be specified in Trimble Mobile Manager.
Location Profile
In order to make sure Field Maps handles the GNSS coordinates properly, you need to create a Location Profile to define the (geographic) coordinate system of the incoming GNSS stream, the coordinate system of the web map(s) you intend to you use, and if necessary, the datum transformation between the two.
For the purposes of this explanation, we will assume that the web map is using a default ArcGIS basemap, so the coordinate system will be WGS 1984 Web Mercator Auxiliary Sphere. The coordinate system of the basemap will generally define the coordinate system of the web map. To configure your profile, follow these steps:
1. In Field Maps, open the Profile screen by clicking on the user icon at the top of the screen. From there choose the Profile option. From the Location Profiles screen, select Add profile to create a new profile.
2. Select the GNSS Coordinate System that matches the GNSS output of TMM. Assuming you have GNSS output in TMM set to Auto, you should select the item that corresponds to your location as shown in the list here. If you have selected a specific reference frame in TMM, then select the corresponding one here. The list of coordinate systems is filtered to geographic coordinate systems supported in this version of the software. Remember from Understanding geodetics that a geographic coordinate system is inextricably tied to a datum and the naming will reflect that. Use the well-known ID (WKID) code for an easier search or lookup.
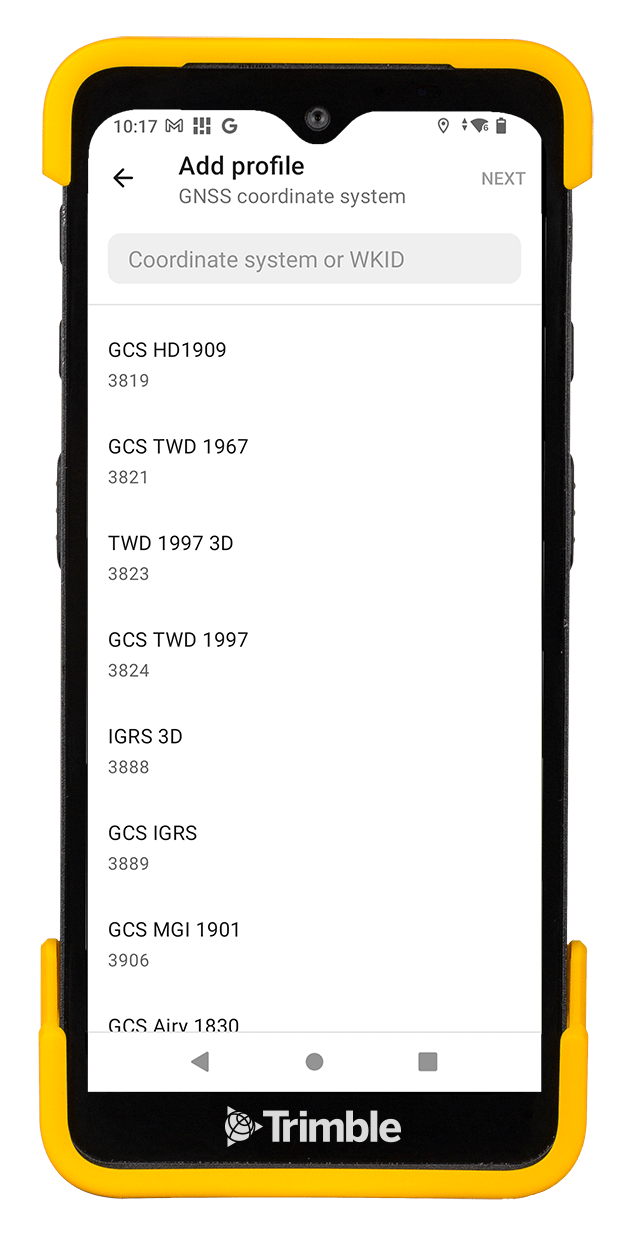
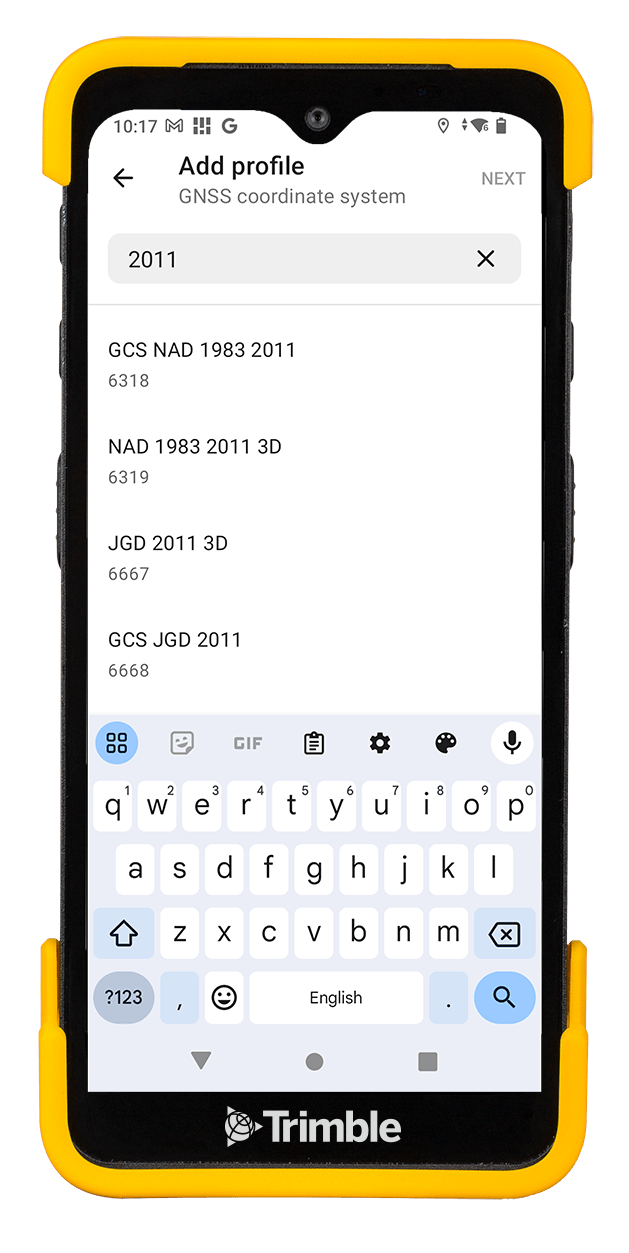
3. For the Map Coordinate System, select WGS 1984 Web Mercator Auxiliary Sphere.
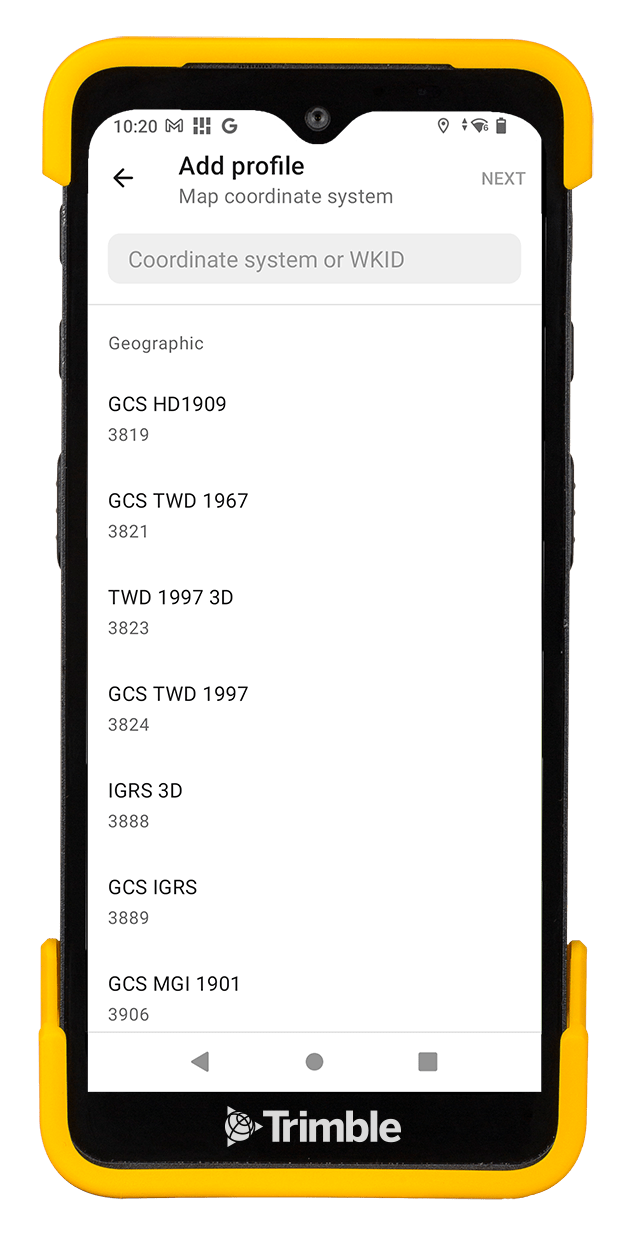
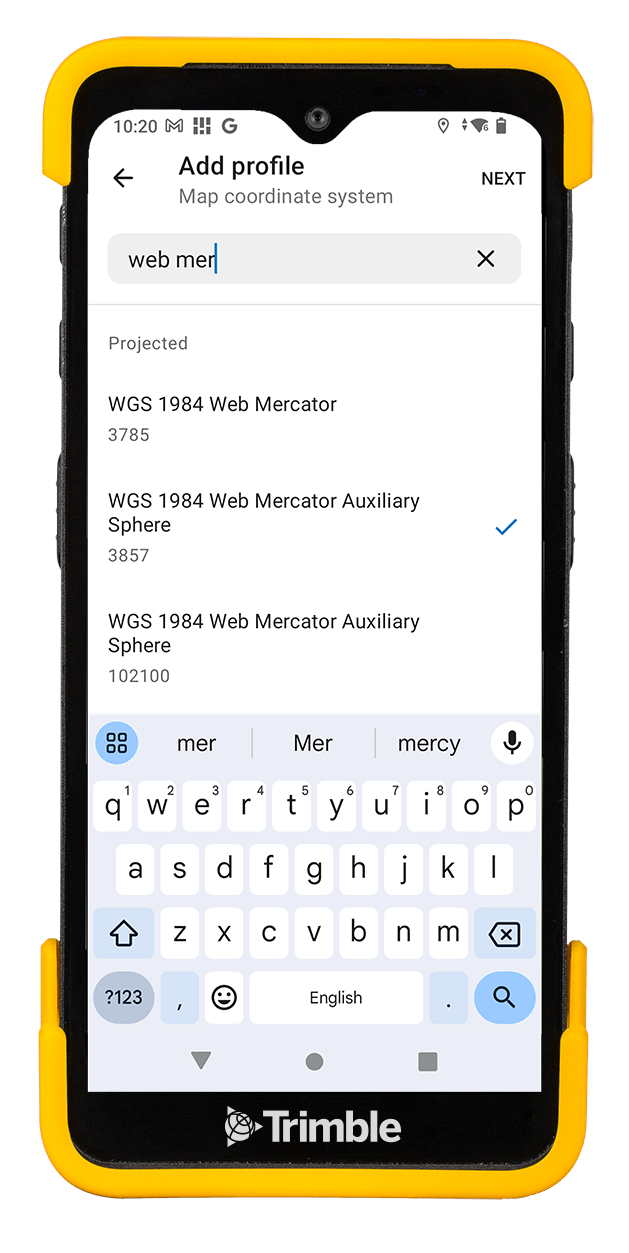
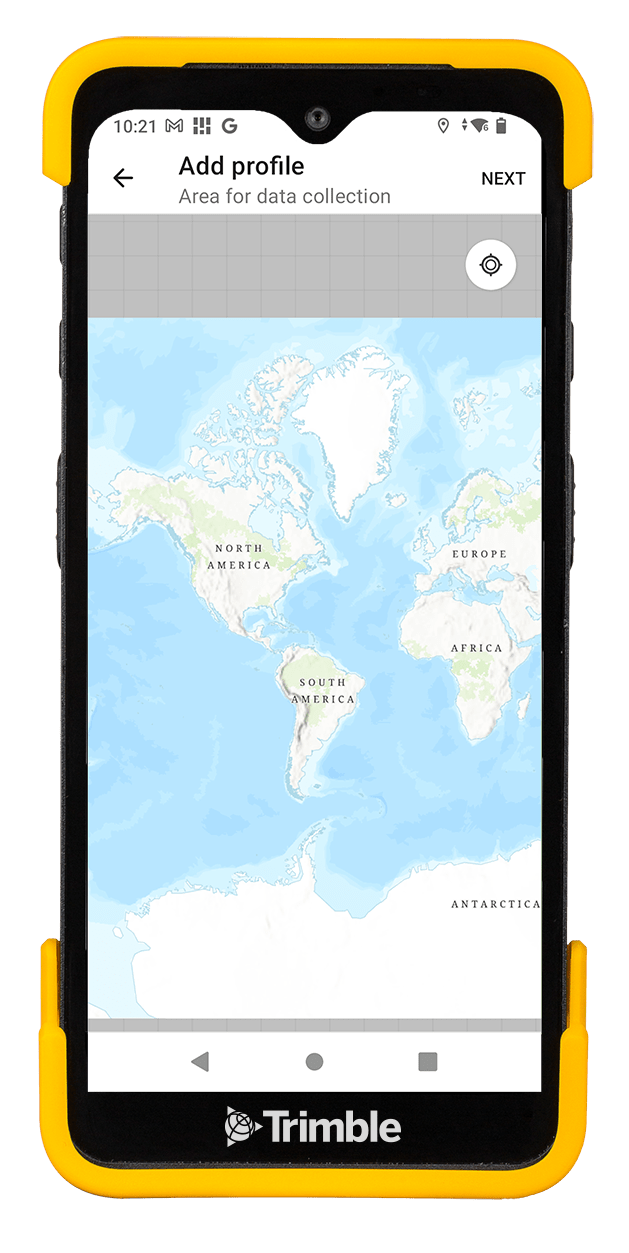
4. You will now see a Map Extent screen. Zoom in to select the extent of the work area — this will enable Field Maps to provide a list of applicable datum transformations, sorted by accuracy.
Note: You must be online for this step, otherwise you will skip to the next step.
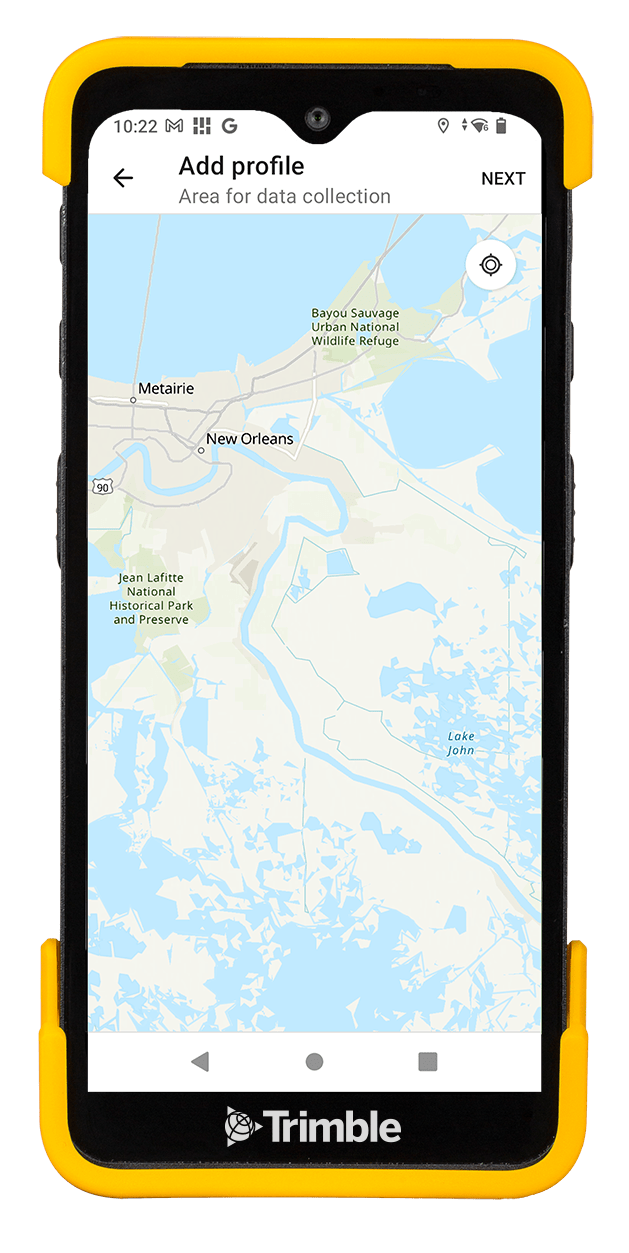
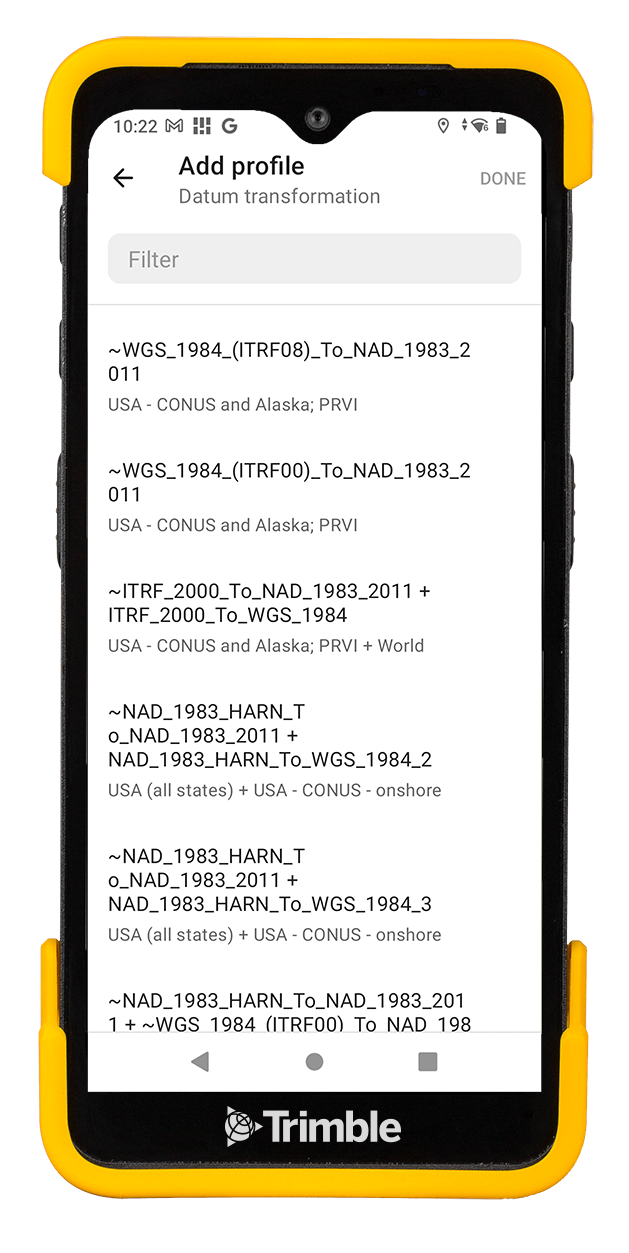
5. Select the top (default) Datum Transformation from the next screen unless you have been told otherwise by your GIS administrator or Trimble distributor.
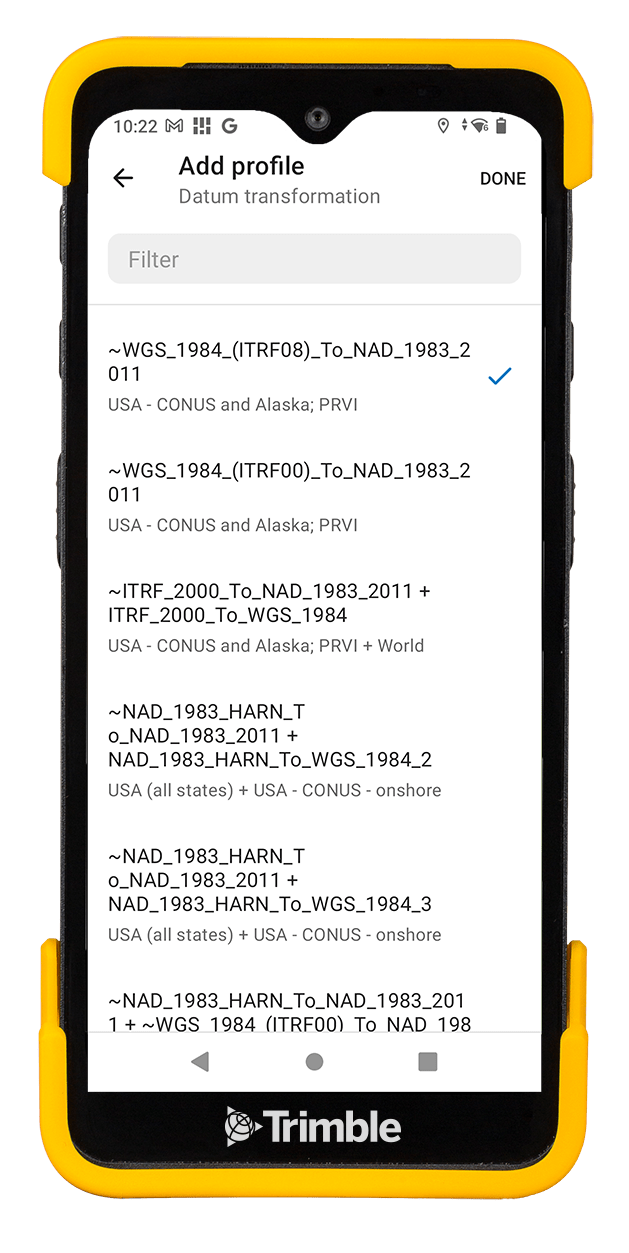
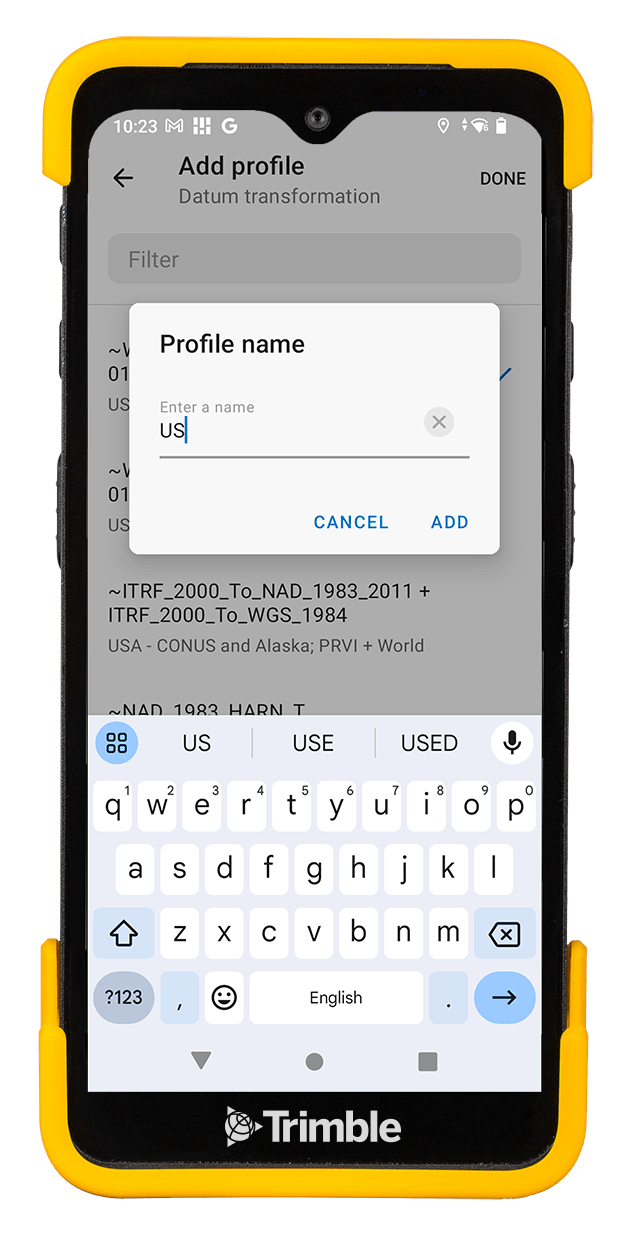
6. Give the profile a Name and save it.
7. Finally, select your location profile from the list.
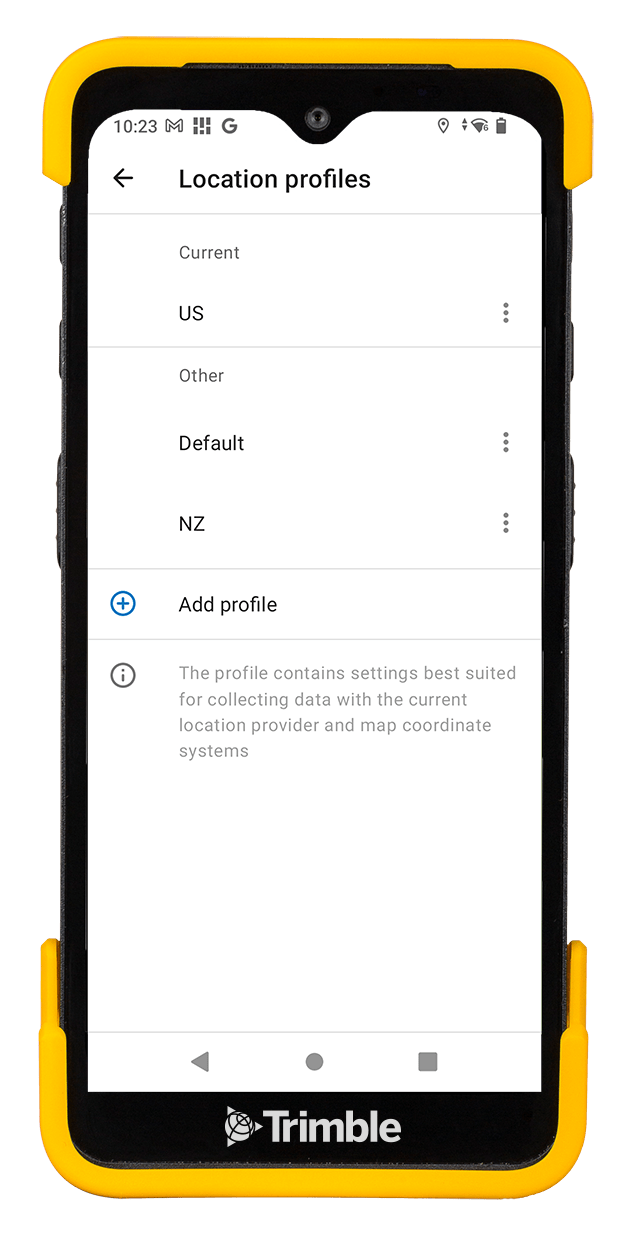
You can see an example profile for default settings in the continental US here:
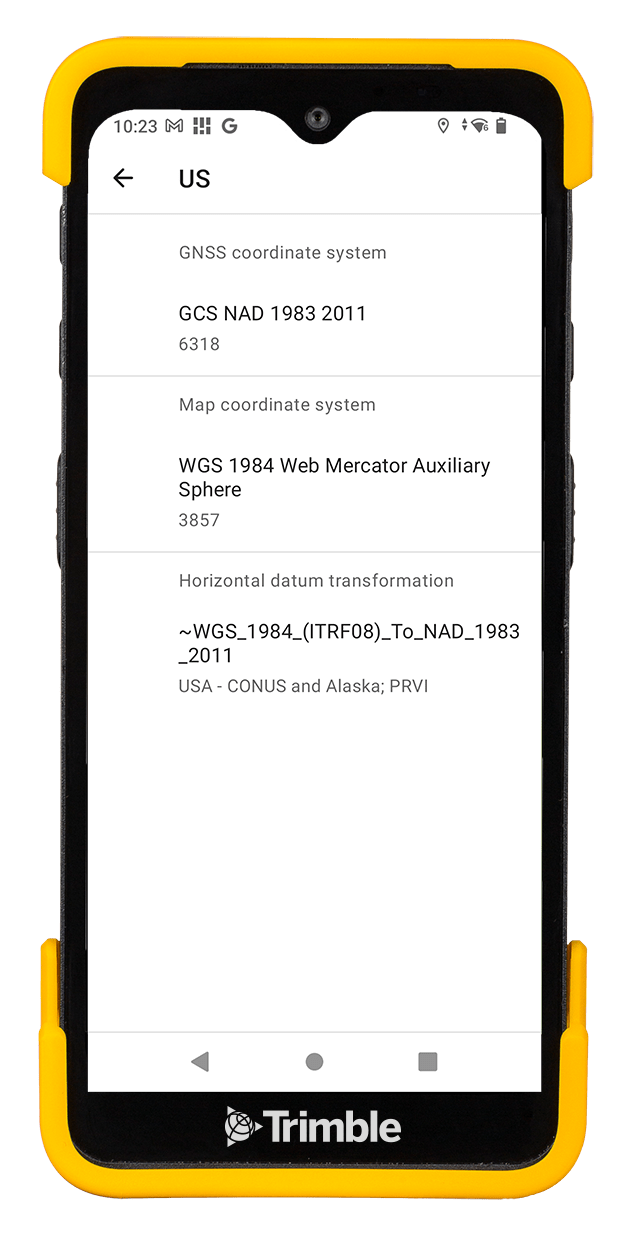
Note: A location profile is not the only use of datum transformations in a Field Maps data collection workflow. Any differences in coordinate system between basemap and feature layers, or feature layers and geodatabase, would require additional datum transformations selected in the ArcGIS components. Please consult Esri documentation for additional information.
You should now be ready to use your Trimble GNSS receiver to collect Trimble TIP-enabled high-accuracy data in your Esri ArcGIS Field Maps webmaps. We recommend you regularly check the TIP status is still Ready in the TMM Status screen.
1 If no correction sources are available the receiver will output autonomous (non-corrected) positions.